ArchivesSpace at Yale: User Manual
Overview: ArchivesSpace Application and its Governance
Scope of User Manual
What’s covered
What is ArchivesSpace.
Yale ArchivesSpace policies and procedures.
Creation of Accession records.
Creation of Resource records.
Creation and management of Agent and Subject records, and how to link them to Accession and Resource records.
Recording and management of physical locations within a repository.
Production of description output files in standardized data structures such as EAD and MARCXML.
Application of a content standard, in this case DACS, where applicable, to determine the kind and form of data recorded in an ArchivesSpace record.
Technical and administrative issues relevant to managing your ArchivesSpace repository at Yale.
What isn’t covered
The following aspects of ArchivesSpace are either not covered or only touched upon:
Installation, upgrading, and repairing the application.
Working with the underlying database application.
Mapping legacy data.
Customizing the ArchivesSpace Public User Interface (PUI).
You will find more information about these topics in the ArchivesSpace member services documentation.
To request edits to this user manual or to note errors, please email your ArchivesSpace liaison.
ArchivesSpace Documentation
ArchivesSpace Help Center:
https://archivesspace.atlassian.net/wiki/spaces/ADC/pages/917045261/ArchivesSpace+Help+Center
*use your Yale email to establish an ArchivesSpace Help Center account
ArchivesSpace Committee at Yale LibGuide:
http://guides.library.yale.edu/archivesspace
ArchivesSpace Committee at Yale Blog:
http://campuspress.yale.edu/yalearchivesspace/
ArchivesSpace at Yale listserv:
This is a YUL managed listserv to share best practice, ask for help, report problems, and notify users of systems issues related to ArchivesSpace at Yale. Please visit: http://mailman.yale.edu/mailman/listinfo/yulaspace to enter your yale email address and subscribe. Once you are subscribed to the list, you may send email to the address: yulaspace@mailman.yale.edu
The list will be monitored by members of the ArchivesSpace Committee to make sure all questions are answered.
An Introduction to ArchivesSpace
ArchivesSpace is:
An open source, online database application to support basic collection management, archival processing, and production of access instruments, including finding aids and catalog records.
Governed by a membership community.
An application that promotes data standardization:
Informed by DACS, the U.S. national content standard for archival description; and also informed by international archival descriptive standards – ISAD(G) and ISAAR (CPF).
Supports the use of data value standards for subject headings, dates, languages, and other descriptive data.
Supports exports into common data structure standards: EAD, MARCXML, Dublin Core, MODS, METS.
An application that promotes efficiency:
Integrates a range of archival functions.
Facilitates repurposing of data.
Automates encoding and reporting.
Governance of ArchivesSpace at Yale
ArchivesSpace at Yale is collaboratively managed by a group of archivists and IT professionals who comprise the Yale Archival Management Systems Committee. The Committee’s work is informed by the following goals:
the implementation and maintenance of ArchivesSpace as the main archival management system at Yale;
a commitment to the future development of ArchivesSpace in order to increase its functionality to meet Yale needs and to support the development of the application as a strong product;
the creation of a YUL/Yale committee to inform and support all Yale units implementing ArchivesSpace and to bring together disparate archival collections management practices;
active participation in the ArchivesSpace community beyond Yale through membership, Board participation, active communication with other users, and contribution of resources.
Every repository on campus using ArchivesSpace has been assigned a Yale Archival Management Systems Committee liaison. This person will provide support and training on using the system, answer any technical, administrative, or system-related questions that you have about ArchivesSpace, consult on data migrations and/or exports when needed, and coordinate the process of adding and removing users for your repository in ArchivesSpace.
YUL IT has committed to supporting ArchivesSpace as our enterprise archival management system. They have been installing updates and new releases, advising on development work, and ensuring that ArchivesSpace and our work meets University requirements.
A complete list of Yale Archival Management Systems Committee members and liaisons is available on the Yale Archival Management Systems Committee LibGuide: https://guides.library.yale.edu/archivesspace.
In committing to a single instance of ArchivesSpace at Yale, its implementation is providing us with a unique opportunity to share name and subject authorities and further develop cooperation among the University’s repositories. We hope that this ArchivesSpace manual will help all of us work together more effectively.
Application Overview
Staff interface
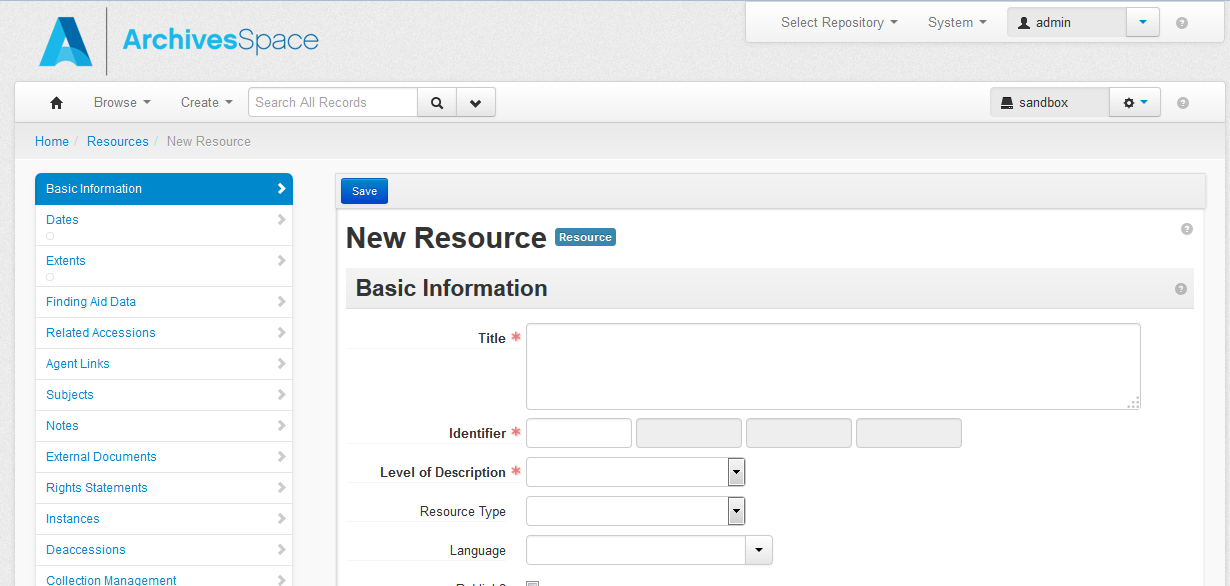
The initial Staff Interface is divided into four command areas or zones: 1: Repository/Application Management; 2: User Permissions, Preferences Management, Reports, Imports, and Plugins; 3: Browsing, Creating, Editing, and Deleting Records; and 4: Search and Advanced Search.
Note: Unless illustrating functions requiring higher permission levels, screenshots are of Advanced Data Entry views.
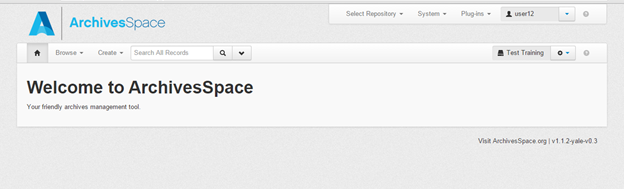
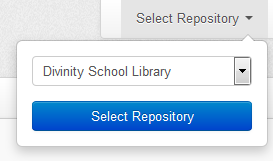
1. Repository / Application Management: This is where you will verify that you are working in your own repository.
 />
/>
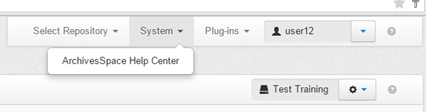
Access the online help center.
 />
/>
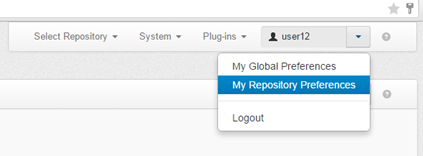
And, view or set your preferences or log out.
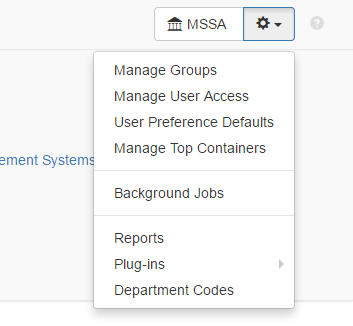
2. User Permissions, Preferences Management, Reports, Imports, and Plugins:
3. Creating, Editing, Deleting Records (see Create drop-down menu):
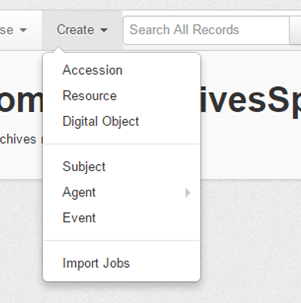
Accession, Resource, and Digital Object records are known collectively as archival objects or material description records. Resource and Digital Object records both allow for multi-level description or the presence of component records.
The other records—Subject, Agent, Location, and Event—are for amplifying the description record, indicating the whereabouts of described material(s), and recording actions done to the described materials.
All of the record types for the Create option can be created independently of any other record and subsequently linked to other records. For example, subject and agent records can be created in advance of their linking to material description records.
To import legacy data (EAD, MARC, accession CSV file), use the Import Jobs link at the bottom of the Create drop-down menu.
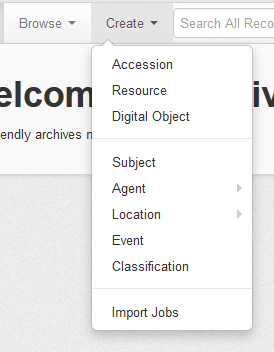
Each function outlined in the Create drop-down is also available to be viewed in the Browse menu. Note that Collection Management records only appear as an option on the Browse record option and not on the Create record option. That is because a Collection Management record is assumed to be about certain material and, thus, can only be created in the context of a material description record for the material (i.e. an Accession, Resource, or Digital Object record).
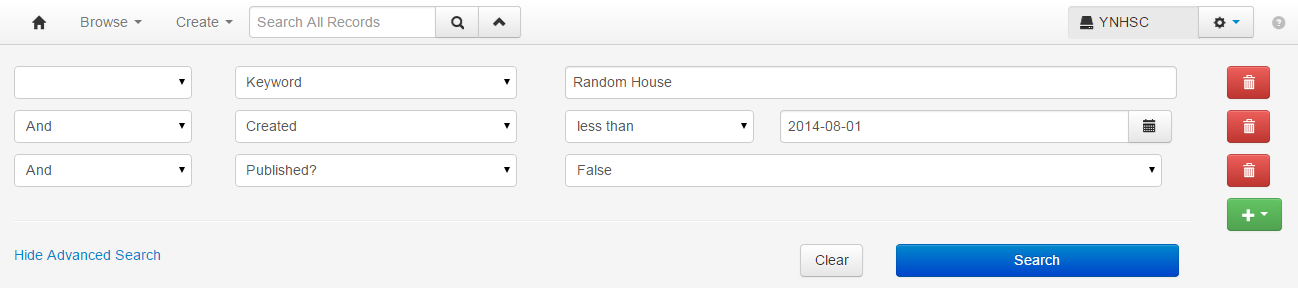
4. Keyword search (labelled Search All Records) and Advanced Search drop-down (click the down arrow next to Search All Records to see Advanced Search):
Both options permit searching every type of record in the ArchivesSpace application. With Advanced Search, four types of search fields (Text, Date, Boolean, and Controlled Value) can be linked together (click green button to add a search row). Each type of advanced search can be scoped to various fields.
Text
Keyword (searches all text fields)
Linked Agent
Bibliographic Citation
Call Number
Condition Description
Container Summary
Content Description
Record Created By
Creator
Department
Extent Number
Fiscal Year
General Note
Identifier
Inventory
Invoice Number
Record Last Modified By
Monographic Series
Notes
Invoice Number
Payment Authorizer
Physical Details
Place of Publication
Plating Information
Processors
Provenance
Linked Subject
Title
Title Main Entry
Date
Accession Date
Accession Completed Date
Begin
Record Created
End
Event Begin
Payment Date
Record Updated
Event End
Boolean
Access Restrictions?
Authorization Received?
External Documents?
Material Type - Audiovisual Materials?
Material Type - Books?
Material Type - Computer Files?
Material Type - Games?
Material Type - Manuscripts?
Material Type - Maps?
Material Type - Microforms?
Material Type - Photographs?
Material Type - Realia?
Material Type - Serials?
Material Type - Works of Art?
Published? (This refers to whether a record – be it a resource record, an archival object, a digital object, or an accession – is marked as publish or internal-only. This indication affects the ArchivesSpace Public User Interface, as well as the EAD serialization, since it indicates that the record’s audience = internal only)
Record Reviewed
Restrictions Apply?
Rights Statements?
Suppressed? (This searches whether a record is suppressed from EAD or MARC export).
Use Restrictions?
Controlled Value
Acquisition Type
BRBL Owner
Event Outcome
Event Type
Extent Type
Fund Code
Priority
Processing Status
Role
These advanced search fields can be used in any combination together, but the search must be connected with Boolean operators. AND, OR, and NOT are available, with AND being the default option for linking the search fields together. Example:
Record Template
Navigation panel
When creating a new record via the Create drop-down menu, the navigation panel on the left side of the ArchivesSpace staff interface provides a snapshot of the major high-level sections of an ArchivesSpace record.
Clicking on any section of the navigation panel takes the staff user directly to the ArchivesSpace data fields associated with that section, highlighting the selected section, as shown in the illustration below of the data fields associated with the Collections Management section of an ArchivesSpace Resource record. An ArchivesSpace record is a linear document, and, while scrolling through a record, the highlighted section of the navigation panel will change to keep the staff user oriented to the current position within the record.

Rollover texts
Rollover texts are associated with almost all of the labels in the ArchivesSpace records; hover your mouse over a particular heading or label to see the rollover text (also known as a tool tip). Typically, the rollover consists of a definition of the element, a reference to the appropriate rule in DACS or to elements in export data formats, such as MARC, and examples of good practice.

Records and sub-records
ArchivesSpace uses the terminology “records” to describe parts of the application where the staff user can record various archival functions.The following definitions should help you to better understand the ArchivesSpace record types and how they relate to one another.
Repository record
Provides information about the repository having custody of the resources being described. The Yale ArchivesSpace installation is used by a number of different repositories, each with its own Repository record. A Repository record describes the basic characteristics of the physical repository.
User record
Allows individual staff users to have ArchivesSpace accounts with varying levels of permission to access and make changes in parts of the database.
Accession record
Records information documenting the accession transaction and can include information about physical, intellectual, and legal control over acquisitions to the repository.
Resource record
Describes a unit of materials, from an item to a manuscript collection or record group, managed according to archival principles. Resource records can be single or multi-level records as defined in ISAD(G) and DACS. Descriptions of materials in Resource records can be linked to information about physical manifestations (containers) or digital manifestations (Digital Objects).
Digital Object record
The Digital Object record is the place for technical and administrative metadata about digital objects. The Digital Object record can either be single- or multi-level; that is, it can have sub-components just like a Resource record. Moreover, the record can represent the structural relationship between the metadata and associated digital files–whether as simple relationships (e.g., a metadata record associated with a scanned image, and its derivatives) or complex relationships (e.g., a metadata record for a multi-paged item; and additionally, a metadata record for each scanned page, and its derivatives). One or more file versions can be referenced from the Digital Object metadata record.[1] The Digital Object record can be created from within a Resource record, or created independently and then either linked or not to a Resource record.
Subject record
Describes the principal themes or topical contents of the records being described, as well as format and genre characteristics or occupations, that are important as access points. Subject records can be simple or compound hierarchical records, and can be applied at any level of description for Accessions, Resources, and Digital Objects. The content of these records should be carefully controlled by existing subject vocabularies.
Agent record
Describes persons, families, or corporate entities that have a specified relationship to the records being described, such as creator, source (i.e., donor), subject, rights owner, or to an Event. The Agent record is also used for managing relationships among agents.Classification record
Used to create or edit a hierarchy of record groups, subgroups or fonds, at as few or as many levels as required by a repository. Classifications define a repository’s overall arrangement scheme. ArchivesSpace displays a classification in a tree structure containing a hierarchy of categories and subcategories. A tree is formed from a root term (shown in the system by the classification name) and the branches (subgroups) of the tree are the classification terms. Each classification term can itself contain zero or more classification terms. The classification tree is formed of classification terms with a classification name at the root (shown at the top of the structure).
Location record
Describes any storage locations–shelves, drawers, file cabinets, bins, walls, etc.–where a repository stores archival materials. Location records are designed to track both temporary locations and permanent storage locations. Location records are intended to represent physical shelving spaces and not web-accessible file locations. The latter can be represented using URIs recorded as part of Digital Object records.
Location records must be created in accordance with the Yale schema so that other systems (Aeon, Voyager) can read the data predictably and reliably and send materials to the proper place.
Event record
Describes an action involving a selected object in the archival repository (at any level in a multi-level hierarchy) and an agent. Events represent a specific action that one or more agents undertook in relation to one or more archival objects at a specific date and time or a range of dates and times. Events can be used, for example, to document actions that alter archival records, create new relationships between archival records, or record validity and integrity checks for born-digital records.
Each ArchivesSpace record has available to it several sub-record types. A sub-record is a linked record that can only be created and edited through the primary record. Some sub-records are required in some contexts, based on required elements dictated by our content standard. All sub-records have their own requirements. Sub-records in ArchivesSpace include:
**Dates sub-record
**For recording types of dates about the material or entity being described, e.g., date of creation, of broadcast, or publication. Occurs in Accessions, Resource, Resource component, Digital Object, Digital Object component, and Deaccession records.**Extents sub-record
**For recording the extent for the whole or part(s) of the described material. Occurs in Accessions, Resource, Resource component, Digital Object, Digital Object component, and Deaccession records.**Notes sub-record
**For recording notes providing more detailed description of processed archival materials. Occurs in Resource, Resource component, Digital Object, and Digital Object component records.**Rights sub-record
**For indicating the rights status of the material being described. Occurs in Accession, Resource, Resource component, Digital Object, and Digital Object component records.**Deaccessions sub-record
**For indicating materials that have been removed from an accession or from a processed collection. Occurs in Accession and Resource records.**Collection Management sub-record
**For recording information about the work on the materials being described. Occurs in Accession, Resource, and Digital Object records. Further guidance about the use of collection management records will be determined after initial ArchivesSpace migration.
Data entry considerations within the staff interface
When multiple users edit a record at the same time
ArchivesSpace is a networked application in which more than one user can access and view the same record at the same time. A situation may occur where two people attempt to save the same record at the same time.
ArchivesSpace resolves this potential conflict with the “first to save wins” method. What this means is that if two people open the same record, both edit it independently then both save it, the first person to save will be successful, the second person to save will receive an error message indicating the local copy of the record is now outdated and they must reload the record and re-enter any unsaved changes.
Remember to save frequently when editing records that others may want to edit as well.
Required data fields
ArchivesSpace marks required fields with a red asterisk and bold type.
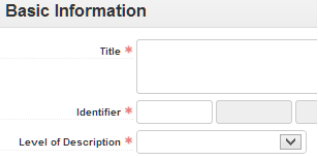
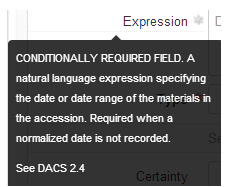
If a sub-form or field is conditionally required, this is noted in a text box when you hover over the field. Conditionally required fields are marked with a gray asterisk.
EAD tagging within data fields
There are circumstances in which you will want to provide more granular encoding than ArchivesSpace creates fields for in its forms. To accommodate this, within Notes sub-records and several other fields in the resource record, ArchivesSpace provides an auto-complete function for EAD tags. You can either directly include EAD markup within the data field – or type “<” to invoke the auto-complete function.
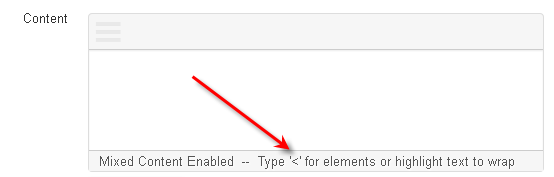
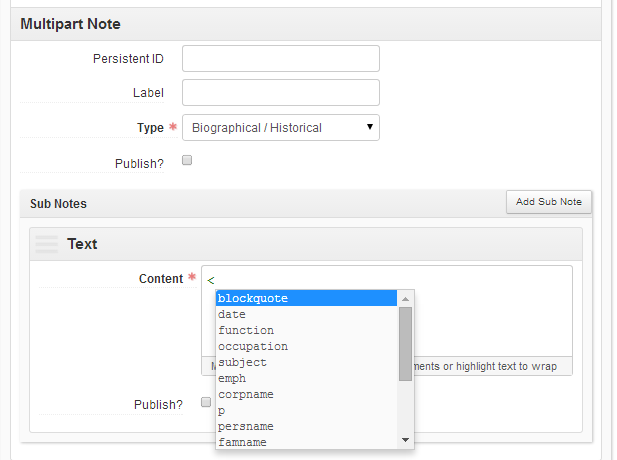
Be careful when adding EAD tags, since mistakes can invalidate the resulting document in EAD export.
Even though the auto-complete function doesn’t appear on data fields external to Notes sub-records, you can still enter EAD tags into other fields. Notice, however, that the underlying data will have a specific mapping to an EAD tag – and the particular tag may only allow for certain nested EAD tags. The ArchivesSpace website (ArchivesSpace Application > Technical Documentation > EAD Import / Export Map) provides a summary of export mappings from Resource record data fields into EAD.
Special characters within data fields
Special characters, or text from any international writing system, can be inputted directly as UTF-8 Unicode using typical Mac or Windows keyboard commands in your browser.
Punctuation within data fields
ArchivesSpace does not supply any end punctuation after text entered within data fields. If you want to see punctuation appear, you must include it inside of data fields. Consult with your repository’s style guide for guidance about using punctuation.
Expanding data fields
Some data fields can be expanded to allow for entering multiple lines of text – or long narrative statements. Select and drag the bottom right corner of the data field to expand it.

Supported Browsers
When using ArchivesSpace, you must use Internet Explorer version 11+, Firefox 8+, Chrome, or Safari 5+.
Repository Records
Functional overview
A Repository record is created during the initial setup of ArchivesSpace. After set up, this record can be edited and additional Repository records can be created through the Manage Repositories function of the Systems drop-down menu. The Repository record serves two basic purposes: to store information for later output and to demarcate the data of one repository from that of another repository.
The Repository record stores data such as the repository’s contact information and identifying codes for later output to access instruments such as EAD-encoded finding aids. Recording and storing this information in one place – at the repository level of description – alleviates the need for repetitive data entry at the resource level and makes revision of all ArchivesSpace exports easier.
The second purpose of the Repository record is to distinguish one repository’s Accession records, Resource records, and data rules from those of another repository using the same multi-repository implementation of ArchivesSpace.
NOTE: To perform any tasks related to managing Repository records, you need to be signed in with a System Administrator account.
Creating and managing Repository records
Repository information was migrated from Archivists’ Toolkit. You may wish to review this information to double-check its accuracy.
When creating a Repository record, only two data fields are required:
Repository Name: The full name of the repository that has responsibility for the records being described.
Repository Short Name: An abbreviation or acronym of the repository name. This is the name shown in most places in the ArchivesSpace interface. You should choose a short name that will allow users to easily differentiate between repositories on your system if you have multiple repositories.
Enhancing a Repository record
Enter detailed additional information about your repository, including Organization/Agency Code, Country, Home Page URL, Branding Image URL (for a repository logo that should appear on your finding aids), and information concerning Contact Details (address, phone, etc.).
After editing, save your additional information by clicking Save Repository.
User Records and User Management
Functional overview
A user record is created for each user of ArchivesSpace and permissions are managed by Repository Managers and by the Yale Archival Management Systems Committee. New user records are created when a user registers a new account after which the user record can be edited to assign permissions within a specific repository or repositories. User records should not be deleted at any time, and user records for staff members no longer at Yale are not deleted from the system.
The User record serves several purposes: it stores data about the user, including name, department, and contact information; it stores data about what the user can do in the database; and it allows the system to store data about what actions the user performed in the system. To perform any actions in the ArchivesSpace staff interface, you need to be signed in as a user.
User accounts are managed by the Yale Archival Management Systems Committee and are governed by the Yale ArchivesSpace User Management Policy section, below
Yale ArchivesSpace User Management Policy
5/2015; revised 12/2018; revised 6/2020
This policy governs:
The creation, management, and deactivation of user accounts within ArchivesSpace
The granting and revocation of privileges associated with each user account
The authentication by which the user establishes a connection to their account
Rationale
This approach to user groups gives the greatest possible flexibility to workers in repositories to assign and remove privileges as staff responsibilities change while still protecting the data in other repositories. These permissions atomize common work functions (creation, read access, update access, and delete) by record type (accessions, resources, containers, and records shared across repositories) and make clear which functions affect only the user’s repository and which affect all repositories.
Scope
This policy applies to all ArchivesSpace accounts at Yale University. This document includes statements on access control, privileges, authentication/password management, and the information required to request a user account.
Access Control
Access to ArchivesSpace will be primarily limited to users with Yale
NetIDs who require access to the system for their work. Users external to Yale (e.g., consultants) may be granted access to the system on a case-by-case basis.
Access is managed separately for all three instances of ArchivesSpace
at Yale: development (DEV), production (PROD), and test (TEST). Access to the TEST and DEV environments is managed on an as-needed basis.
Certain software systems which are integrated with ArchivesSpace (i.e.
Preservica, EAD export service) utilize user accounts to perform GET and POST requests against the ArchivesSpace API. These accounts are identified by the name of the service (i.e. preservicaprod, ead_export_service).
The YAMS co-chairs have system administrator permissions. Additional
system administrator permissions may be granted on a case-by-case basis.
The person enacting any change to a user account must be different
from the person requesting the change.
Accounts should never be deleted from the ArchivesSpace database;
instead, when a user no longer requires access to the ArchivesSpace database, their account will be deactivated by removing any repository roles associated with that account.
Repository managers are responsible for either deactivating user
accounts themselves or alerting YAMS when staff or student workers are no longer active.
Accounts will be reviewed annually by YAMS for inactive NetIDs to
determine if any need to be deactivated.
Accounts may be re-activated – but only after a request has been
issued and approved by following the same procedures required for requesting a new account.
Authentication/Password Management
For authentication to the Staff Interface, ArchivesSpace will use CAS for staff logins, thereby allowing most users to manage passwords externally.
For authentication to the API, users will have to use a local password. These can be set by the system administrator and will have to be reset by the same.
A system administrator account exists but is not used. That account’s password may be reset by a sysadmin if the account must be used.
Aside from administrative and API passwords, no other passwords should be assigned within the ArchivesSpace application.
Guidance for Users
Getting access to ArchivesSpace requires following the User Account Creation steps as outlined in the YAMS LibGuide: Yale Archival Management Systems Committee: User Account Creation
In order for the user to be assigned roles within the system, she must follow the above guidelines to create her account. These steps are necessary in order for the username (the user’s NetID) to be present in the system and for her repository manager to assign her roles.
The second step is for the repository manager to give that user access to whichever user groups the repository manager deems appropriate. All groups are additive and access must be explicitly granted to each group.
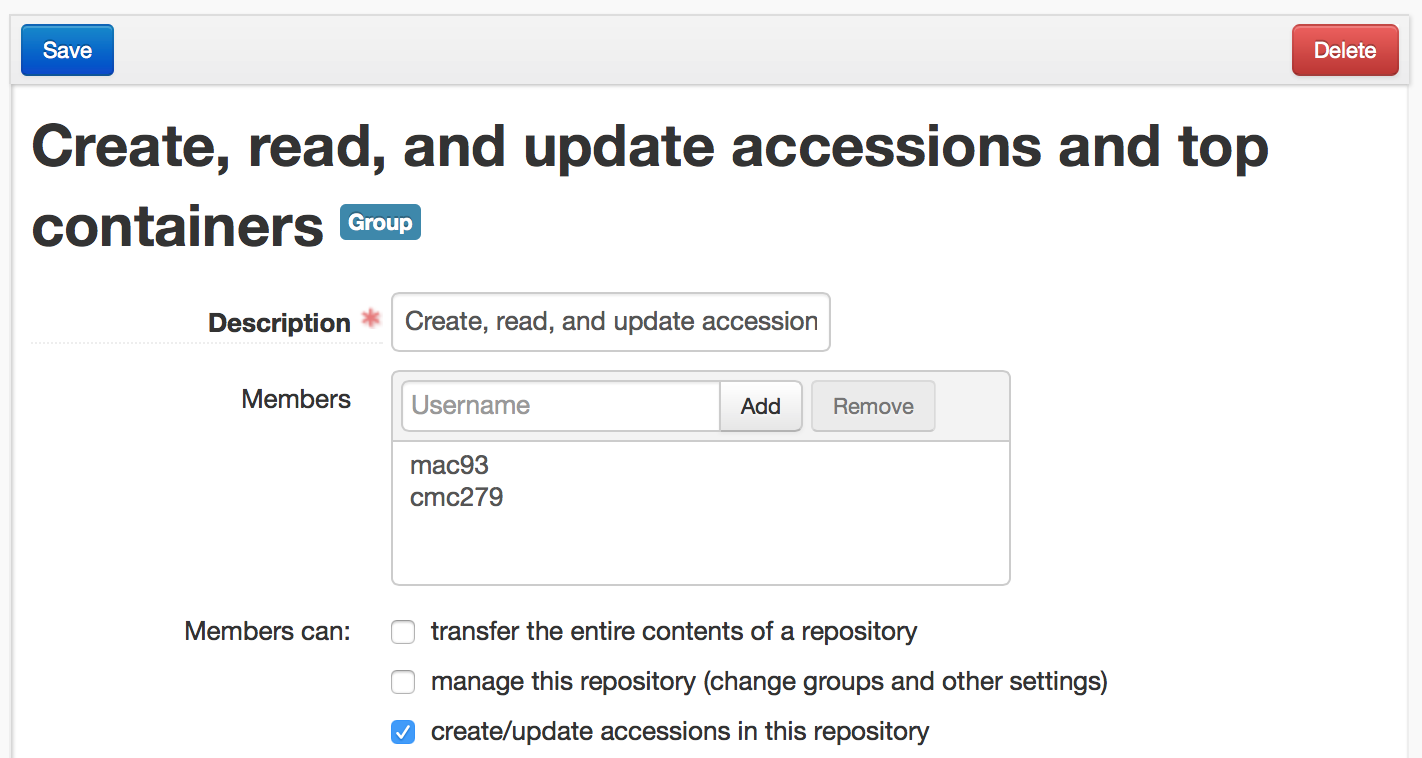
For instance, if you want a user to be able to create accessions AND resources, you must add that user to both the “Create, read, and update accessions and top containers” group and the “Create, read and update resources and top containers” group. A user can be assigned to a group by entering her NetID in the “Members” field of a group. This step must be repeated for each group that a user will be assigned to.
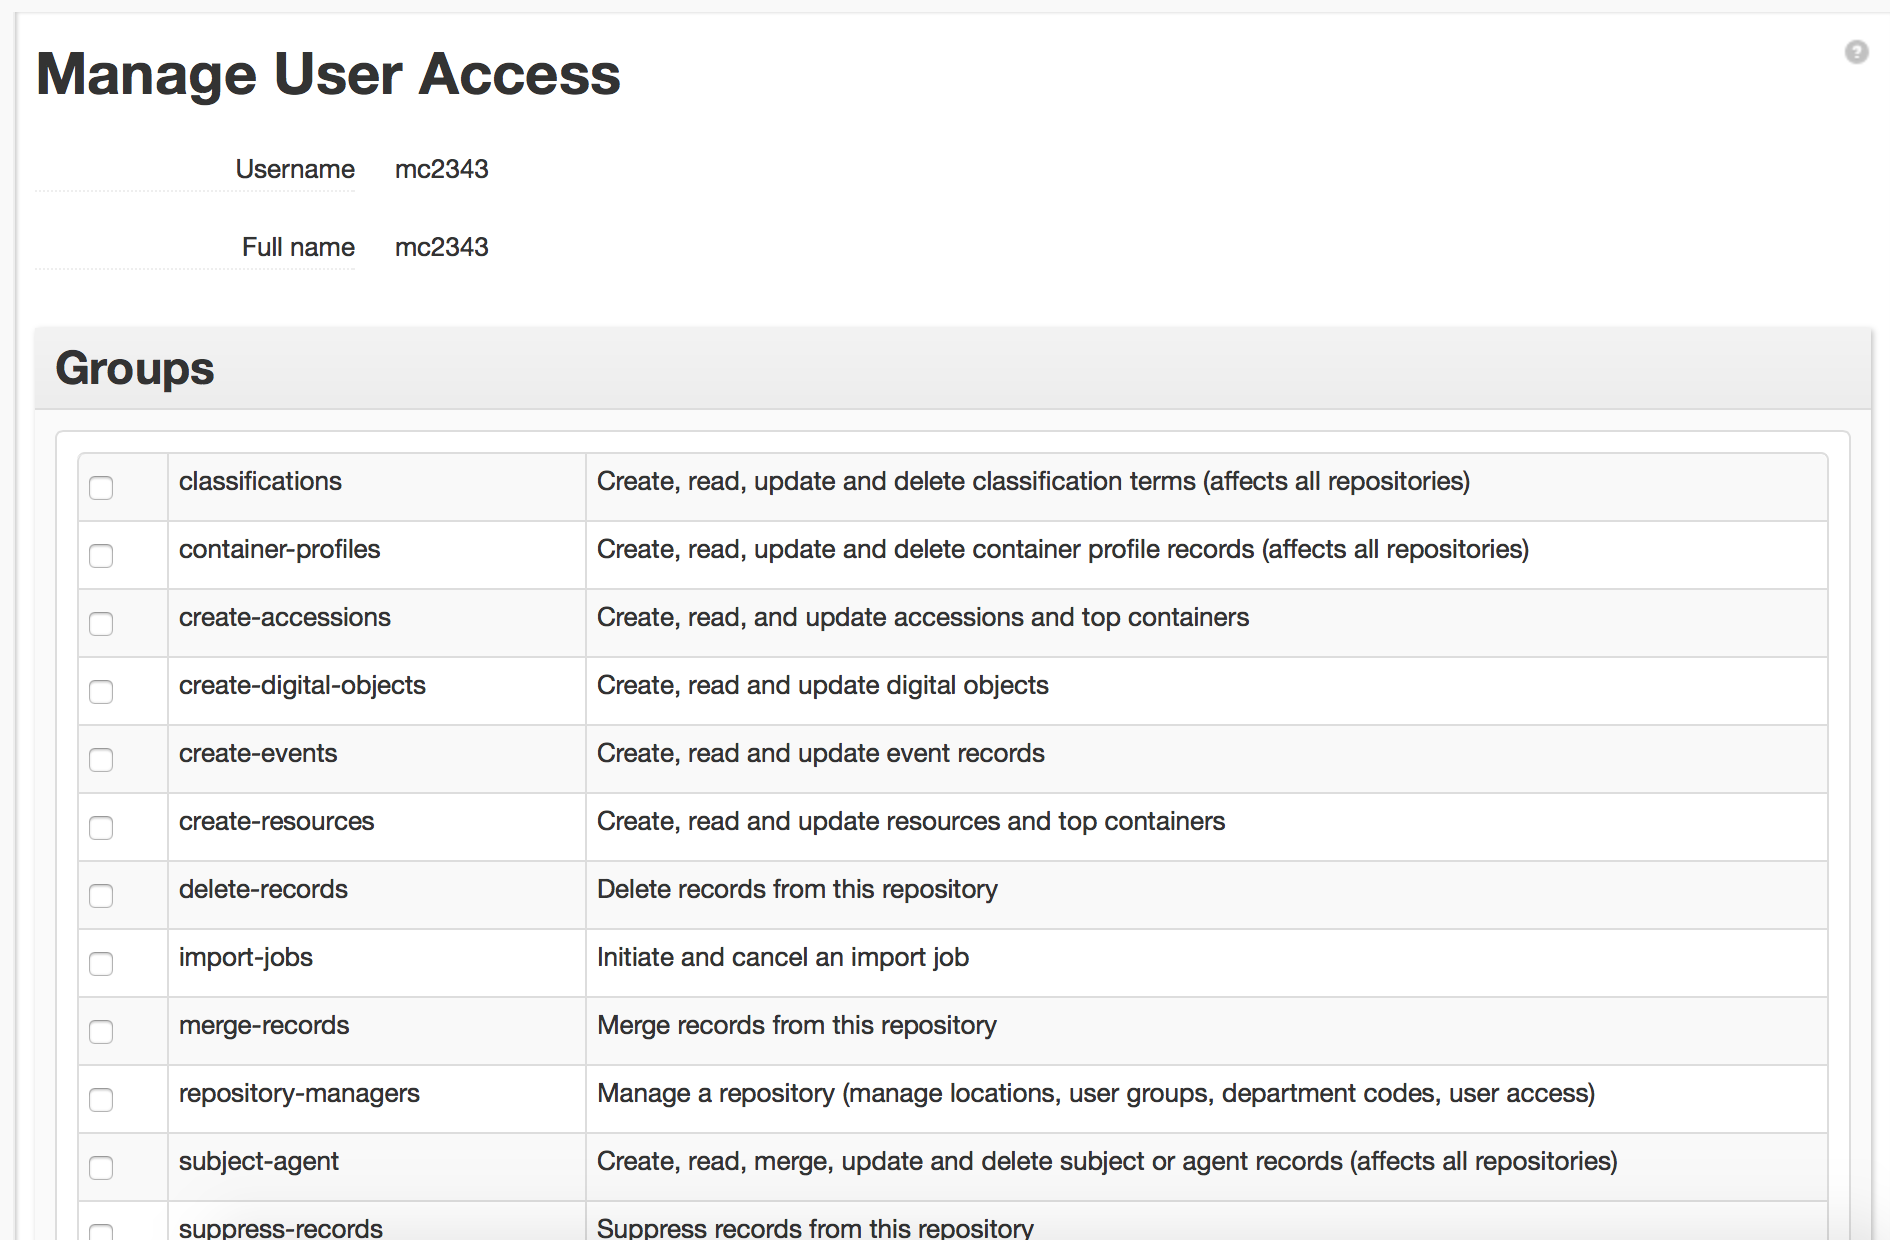
Multiple user groups may also be assigned to a user by selecting their username under Manage Users, then selecting Edit Groups. User groups can be added or removed by checking and unchecking the check boxes next to each user group. See the User Groups at Yale section of this document for definitions and permissions associated with each group.
Guidance for Assigning Permissions
Repository managers internal to the repository
Repository managers generally have the following permissions within their repository:
Assessments – Create, read, update and delete assessment records
Create-accessions – Create, read, and update accessions and top containers
Create-digital-object – Create, read and update digital objects
Create-events – Create, read and update event records
Create-resources – Create, read and update resources and top containers
Delete-records – Delete records from this repository
Import-jobs – Initiate and cancel an import job
Manage-top-containers – Delete or bulk update top containers in this repository
Merge-records – Merge records from this repository
Repository-managers – Manage a repository (manage locations, user groups, department codes, user access)
Subject-agent – Create, read, merge, update and delete subject or agent records (affects all repositories)
Suppress-records – Suppress records from this repository
Transfer-distinct-records – Transfer distinct records across a repository
View-records – View (non-suppressed) records in this repository
View-suppressed-records – View suppressed records in this repository
Vocabulary-classification – Create, read, update and delete vocabulary or classification terms (affects all repositories)
Archivist staff members internal to the repository
Archivist staff members generally have the following permissions within their repository:
Assessments – Create, read, update and delete assessment records
Create-accessions – Create, read, and update accessions and top containers
Create-digital-objects – Create, read and update digital objects
Create-events – Create, read and update event records
Create-resources – Create, read and update resources and top containers
Delete-records – Delete records from this repository
Import-jobs – Initiate and cancel an import job
Manage-top-containers – Delete or bulk update top containers in this repository
Merge-records – Merge records from this repository
Subject-agent – Create, read, merge, update and delete subject or agent records (affects all repositories)
View-records – View (non-suppressed) records in this repository
View-suppressed-records – View suppressed records in this repository
Vocabulary-classification – Create, read, update and delete vocabulary or classification terms (affects all repositories)
Technical services support staff members internal to the repository
Technical services support staff members generally have the following permissions within their repository:
Assessments – Create, read, update and delete assessment records
Create-accessions – Create, read, and update accessions and top containers
Create-digital-objects – Create, read and update digital objects
Create-events – Create, read and update event records
Create-resources – Create, read and update resources and top containers
Delete-records – Delete records from this repository
Import-jobs – Initiate and cancel an import job
Manage-top-containers – Delete or bulk update top containers in this repository
Merge-records – Merge records from this repository
Subject-agent – Create, read, merge, update and delete subject or agent records (affects all repositories)
View-records – View (non-suppressed) records in this repository
Vocabulary-classification – Create, read, update and delete vocabulary or classification terms (affects all repositories)
Staff members internal to the repository without regular data entry responsibilities
Non-technical services staff members generally have the following permissions within their repository:
View-records – View (non-suppressed) records in this repository
The following additional permissions may also be added in some instances, if the staff member requires these permissions for their work and has received proper training:
Create-accessions – Create, read, and update accessions and top containers
Create-digital-objects – Create, read and update digital objects
Create-events – Create, read and update event records
Create-resources – Create, read and update resources and top containers
Student staff members in the repository
Student staff members generally have the following permissions within their repository:
Create-events – Create, read and update event records
Create-resources – Create, read and update resources and top containers
Manage-top-containers – Delete or bulk update top containers in this repository
View-records – View (non-suppressed) records in this repository
Staff members external to the repository
In some cases, staff members at Yale have repository permissions for repositories outside of their home repository. For example, as noted above, the YAMS co-chairs have system administrator permissions. In some cases, staff members in one repository or department require permissions in another repository. Such permissions are granted by the repository managers on a case-by-case basis and are documented by YAMS in a spreadsheet of who has which exceptional permissions and why. YAMS periodically audits that list against the Account Manager.
User Groups at Yale
User groups at Yale are comprised of a set of functions that a user can perform. These functions are hard-coded into the application and not changeable. This means that although we have a great deal of flexibility in assigning permissions as sets of these hard-coded functions, there are some options that are simply not available. For instance, the “view records” function gives a user permission to view all non-suppressed records in a repository. At this time, there is no option to only let users see a single record type (e.g., only accessions or only resources).
Yale User Permission Groups include the following:
Create, read, update and delete assessment records*
assessments
X create/update assessment records
X delete assessment records
*BRBL only as of 6/2020
Manage a repository (manage locations, user groups, department codes, user access)
repository-managers
X manage this repository (change groups and other settings)
X create and run a background job
X cancel a background job
Transfer the entire contents of a repository
transfer-contents
X transfer the entire contents of a repository
Transfer distinct records across a repository
transfer-distinct-records
X transfer major record types between repositories
Create, read, and update accessions and top containers
create-accessions
X create/update accessions in this repository
X view the records in this repository
X create/update top container records
Create, read and update resources and top containers
create-resources
X create/update resources in this repository
X view the records in this repository
X create/update top container records
X delete/bulk update top container records *BRBL
X manage RDE templates
Create, read and update digital objects
create-digital-objects
X create/update digital objects in this repository
X view the records in this repository
Create, read and update event records
create-events
X create/update event records in this repository
X view the records in this repository
Create, read, update and delete container profile records (affects all repositories)
container-profiles
X create/update/delete container profile records
Suppress records from this repository
suppress-records
X suppress the major record types in this repository
X view suppressed records in this repository
Delete records from this repository
delete-records
X delete event records in this repository
X delete the major record types in this repository
X delete/bulk update top container records
Delete or bulk update top containers in this repository
manage-top-containers
X delete/bulk update top container records
Merge records from this repository
merge-records
X merge the major record types in this repository
View suppressed records in this repository
view-suppressed-records
X view suppressed records in this repository
View (non-suppressed) records in this repository
view-records
X view the records in this repository
Initiate and cancel an import job
import-jobs
X create/update resources in this repository *BRBL only
X view the records in this repository *BRBL only
X initiate import jobs
X cancel an import job
X merge the major records types in this repository *BRBL only
X create and run a background job
X cancel a background job
Create, merge, update and delete subject or agent records (affects all repositories)
subject-agent
X create/update/delete subject records
X create/update/delete agent records
X merge agent/subject records
Create, update and delete vocabulary or classification terms (affects all repositories)
vocabulary-classification
X create/update classifications and classification terms
X delete classifications and classification terms
X create/update/delete vocabulary records
Examples of custom Yale User Permission groups include:
Printed Acquisitions*
Printed-Acq
X create/update accessions in this repository
X create/update event records in this repository
X view the records in this repository
X initiate import jobs
X cancel an import job
*BRBL only
Student workers*
MusicLibraryStudentStaff
X create/update resources in this repository
X view the records in this repository
X create and update top container records
*Music only
Delete/Cancel/Transfer permissions not explicitly specified in other groups*
higher_level_permissions
X transfer the entire contents of a repository
X delete event records in this repository
X transfer major record types between repositories
X view suppressed records in this repository
X create/update classifications and classification terms
X delete classifications and classification terms
X cancel an import job
X merge the major record types in this repository
*Fortunoff_Testimonies only
User Permission Groups provided in ArchivesSpace by Default
System Administrator
Has all read/write and functional permissions for all repositories sharing the ArchivesSpace installation.
Advanced Data Entry users of the [Repo name] repository*
repository-advanced-data-entry
X create/update accessions in this repository
X create/update resources in this repository
X create/update digital objects in this repository
X create/update event records in this repository
X view the records in this repository
X initiate import jobs
X create/update/delete subject records
X create/update/delete agent records
X create/update/delete vocabulary records
X create/update top container records
X delete/bulk update top container records
X create/update/delete container profile records
X create/update/delete location profile records
X create and run a background job
Archivists of the [Repo name] repository*
repository-archivists
X create/update accessions in this repository
X create/update resources in this repository
X create/update digital objects in this repository
X create/update event records in this repository
X view the records in this repository
X initiate import jobs
X create/update/delete subject records
X create/update/delete agent records
X create/update/delete vocabulary records
X create/update top container records
X delete/bulk update top container records
X create/update/delete container profile records
X create/update/delete location profile records
X create and run a background job
Basic data entry users of the [Repo name] repository*
repository-basic-data-entry
X create/update accessions in this repository
X create/update resources in this repository
X create/update digital objects in this repository
X view the records in this repository
X create and run a background job
Managers of the [Repo name] repository*
repository-managers
X manage this repository
X create/update accessions in this repository
X create/update resources in this repository
X create/update digital objects in this repository
X create/update event records in this repository
X suppress the major record types in this repository
X delete the major record types in this repository
X view the records in this repository
X initiate import jobs
X create/update/delete subject records
X create/update/delete agent records
X create/update/delete vocabulary records
X create/update top container records
X delete/bulk update top container records
X create/update/delete container profile records
X manage RDE templates
X create/update/delete location profile records
X create and run a background job
X cancel a background job
Project managers of the [Repo name] repository*
repository-project-managers
X create/update accessions in this repository
X create/update resources in this repository
X create/update digital objects in this repository
X create/update event records in this repository
X suppress the major record types in this repository
X delete the major record types in this repository
X view the records in this repository
X initiate import jobs
X create/update/delete subject records
X create/update/delete agent records
X create/update/delete vocabulary records
X merge agent/subject records
X create/update top container records
X delete/bulk update top container records
X create/update/delete container profile records
X create/update/delete location profile records
X create and run a background job
X cancel a background job
Viewers of the [Repo name] repository*
repository-viewers
X view the records in this repository
Creating and managing User records
Only three elements are required to create a user record, one of which must be confirmed by re-entering its value.
Username: The login name the user will use to access an ArchivesSpace repository.
Full name: The full given and surname of the user.
Password/Confirm Password: The password the user will use, along with her or his username, to access the API
New user records are created via the user account creation process described on the Yale Archival Management Systems Committee LibGuide: https://guides.library.yale.edu/c.php?g=296249&p=4694567
After user records are created, repository managers should immediately edit the corresponding agent record to include the following in the agent’s bioghist note: Yale NetID; department; title; and dates of service (e.g. Archivist, Beinecke Library (2010-2017); NetID: abc123).
Editing a User record
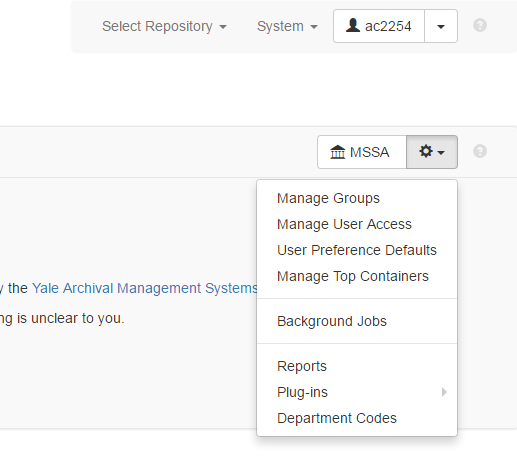
Select Manage User Access on the Gear option on the top toolbar.
Click on the Edit option for the User record to be edited.
Update the record as needed.
Click on Update Account to save the updated User record.
Deleting a User record
As per the Yale ArchivesSpace User Management Policy, User records are not deleted.
Location Records
Functional overview
Location records describe any storage locations—shelves, drawers, file cabinets, bins, walls, etc.—where archival materials are stored. Location records are designed to track both the permanent and temporary locations of materials.
Location records are intended for physical shelving spaces and not for web-accessible file locations. Locations for materials on the web are managed via URIs recorded as part of Digital Object records.
Location records use a coordinate system to represent a repository’s storage space. For example, a coordinate may be a range, shelf, or flat file storage number. Up to three of these coordinates can be recorded. If storage units have not yet been assigned some sort of unique identifier, they will need to be named in some manner in order to create Location records in ArchivesSpace. Location records can be entered and edited at any time, but it may be most effective to create them all at once for an entire repository and link to them as needed.
Coordinates have labels and indicators. A label may be “Shelf”, “Cabinet”, etc., and an indicator would be “1”, “2e7”, etc. It is important to not have labels and indicators in the same field.
Yale Locations Guidelines
| AS Location | Use for | Example(s) | Notes |
| Building | Unique nickname for the Building |
|
|
| Floor | DO NOT USE if an official room number is available | Using official room numbers; should negate need for Floor. Only use for non-LSF locations |
|
| Room | Use for non-LSF room indicator as per official building map |
|
Only use for non-LSF locations |
| Area | DO NOT USE | ||
| Barcode | Only use for non-LSF locations | ||
| Classification | DO NOT USE | ||
| Coordinate Label 1 | Primary location coordinate |
|
For the LSF location only; the building name is also the Coordinate 1 Label (this is because a building name and Coordinate 1 Label or Indicator are required for a valid Location record.) |
| Coordinate Indicator 1 | Only use for non-LSF locations | ||
| Coordinate Label 2 | Use for secondary location coordinate |
|
Only use for non-LSF locations |
| Coordinate Indicator 2 | Only use for non-LSF locations | ||
| Coordinate Label 3 | Use for tertiary location coordinate |
|
Only use for non-LSF locations |
Coordinate Indicator 3 |
Only use for non-LSF locations |
Example of an MSSA locations
| Building | Floor | Room | Area | Barcode | Classification | Coordinate Label 1 | Coordinate Indicator 1 | Coordinate Labe 2l | Coordinate Indicator 2 | Coordinate Label 3 | Coordinate Indicator 3 |
| SML | B51-A | Range | 1 | Section | A | Shelf | 3 | ||||
| LSF | LSF | ||||||||||
| SML | B54 | Cabinet | A | Drawer | 1 |
(NOTE: All location coordinate identifiers are UPPERCASE.)
Creating and managing Location records
Location records can be created one at a time before or at the time of accession or resource description. As a time-saving device, Location records can also be created in batches in advance of linking them to collection materials or as new storage units are established. Those Location records can then be assigned to accessions and resources as needed. Be aware, however, that locations cannot be deleted in batches.
Creating single Location records
On the main toolbar, click Create, select Location and then select Single Location.
Record a value for Building Name. This is a required field.
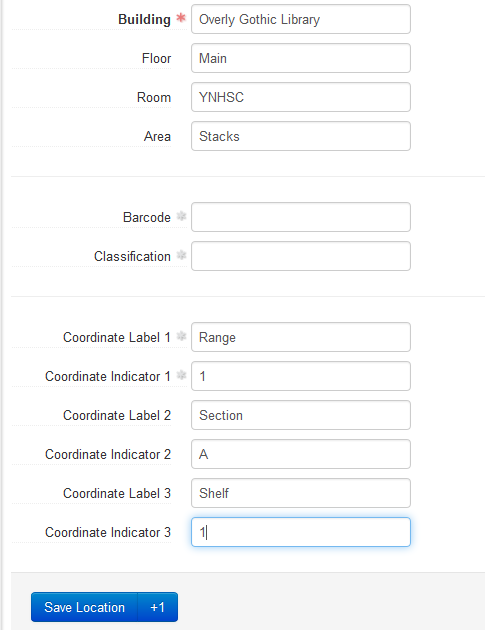
Enter either Coordinate Label 1 and Coordinate Indicator 1 or a value for Barcode. This is the minimum amount of data required for a single Location record.
(Do not use Classification Number.)Save the Location record by pressing the Save Location command button at the bottom of the record. If entering more than one single Location record, click on the +1 button. This will save the current record and open a new Location record template.
Creating multiple Location records
On the main toolbar, click Create, select Location, and then select Create Batch Locations.
In the Base Location section, record a value for Building Name. This is a required field. You can also enter data in other fields in the Base Location section if you wish, but do not enter coordinate information here.
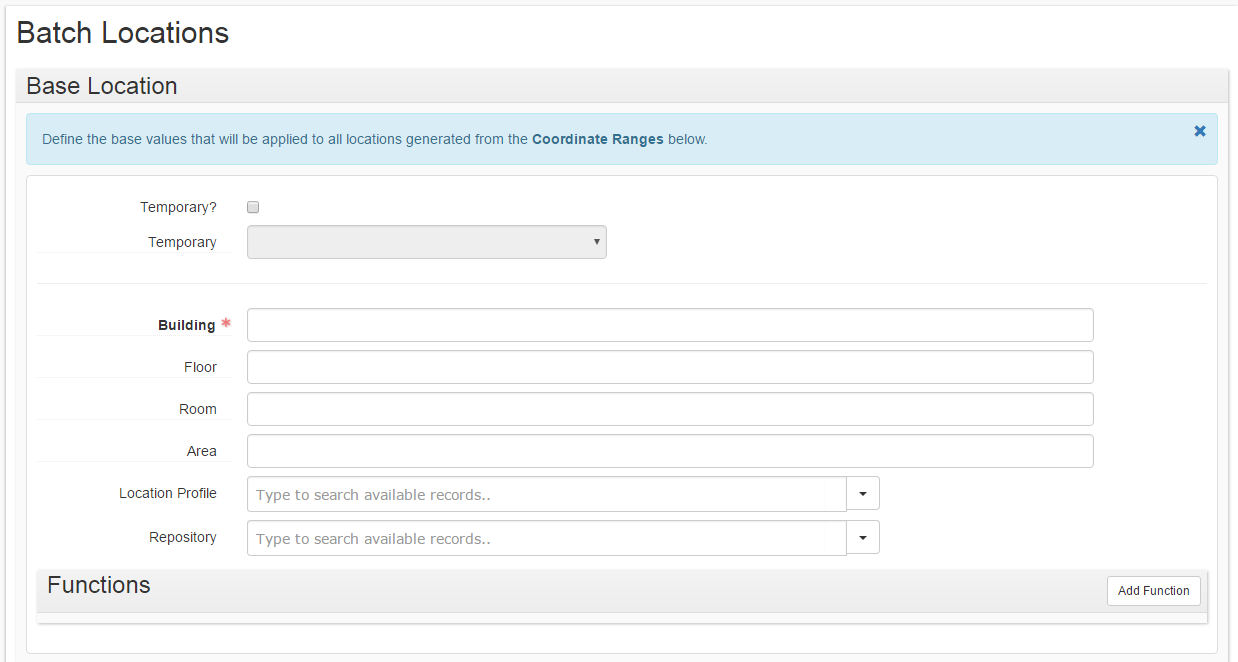
In the Coordinate Ranges section, enter values for Coordinate Range 1’s Label, Range Start, and Range End. This is the minimum amount of data required to generate a batch of locations.
Enter values for Coordinate Range 2 and Coordinate Range 3 if warranted.
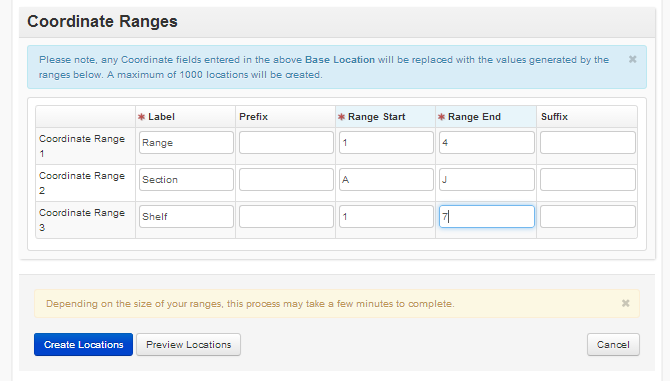
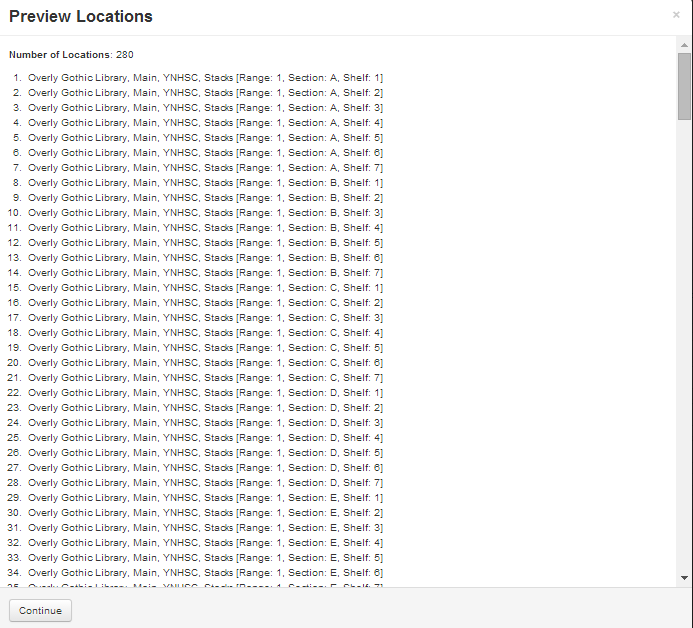
You may review your locations to make sure they are correctly formed by clicking on the Preview Locations button.
Click on the Create Locations button to generate the batch of Location records (the number of records generated is determined by the coordinate information provided). Generate additional batches of records by changing values for the coordinates or, if appropriate, values for the shelving location.
Managing Top Containers
Functional Overview
One feature of ArchivesSpace is the ability to act on containers as distinct entities, as well as the ability to act on them in bulk. This section is an introduction to using the “Manage Top Containers” function in ArchivesSpace.
Navigating to the Manage Top Container Function
“Manage Top Containers” is available under the gear menu for the repository name.
Searching
The manage top container view is both a way to act on containers and a useful search tool.
To search for distinct top containers, a number of fields can be used in combination with one another.
Keyword search: This searches all fields in the top container view – resource name, resource identifier, accession name, accession identifier, container profile name, container indicator, container barcode, and current location. You can perform a boolean NOT operation by putting a minus sign in front of the text in the keyword search term.
Barcode: Searches by barcode of the top container
Resource: Start typing to find the resource you want to enter, or click on the triangle at the end of the field to browse.
Accession: Start typing to find the accession you want to enter, or click on the triangle at the end of the field to browse.
Container Profile: Start typing to find the container profile you want to enter, or click on the triangle at the end of the field to browse.
Location: Start typing to find the location you want to enter, or click on the triangle at the end of the field to browse. Please note that because of a known bug in the application, typing a hyphen will result in the typeahead not producing any results.
Exported to ILS
The Unassociated Containers search is primarily to support clean-up. If a resource or accession record is deleted, the top containers created as part of that record will still remain. By searching for “unassociated containers”, you can find and delete containers that are no longer in use.
Examples of search:
See all of the distinct top containers in a collection. In this example, I want to see which containers are in the Yale Athletics Photographs collection.

Find all of the containers in a particular location. In this example, I want to know all of the containers that are house in SML 150-B, Drawer 1.
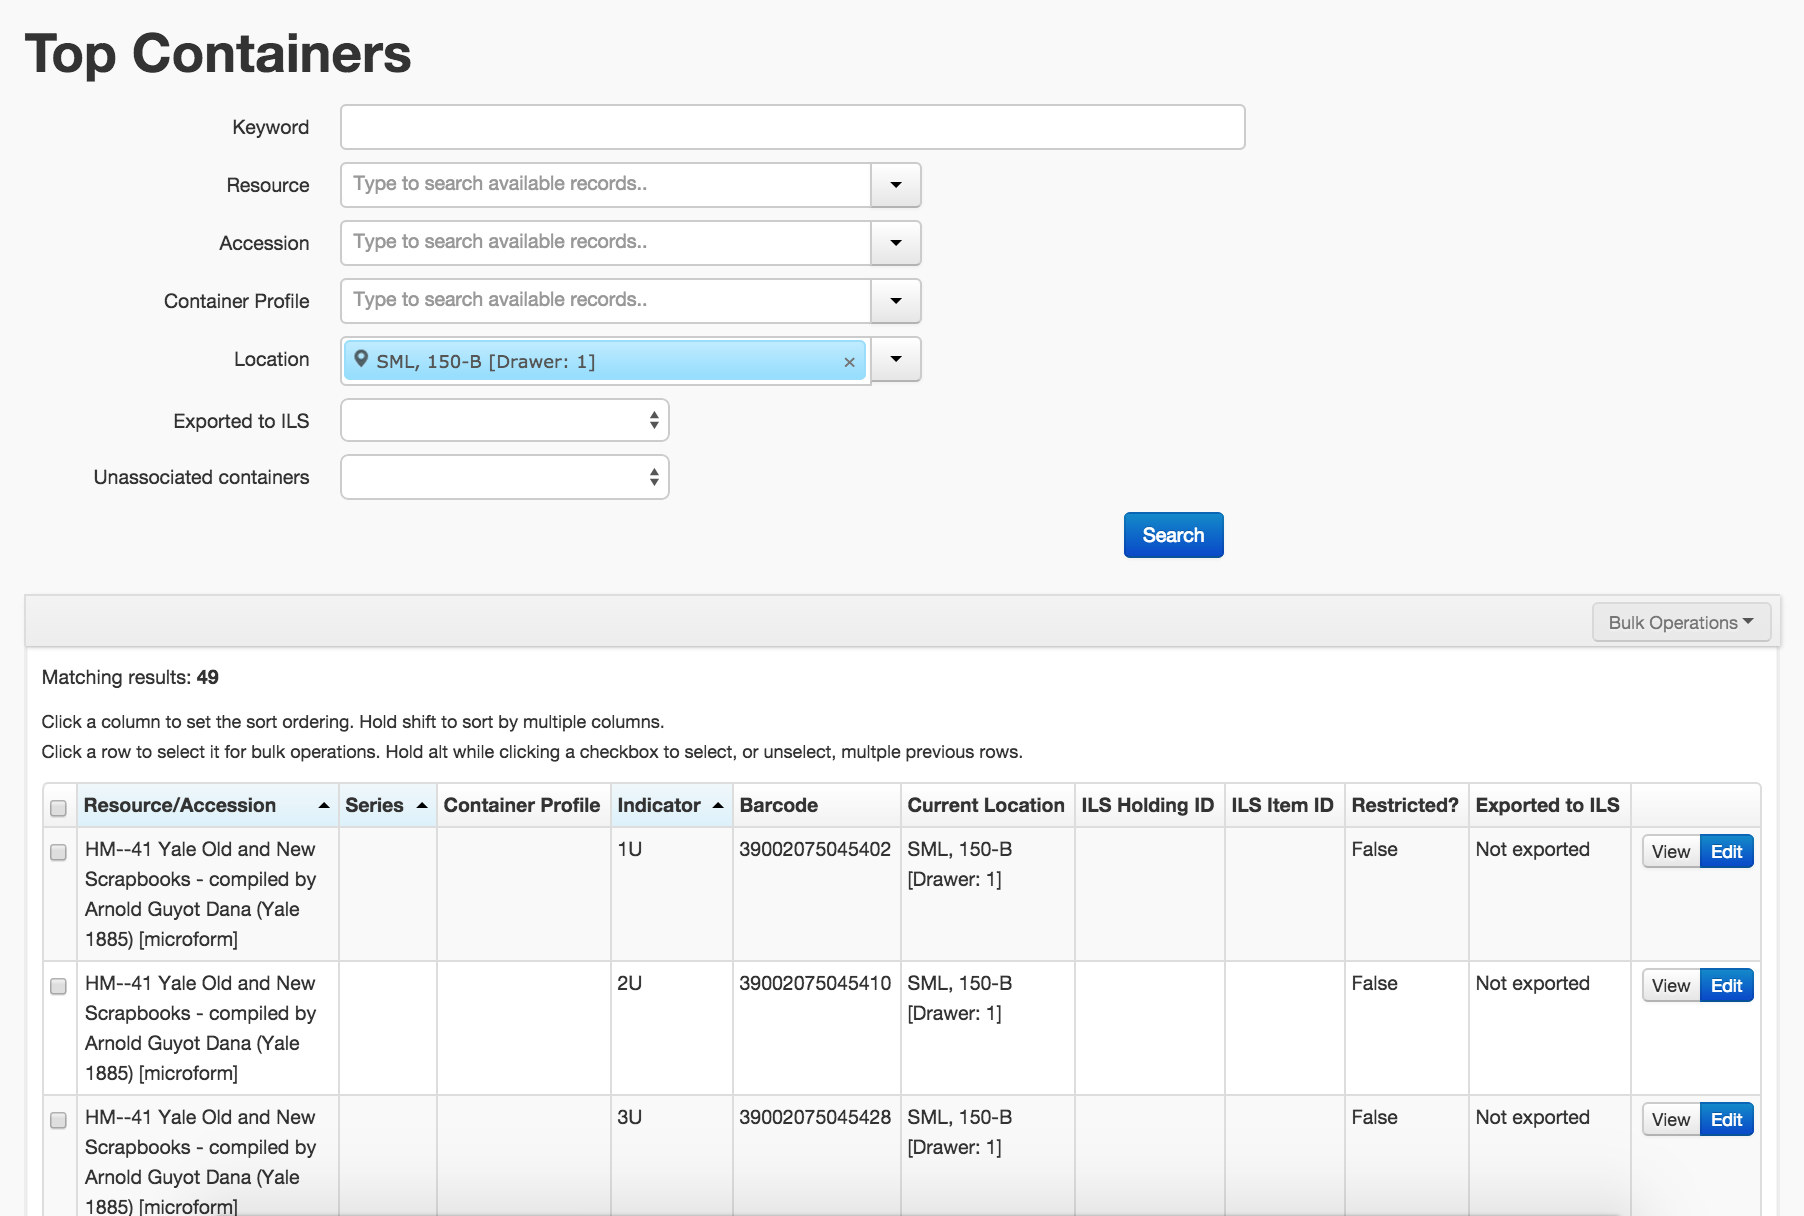
In this example, the location is entered in the “Location” field and the results show us that there are 49 containers that match this location. The results tell us which resource or accession this container belongs to, which series (if applicable), container profiles, container numbers, barcodes, ILS information and restriction information.\
Find examples of container profiles. For instance, you may know that all “blue” boxes are non-archival and want to bring them together for a re-housing project.
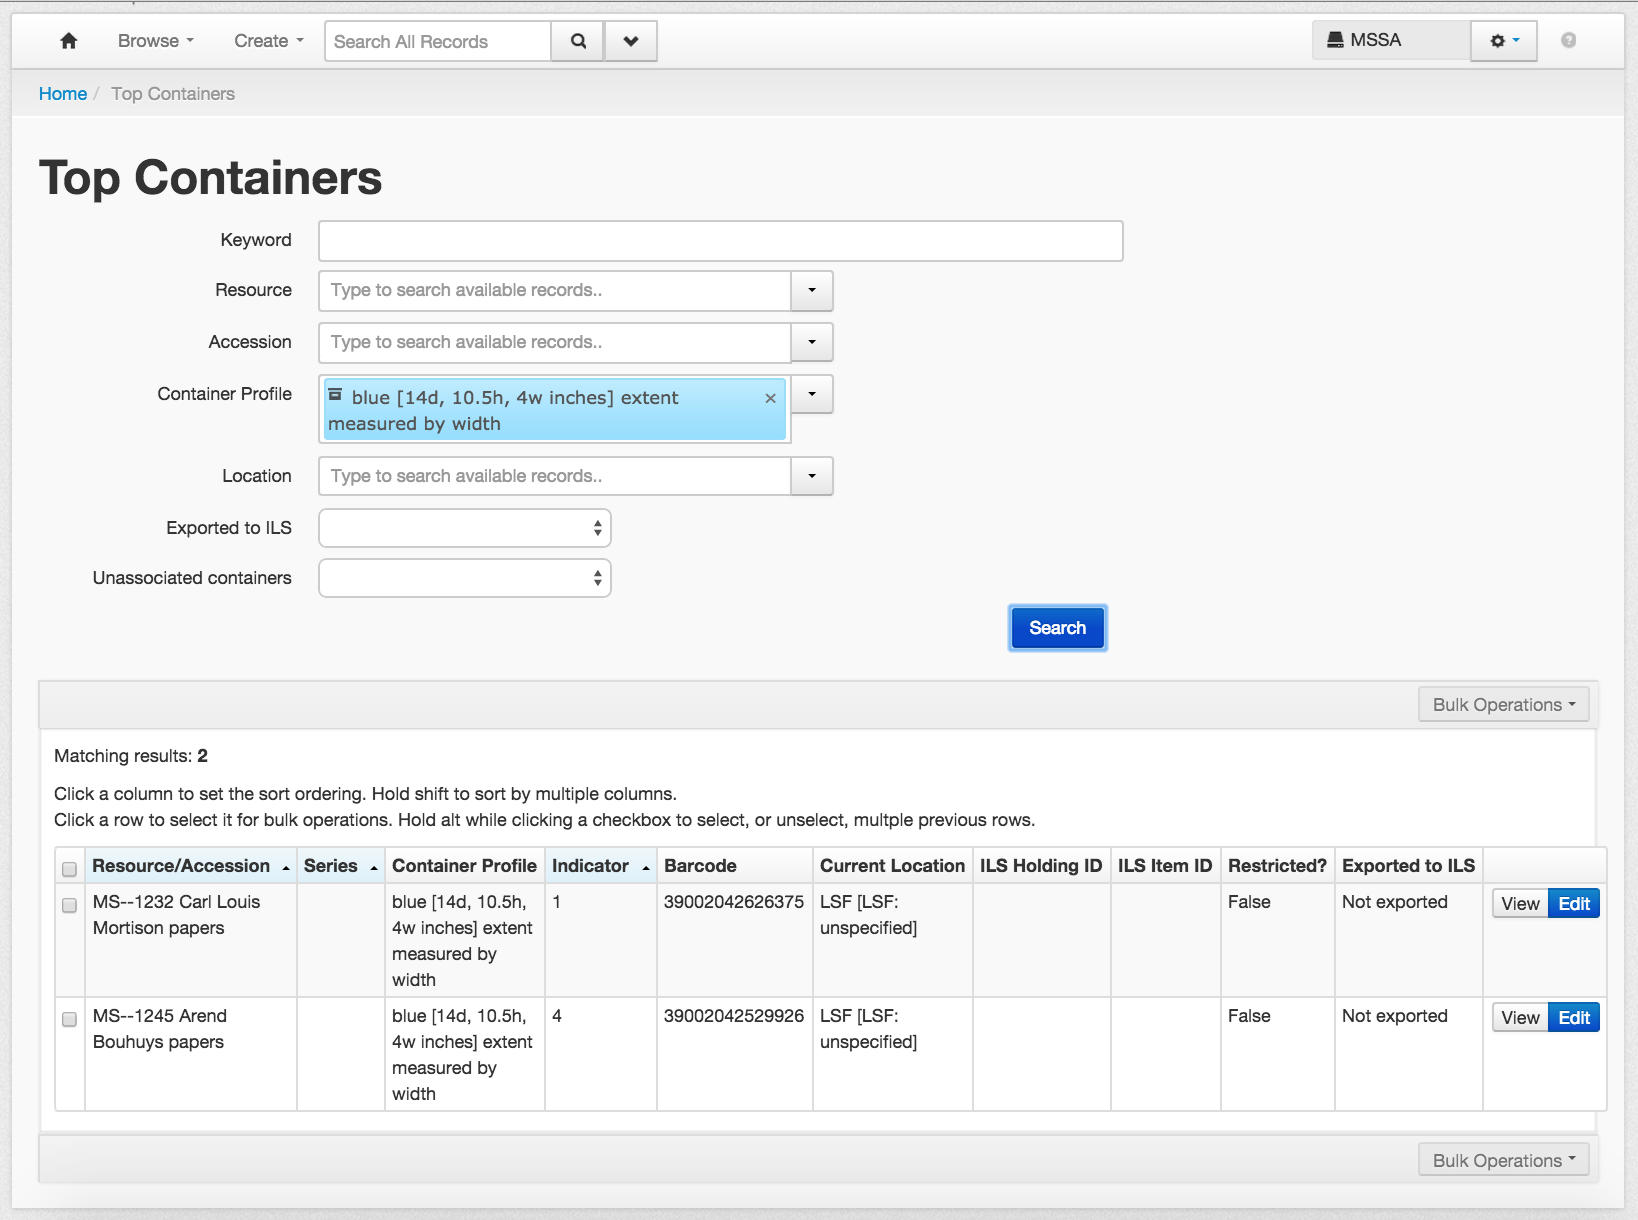
In this example, I searched for a container profile of “blue” and found that there are two top containers that have that container profile. I now know their location, their barcode, and the resource record associated with them, which will make it possible to do a re-housing project.
Updating elements from containers in bulk
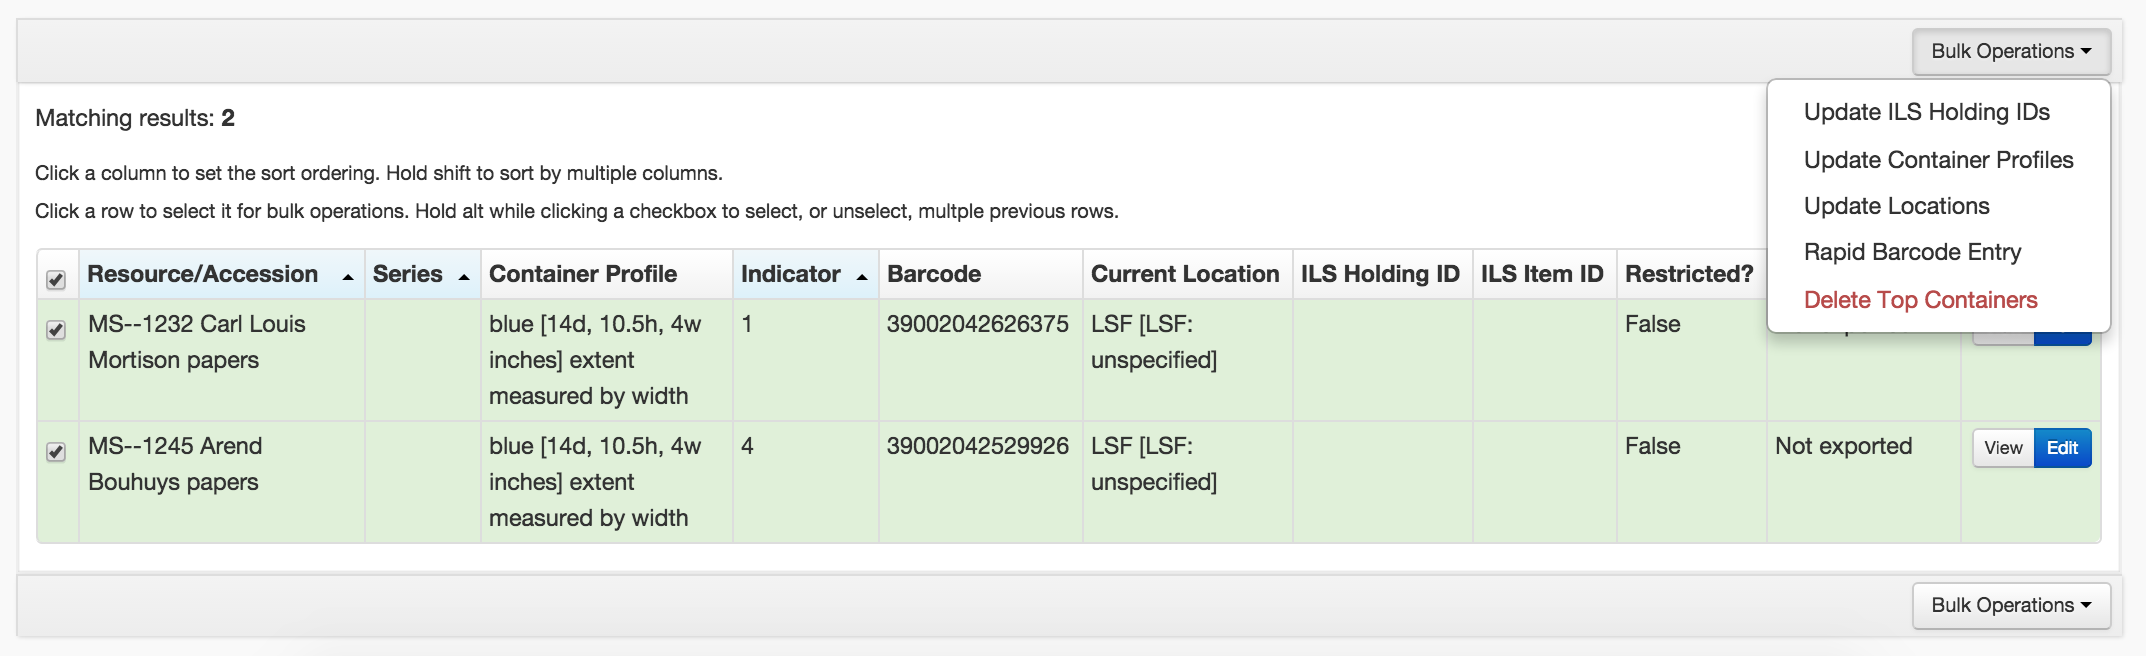
Selecting top containers:
From within a result set, there is the ability to select all containers, select no containers, select containers individually (as a set), or select from a contiguous range. Click a row or rows to select it for bulk operations.
From the “manage top containers” screen is the ability to update the following elements:
Update ILS Holding IDs
This may be used to reconcile the Voyager holdings ID for containers. There is no current use for this at Yale.
Update Container Profiles
This is an opportunity to set information about container profiles in bulk.
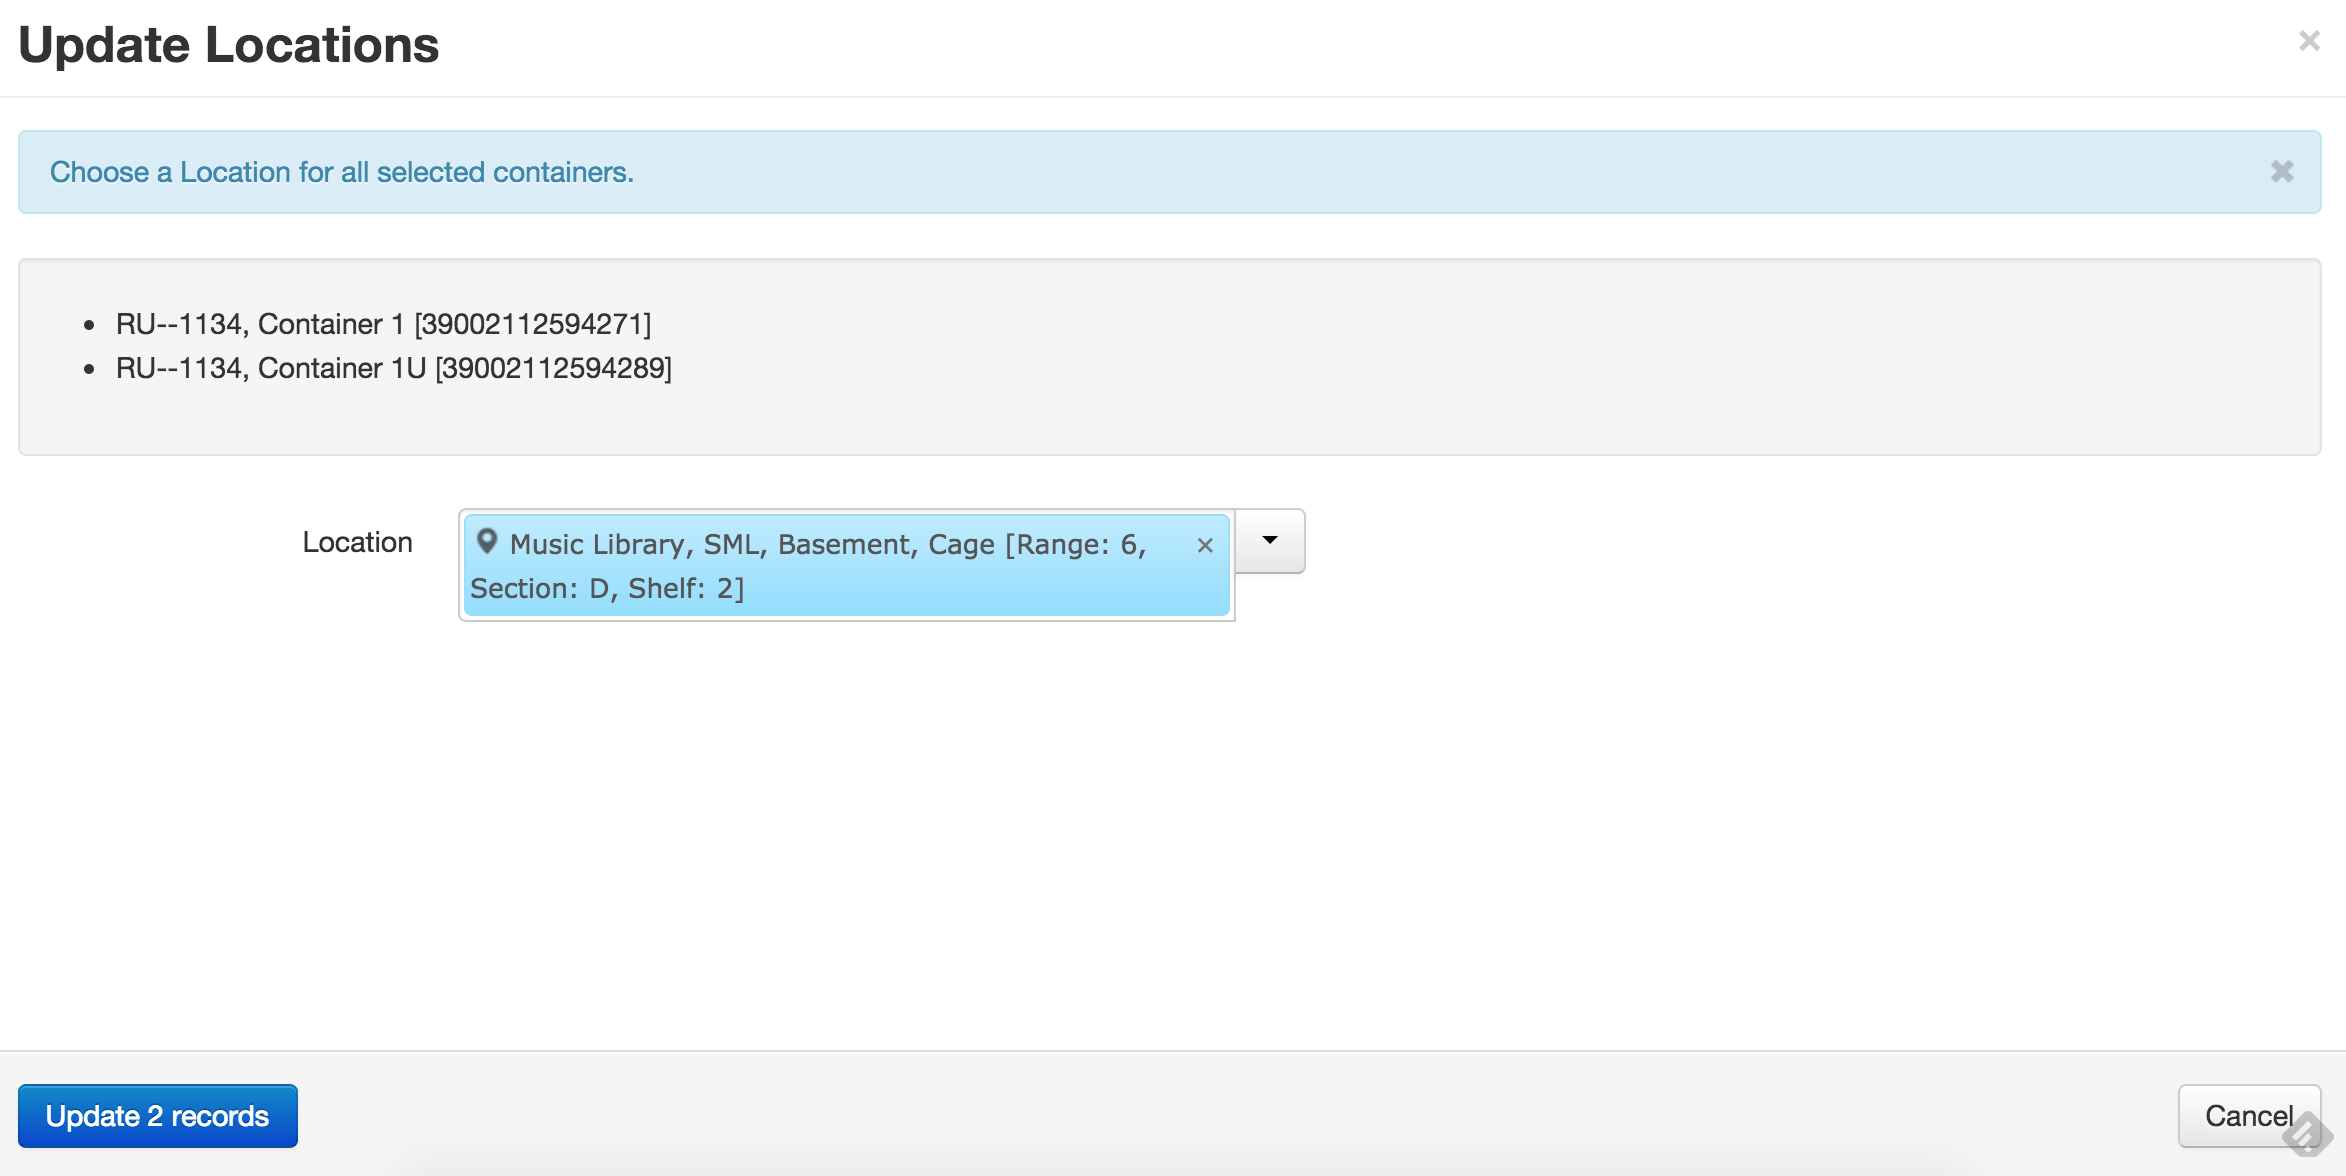
Update Locations
This function allows the user to change the locations of containers singularly or en masse to a new permanent location or locations.
Rapid Barcode Entry
With this feature, an archivist can enter all of the barcodes for a group of containers at once. Note that barcodes cannot be repeated within the system and that a specified barcode length can be set. For YUL repositories, all barcodes must be 14 digits.
Delete Top Containers
This option removes top containers and all information contained therein. It does not remove information in resource records, components, or accessions, although it does break the link between these records and a top container.
Container Profile Records
Functional Overview
Container profiles are associated with top containers, and provide information about the physical container in which archival materials are housed. With this data, we can calculate how much space a collection occupies.
Associating an existing container profile with a top container record
Instructions for this can be found in the Managing Top Containers section of the manual.
Creating a container profile
On the main toolbar, click Plug-ins and select Manage Container Profiles.
In the upper right corner of the Container Profiles main page, click Create Container Profile.
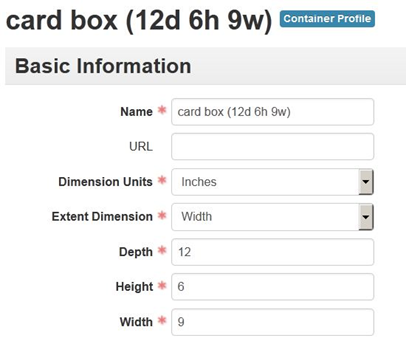
Enter the following information
Name - A descriptive name for the container type. Since this value must be unique, we also include a summary of the container’s dimensions in parentheses. See below for guidance on general name types for container profiles.
Dimension units - The unit of measurement used to measure the dimensions of a container. Container profile dimensions are always measured in inches.
Extent Dimension – The dimension of a container used to measure linear extent. Width is always used to measure linear extent at Yale.
Depth, Height, and Width measurements of the container. When measuring a container, you should always round up to the nearest whole inch.
Depth represents the distance from the front of the shelf to the back of the shelf.
Height represents the distance from the bottom of the box upwards.
Width is the edge of the container that faces out on the shelf.
For flat boxes, the long edge is measured as width.
For containers in which materials are stored upright (i.e. archive boxes, record cartons, card boxes, etc.), the edge facing the front of the shelf (often the short edge) is measured as width.
For two-dimensional containers (folders of any size), the long side should be measured as width and the height should be measured as 0.5 inches.
Click Save Container Profile.
Rules for creating container profiles
Permission to create container profiles is given at the discretion of repository managers.
Container profiles are shared across all repositories.
Container profiles for most standard-sized, commercially-produced containers used in Yale repositories have already been created in ArchivesSpace. Before creating a new container profile for a standard-sized box, please search the existing container profiles to confirm that it doesn’t already exist.
All containers are measured to the nearest inch on each side, with the exception of folders, which are consistently measured as being 0.25 inches high. This means that there may be two different containers of relatively different sizes that belong to the same container profile. Since the goal of container profiles is to give a ballpark estimate of the size of our holdings, these marginal differences are acceptable.
n.b. – a folder of any size should be referred to as a folder (including broadside, folio folder, etc.) Because of the uniqueness constraint, a folder’s name should include its width and depth dimensions. There’s no need to include its height dimension, since all folders are assigned a default height of 0.25 inches.
For flat boxes and folders, assign width to the longest side.
Container profiles refer to the boxes in which materials are stored. In some cases, container profile names may refer to a particular material or carrier type. Keep in mind, however, that in all cases, the container profile name has nothing to do with the materials therein.
Example: A set of earrings may be kept in a 5-inch audiotape box. Never assume that the container profile name refers to the box’s contents.
Container profile names
In order to minimize the possible proliferation of names, we’ve decided on a small group of name types. When creating a container profile, please use a name type from this list. If no value on this list describes the container that you would like to create a profile for, please contact the Yale Archival Management Systems Committee.
Since container profile names must be unique, the name should be a combination of the name type and a summary of the dimensions.
Examples
flat box (21d 1.5h 25w)
Container profiles for custom-made boxes
Many Yale repositories use custom-made boxes to house oddly-sized or shaped materials that won’t fit safely into standard-sized containers. In order to prevent an unmanageable proliferation of container profiles in ArchivesSpace, a single set of uniform container profiles for custom boxes has been created. These container profiles correspond approximately to the most common types and dimensions of custom boxes used in Yale repositories. They are as follows:
Custom box [vertical octavo, 1” wide] (1” w x 10” h x 9” d)
Custom box [vertical octavo, 3” wide] (3” w x 10” h x 9” d)
Custom box [vertical quarto, 1” wide] (1” w x 15” h x 13” d)
Custom box [vertical quarto, 3” wide] (3” w x 15” h x 13” d)
Custom box [flat, 12” wide] (12” w x 3” h x 10” d)
Custom box [flat, 18” wide] (18” w x 3” h x 14” d)
Custom box [flat, 24” wide] (24” w x 3” h x 20” d)
Custom box [flat, 30” wide] (30” w x 3” h x 24” d)
Custom box [flat, 36” wide] (36” w x 3” h x 30” d)
Custom box [flat, 42” wide] (42” w x 3” h x 36” d)
Rules for assigning container profiles to custom containers
For containers smaller than 42 inches in width, round up to the next closest size container.
For containers larger than 42 inches in width, assign “Custom box (flat, 42” wide) (42” w x 3” h x 36” d)”
For custom containers made for objects that do not correspond to the above standard custom boxes, indicate: Object box (##” w x ##” h x ##” d)
Strategies for searching, browsing, and choosing container profiles
When searching for a container profile in a typeahead field (for example, in the Create Top Container window), look for words in bold text in your search results. When an exact match for your search term(s) is found in a record, that term will appear in bold.
Using the Browse feature provides you with a greater number of tools for finding container profile records. To browse for a container profile from the Create Top Container Window, open the drop-down menu next to the typeahead and click on Browse. Some tips for browsing top container records:
In the search field in the top left corner of the Browse window, you can use quotation marks to search for an exact phrase. If you use the correct container profile name (example: “archive half legal”), this will make your search more accurate and greatly reduce your search results.
On the left side of the browser window, you can browse containers according to their height, width, or depth dimensions (but not all three at the same time). Click on the link next to the desired dimension and measurement to see all container profile records for boxes that include that dimension.
Accession Records
Functional overview
Accession records store information about the receipt and legal transfer of archival materials. An accession may be a single item or an aggregation of materials. It may be the beginning of a new resource or multiple resources, or an accrual to an existing resource.
Accession records may also be linked to other types of ArchivesSpace records, such as existing Resource, Digital Object, Subject, Agent, and even other Accession records.
Data in an Accession record can also be transferred into two types of records. It can be spawned into additional Accession records to reflect hierarchical or sibling relationships. It can also be spawned into a new Resource record. Edits to a spawned Resource record do not change the Accession record it came from. Only the first Accession record can be spawned to the Resource record; data from subsequent Accession records associated with the same resource will need to be entered manually. The process of spawning new Resource records from Accession records is covered in the Spawning a Resource Record section of this manual.
Creating and managing Accession records
ArchivesSpace requires two elements in an Accession record, though you may enter many more if warranted:
Identifier
Accession Date
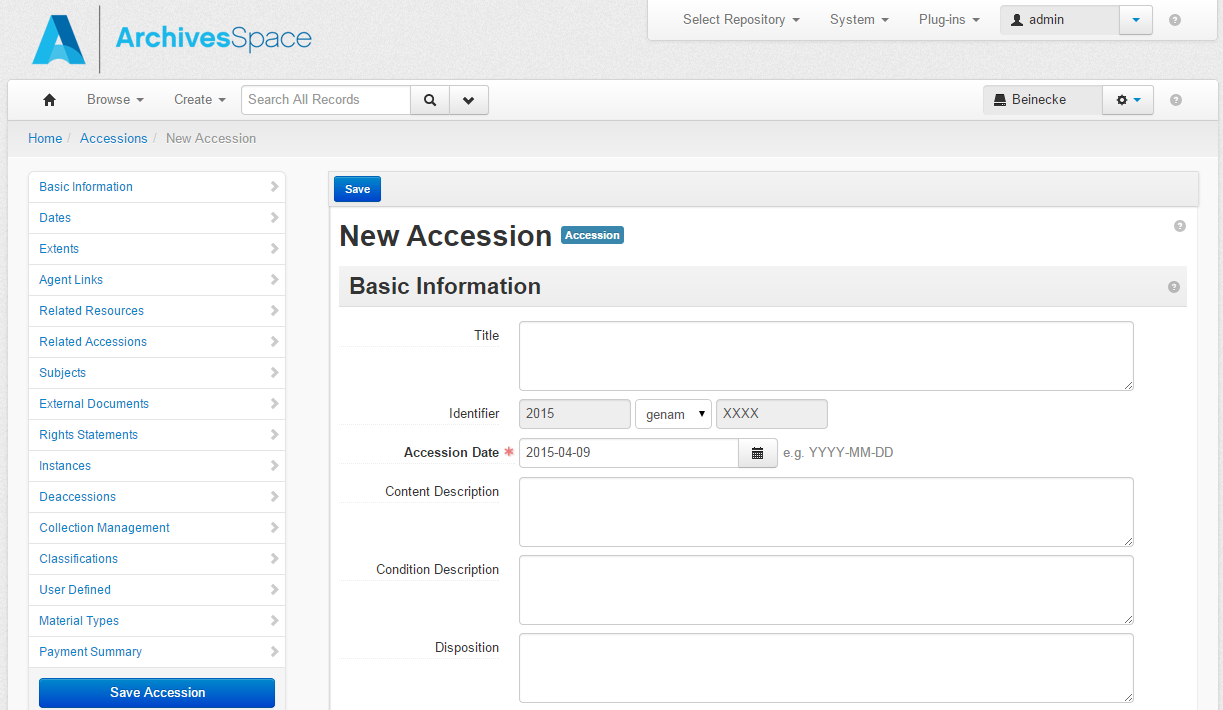
Creating an Accession record
On the main toolbar, click Create and select Accession.
Enter the following information:
Accession Date: This field is automatically filled with the current date. Edit the accession date as necessary. The accession date may represent the date of the receipt of the materials or the invoice date. Assign according to your repository procedures.
Identifier: An accession identifier is comprised of three segments. The first segment is the fiscal year of the accession. This is set automatically based upon the assigned accession date. The second segment is a department code. If your repository has multiple departments, select the appropriate code from the drop-down menu. If your repository has only one department code, it will be assigned by default. The third segment is a four-digit number that is assigned in a sequence for each department and fiscal year. The third segment will be generated automatically upon saving the new accession record. Do not use this field for unique identifiers assigned to individual pieces of media for the purposes of tracking and managing the media.
Click Save Accession. If any required element is missing, you will be prompted to add the information, which you must do in order to save the record.
Adding further information to an Accession record
After the minimum information about an accession has been entered, you can continue to describe the accession using the sub-records available in the left navigation bar.
When you add a sub-record, depending on the type of record, specific fields may be required. If any required information is missing, you will be prompted to add the required information.
Below is a summary of selected additional, optional key data fields often used in the creation of accession records. In all cases, follow your repository’s guidelines and supervisor’s instructions when creating accession records.
Basic Information
Title: Consult DACS and your repository’s accession guidelines for advice on forming titles.
Content Description: Open text field. A description of the types of material and topical contents of the accession. For born-digital materials, you may insert information such as operating systems, hardware information, and software dependencies here, if known.
Condition Description: Open text field. A description of the physical condition of the contents of the accession, including any special handling requirements. Particular preservation concerns may be noted here, including issues of fragility or obsolescence.
Disposition: Open text field. A note to describe a range of processes associated with implementing appraisal, destruction, and preservation decisions. Disposition is a comprehensive term that includes both destruction and transfer of records.
Inventory: Open text field. A note that can capture a list of the contents of the accession.
Provenance: Open text field. A note that provides source information about an accession, such as custodial history and detailed acquisition information.
Retention Rule: Open text field. A note indicating the retention authority or rule for the accession.
General Note: Open text field. A catch all note field for any information that does not fit in any of the more specifically defined fields. This field does not display in the Public User Interface, and should only be used for internal notes.
Acquisition Type: Choose from a drop-down list. A categorical descriptor for the type of acquisition. Possible data values include deposit, gift, purchase, transfer. May be left unassigned if the acquisition type is unknown.
Resource Type: Not used by Yale. A list of terms for categorizing resources into basic types.
Restrictions Apply: Not used at Yale.
Publish: Select or clear the check box. A selected check box indicates that this accession will be published to the Public User Interface.
Access Restrictions: Select or clear the check box. A selected check box indicates that access to the materials is restricted.
Access Restrictions Note: Open text field. A statement indicating what materials in the accession have access restrictions, what the authority of the restriction is, and for how long the restriction will be in effect. If Access Restrictions (see above) is selected this field should include a relevant explanation.
Use Restrictions: Select or clear the check box. A selected check box indicates that there are use restrictions for materials in the accession.
Use Restrictions Note: Open text field. A statement indicating which materials have use restrictions, how the materials can be used, what the authority of the restriction is, and for how long the restriction will be in effect. If Use Restrictions (see above) is selected this field should include a relevant explanation. Additional information may also be recorded in a Rights sub-record.
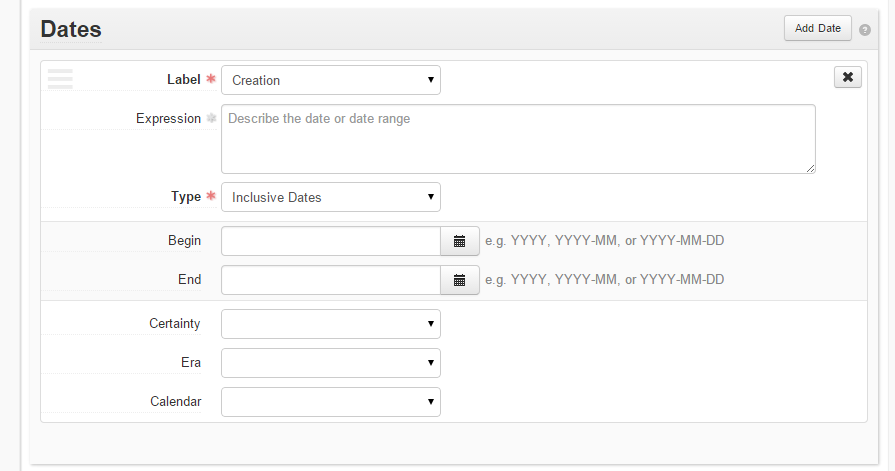
Dates sub-record
This sub-record identifies and records the date(s) that pertain to the creation, assembly, accumulation, and/or maintenance and use of the materials being described. The required fields are Label and Type.
Label: Choose from a drop-down list. Describes the type of activity that the date signifies.
Expression: A natural language expression specifying the date or date range of the materials is required when a normalized date is not recorded or when the date expression is different than the normalized date values. Examples include:
1870 - circa 1879
Easter 1925
1955-1959, undated
Type: Choose from a drop-down list. Indicate the type of date sub-record, either a single date or a date range (inclusive or bulk). This is a required field for date sub-records.
Optionally, you may specify normalized date values. Normalized values can be input into the Begin and End date fields either manually in the YYYY, YYYY-MM, or YYYY-MM-DD formats, or by clicking on the calendar icon and choosing the appropriate date.
Extents sub-record
This sub-record is used for recording the size of the described materials. The required fields are Portion, Number, and Type. Users may use multiple, parallel extent sub-records within a single accession record.
Portion: Choose from a drop-down list. Used to specify whether an extent statement relates to the whole or a part of a given described aggregation or item. At least one extent sub-record should refer to the whole accession.
Number: Open text field. A numeric value for indicating the number of units in the extent statement, e.g., 5, 11.5, 245. Used in conjunction with Type to provide a structured extent statement.
Type: Choose from a drop-down list. A term indicating the type of unit used to measure the extent of materials described. For born-digital material that arrived on physical media, indicate the carrier type(s) (e.g. external hard drive). For born-digital material that arrived via transfer without a carrier, indicate quantity of data transferred in gigabytes.
Container Summary: Open text field. A list of container and container types housing the materials described in the component record.
Physical Details: Open text field. Other physical details of the materials described, e.g., analog, black and white, negatives.
Dimensions: Open text field. The dimensions of the materials described.
Extent sub-records may be entered manually. Alternatively, Extent sub-records for archival components in Top Containers can be generated with the Extent Calculator button. The Extent Calculator creates a draft extent sub-record that may be edited before saving. Note: this will not replace an existing extent sub-record. If an existing sub-record becomes obsolete; the user must delete the old extent subrecord.

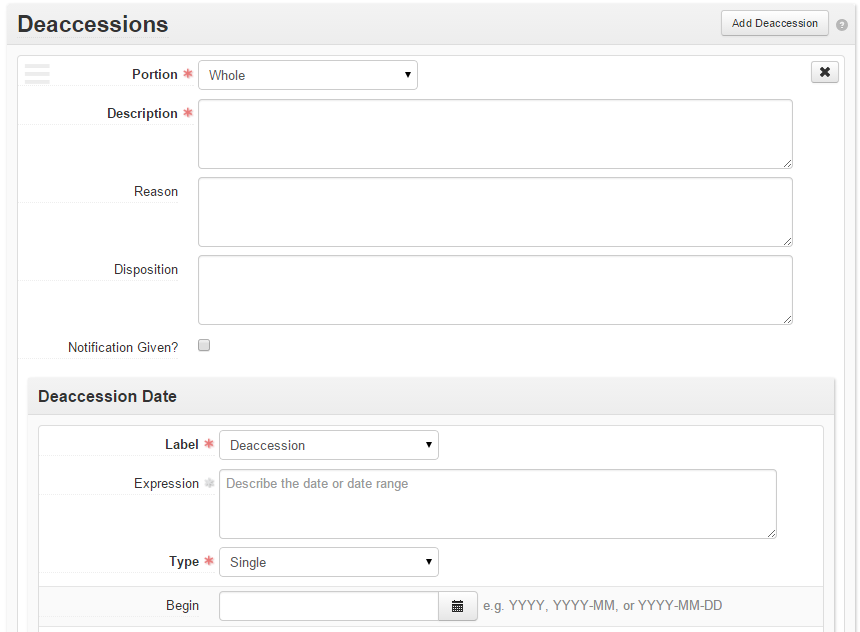
Deaccessions sub-record
This sub-record identifies the scope and circumstances of materials permanently removed from the accession. The required fields are Portion and Description, as well as a Deaccession Date.
Portion: Choose from a drop-down list. Options include “whole” and “part.” If the entirety of the accession has been deaccessioned, select “whole.” Otherwise, if not all of the accession has been deaccessioned, select “part.”
Description: Open text field. Describe the nature of the deaccessioned materials.
Reason: Open text field. Summarize the reasons why the materials were deaccessioned.
Disposition: Open text field. Describe what was done with the deaccessioned materials.
Notification Given?: Boolean field. Select this field if any notice of the deaccession has been sent.
Deaccession Date: Select the type of date (most likely a single date), then provide both a date expression value and a normalized “Begin” date.
Optionally, you may provide a deaccession extent sub-record. To do so, under the Deaccession Date, click “Add Extent.” Required fields include Portion, Number, and Type.
Material Types sub-record
This sub-record contains eleven Boolean fields that may be used to indicate the presence of specific material formats in the accession. There are no required fields. The material types that may be flagged by checking the corresponding box as follows:
Books
Games
Maps
Microforms
Realia
Serials
Audiovisual Materials
Computer Files
Manuscripts
Photographs
Works of Art

If you frequently accession a particular type of material, as a user you may set default Material Type values that will automatically be selected when you create a Material Types sub-record. In the top toolbar, click on the drop-down menu next to your user name and select “My Repository Preferences.” Default Material Types can be selected at the bottom of the page. After choosing your default values, click on save at the top of the page.
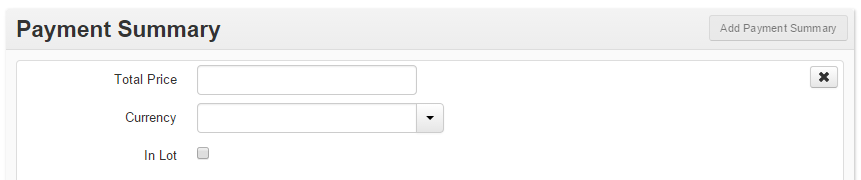
Payment Summary sub-record
This sub-record captures information regarding the details of payments made for purchased accessions. There are no required fields. Payment information consists of one Payment Summary and zero or more Payment sub-records. The Payment Summary may contain the following information:
Total Price: A number representing the total cost of the purchased accession
Currency: A controlled value list. Select the code correspondent to the currency in which all payments were made. USD (US Dollar) is the default. Other currencies may be selected by clicking on the “X” to clear the field, then either using the type-ahead functionality to find the appropriate currency code or by clicking on the down arrow and manually selecting from the list.
In Lot: A Boolean field. Selecting “In Lot” will indicate that the accession combines multiple line items in an invoice.
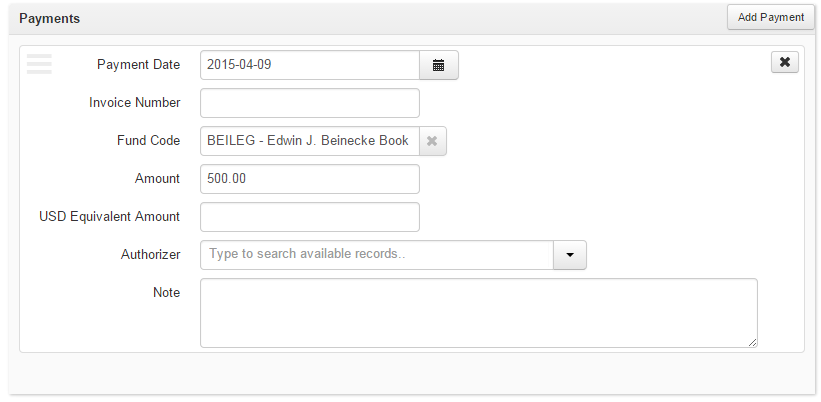
After the Payment Summary has been completed, you may add information about individual Payments. There are no required fields in a Payment sub-record. You may supply the following pieces of information:
Payment Date: A normalized date field. Provide the date in YYYY-MM-DD format, or click on the calendar to select the date.
Invoice Number: An open text field for capturing invoice numbers.
Fund Code: A controlled value list of Fund codes. Select the fund with which the payment was made from the list by either using the type-ahead function or by clicking on the down arrow and selecting from the list.
Amount: A number representing the amount of the payment.
USD Equivalent Amount: If the payment is not in USD and your repository chooses to track cumulative expenditures, supply a number of the approximate amount spent in USD.
Authorizer: A link to an agent. Select the agent record for the staff member responsible for authorizing the payment.
Note: An open text field for recording any necessary or useful notes about the payment.
For simple transactions, a single Payment sub-record will suffice. You will need to supply multiple Payment sub-records if a single purchase is paid for on multiple funds, or if subsequent payments are scheduled for future dates.
Spawning Accession Records
To create a copy of an existing Accession record, do the following:
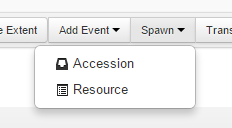
1. Click on the Spawn option at the top of the Accession record template.
2. Select Accession.
3. The spawned Accession record will appear. Provide the appropriate Identifier and Accession Date and make additional edits as necessary.
4. Click Save.
All Basic Information is copied to the newly spawned Accession record except for the identifier and accession date. Other sections copied to the new record include the following: Dates, Extents, Agent Links, Subjects, and User Defined. Sections not copied to the new record include Related Resources, Related Accessions, External Documents, Rights Statements, Instances, Deaccessions, Collection Management, and Classifications.
Resource Records: Single-Level
Functional overview
Within the context of ArchivesSpace, resources can be defined as materials that are in the custody of an archival repository and are being controlled according to archival principles. An ArchivesSpace resource may be comprised of one item, or, more typically, it will be an aggregation of items that can be of any extent or complexity.
ArchivesSpace supports description of the resource as an intellectual entity and also as one or more physical or digital entities that may embody the intellectual item. The description of the archival resource can be supplemented with certain context and content descriptors (names and subjects).
Creating and managing Resource records
There are two ways to create Resource records in ArchivesSpace. One way is to create a Resource record within the Resource module. The other way is to “spawn” a Resource record from an existing Accession record. Both ways are described below and are subject to the same record requirements.
A Resource record must have the following data:
Title
Resource Identifier
Level of Description, chosen from a controlled value list containing the values: class, collection, file, item, record group, series, subgroup, subseries, or other level
Language
Extents sub-record
Dates sub-record
A valid Resource record may not satisfy all the DACS minimum requirements, as it may lack the following:
Scope and Content note (Notes sub-record)
Conditions Governing Access note (Notes sub-record)
Other DACS requirements, such as the Reference Code Element, are recorded in the ArchivesSpace repository record.
Your repository may have other elements that are required in every record.
Creating a Resource record
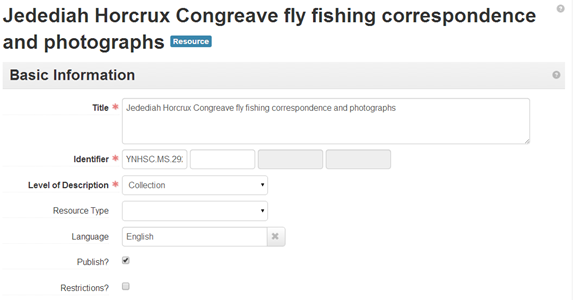
From the Main Screen, select Create and select the Resource option.
In the Basic Information area, record the Title, Identifier (which is where the collection call number is recorded), and Level of Description of the resource.
Record the primary Language (recommended for DACS compliance) of the materials in the resource.
Indicate if any restrictions apply to the resource by checking the Restrictions? checkbox. (Note: this is not used at Yale)
If you intend for your finding aid to be exported to YFAD, check “Publish?.” Do not check this until all work has been completed and the finding aid is ready for publication.
For the Extents sub-record:
Indicate in Portion if the extent statement characterizes the entire resource (”Whole” default) or part of the resource (”Part”). One extent statement for the “Whole” resource is required, and one or more extent statements for parts of the resource may be recorded. For example, you might indicate that an entire collection has a “whole” extent statement of 55 Linear Feet, as well as a “part” extent statement of 30 3.5” floppy disks (where the “part” extent statements may or may not add up to the whole)
Record the Number for the extent measurement, e.g., 5.
Select the Type of extent from the controlled value list, e.g., linear feet.
Optionally, in Container Summary note the number and type of containers comprising the extent in the container summary, e.g., 3 record cartons, 4 archives boxes, and 3 oversized folders.
Optionally, record specific Physical Details and Dimensions.
Optionally, record one or more Extents statements for parts of the resource, e.g., the number of audiocassettes in the resource.
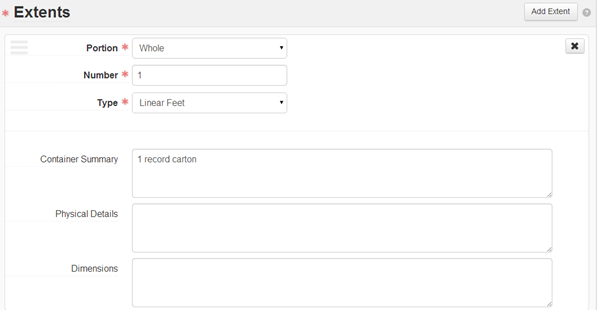
Within the Dates sub-record, record the date(s) (recommended and required for DACS compliance) for the resource.
From the Label (required) controlled value list, select the term that best characterizes the date.
Enter a date Expression (natural language, e.g., “between May 1 and May 5, 1970”) and/or normalized Begin and End dates.
From the Type (required) controlled value list, indicate if the date is for single, bulk, or inclusive date(s).
If appropriate, select values for Certainty, Era, and Calendar.**
**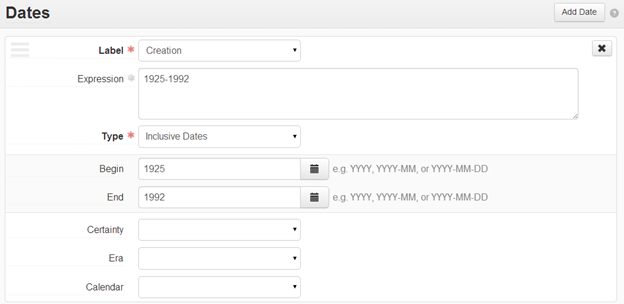
Save the record by clicking on Save Resource at the bottom of the record index or on the Save button at the top of the Resource record.
When you add a sub-record, depending on the type of record, specific fields may be required. If any required information is missing, you will be prompted to add the required information.
Spawning a Resource record
A preliminary Resource record can be generated from an Accession record. To do so, open the Accession record from which the Resource record will be spawned and then click on the Spawn option at the top of the Accession record template and choose Resource.
Some, but not all, of the information recorded in the Accession record will be copied to the newly created and linked Resource record.
The same Accession record can be used to spawn two or more Resource records, provided each spawned resource has a unique identifier. However, once a Resource record has been spawned from an Accession record, subsequent modifications to that Resource record need to be made manually (for example, manual updates will be needed to note the inclusion of subsequent accruals). A second, third, or later Accession record for an addition to a resource cannot be spawned to the existing Resource record. Those Accession records can be linked to the resource in order to show all the accessions that have been processed as part of the resource.
For first time accessions for newly acquired resources, think about the data you are inputting for the accession as the beginning of the Resource record. The more careful you are in creating quality content and formatting the accession data, the more work you can save when it comes time to create the Resource record.
Spawning and linking a preliminarily populated Resource record from an Accession record
Click on the Spawn option at the top of the Accession record template and select Resource.
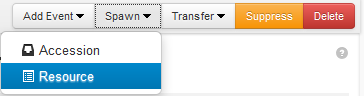
Click on the option for Resource.
A Resource record template will load and will contain values carried forward from the Accession record.
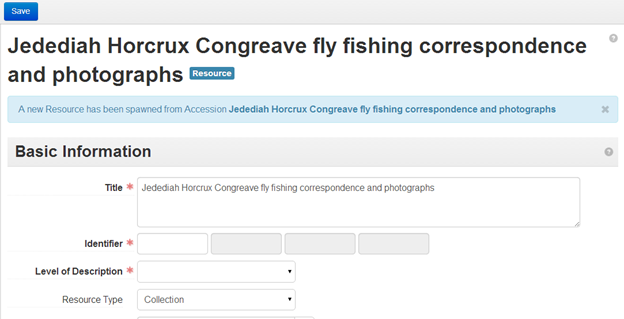
Complete the Resource record according to the input requirements for Resource records described above and the needs of the materials being described.
Click on Save to save the spawned Resource record.
The resulting Resource record will contain in its data fields some of the data recorded in the Accession record on which it is based. The table below identifies what parts of the Accession record are transferred to what parts of the Resource record:
Accession record to Resource record: mapped elements
| Directly mapped fields | |
| Accession record elements: field label | Resource record elements: field label |
| Title | Title |
| Extent Portion | Extent Portion |
| Extent Number | Extent Number |
| Extent Type | Extent Type |
| Extent Container Summary | Extent Container Summary |
| Extent Physical Details | Extent Physical Details |
| Extent Dimensions | Extent Dimensions |
| Date Label | Date Label |
| Date Type | Date Type |
| Date Expression | Date Expression |
| Date Begin | Date Begin |
| Date End | Date End |
| Bulk Date Begin | Bulk Date Begin |
| Bulk Date End | Bulk Date End |
| Resource type | Resource type |
| Publish | Publish |
| Indirectly Mapped Fields | |
| Content Description | Scope and Contents Note |
| Condition Description | Physical Description Note |
| Accession Title | Accession Linked |
| Agent (Linked) | Agent (Linked) |
| Subject (Linked) | Subject (Linked) |
Adding further information to a Resource record
Notes sub-records
Through the use of various notes, the description of an archival resource can be extended considerably. ArchivesSpace supports 29 notes, each of which can be repeated and all of which are available in the Notes section of the Resource record template. Use guidelines in DACS to formulate notes.
Abstract
Accruals Note
Appraisal Note
Arrangement Note
Bibliography
Biographical/Historical Note
Conditions Governing Access Note
Information in this note can be made machine-actionable by entering a restriction begin date and restriction end date OR by choosing a restriction type. This information will serialize to our circulation system and will help manage the restriction status of materials in our care. While users may have a Conditions Governing Access Note without using the date begin and date end or restriction types, users should not use begin and end dates or restriction types without an accompanying Conditions Governing Access Note. See “Local Access Restriction Types” section for further information.
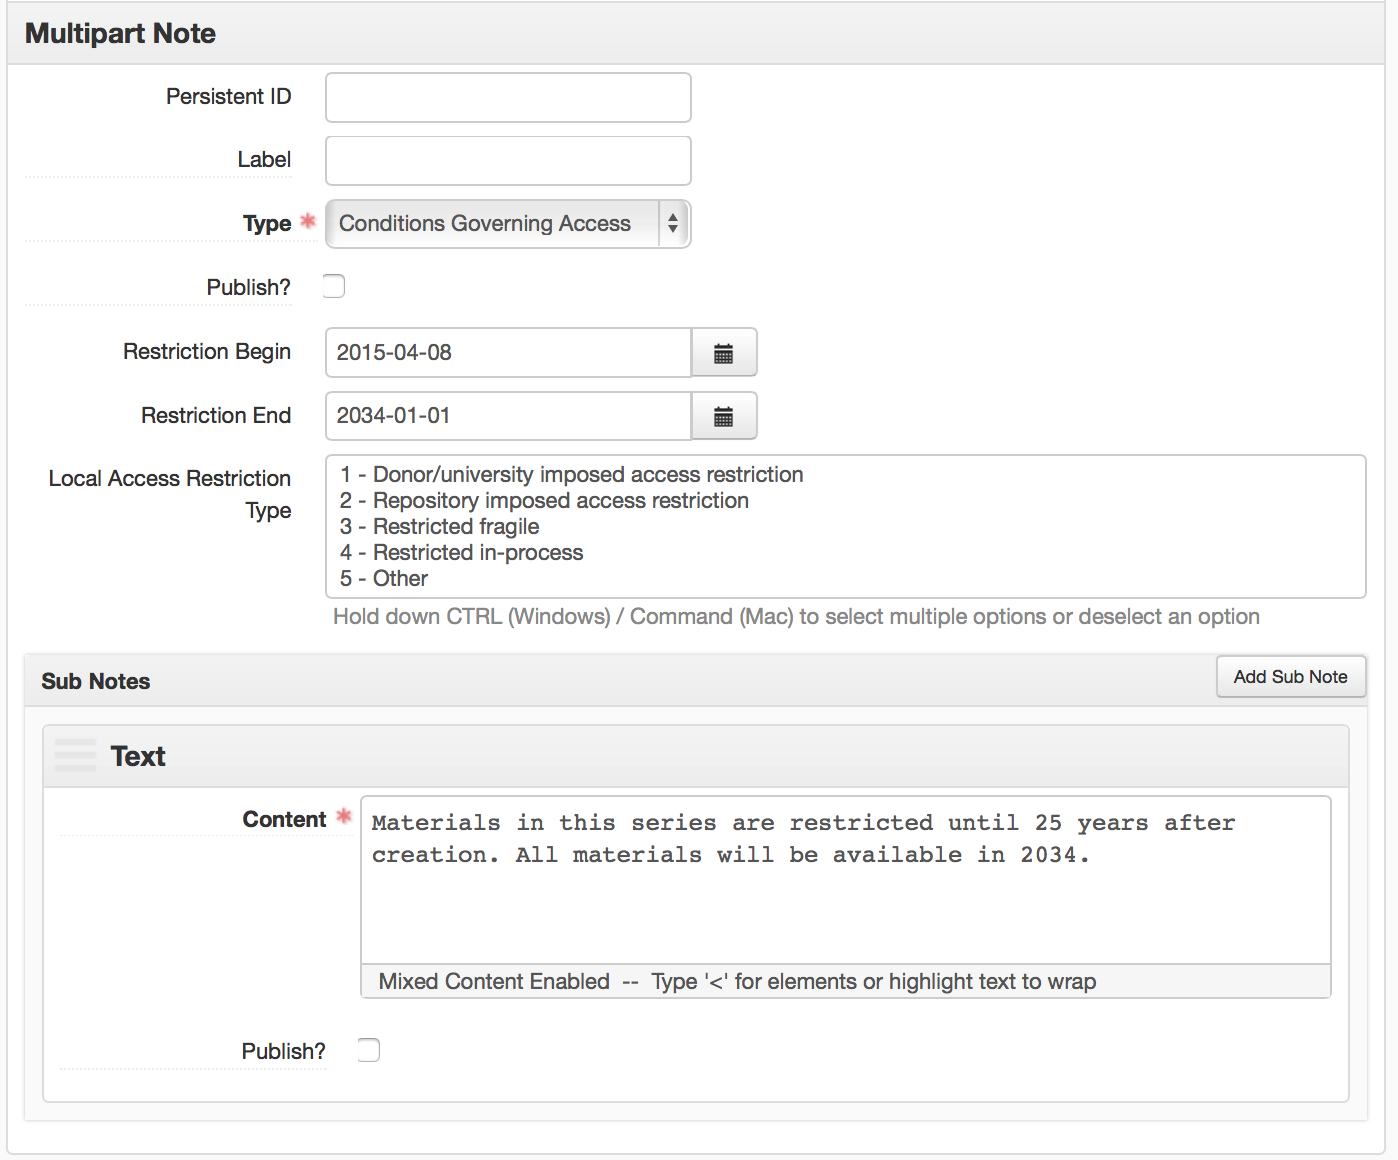
The actionable restriction information is associated with the Top Containers linked to the archival component and is inherited by child archival components and their associated Top Containers. The information is serialized and machine-actionable as well as viewable in the Restricted? column of the Manage Top Container search results view.

Conditions Governing Use Note
Information in this note can be made machine-actionable by entering a use restriction begin date and end date or by choosing a restriction type. This information will serialize to our circulation system and will help manage the use restriction status of materials in our care. While users may include a Conditions Governing Access Note without using the use restriction begin and end dates or restriction types, users should not use begin and end dates or restriction types without an accompanying Conditions Governing Use Note.
Custodial History Note
Dimensions Note
Existence and Location of Copies Note
Existence and Location of Originals Note
File Plan Note
General Note
Immediate Source of Acquisition Note
Index
Language of Materials Note
Legal Status Note
Materials Specific Details Note
Other Finding Aids Note
Physical Characteristics and Technical Requirements Note
Physical Description Note
Physical Facet Note
Physical Location Note
Preferred Citation Note
Processing Information Note
Related Materials Note
Scope and Contents Note
Separated Materials Note
To add Notes sub-records to a Resource record:
Click on Add Note in the Note section banner.
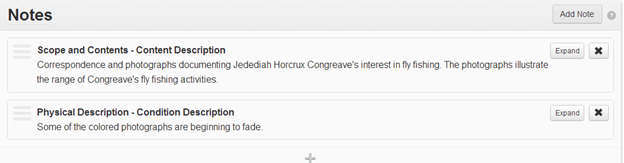
From the Note Type controlled value list, select the type of note to be recorded.
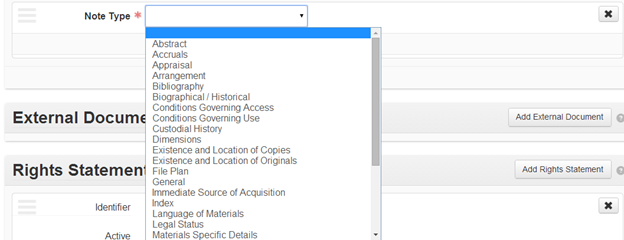
Optionally, record a Persistent ID for the note if desired. The persistent ID must be unique within the context of the complete resource description.
Optionally, record a Label for the note. The label will replace the note type in outputs such as EAD.
Enter the note text in the Content frame.
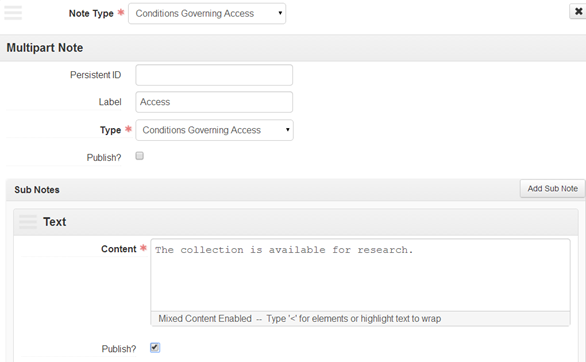
Click on Save or Save Resource to save the note to the overall resource description.
Note order is determined by the Yale finding aid stylesheet and the default note order in the ArchivesSpace Public User Interface (PUI).
Local Access Restriction Types
Introduction
This section outlines local access restriction types used in Yale’s ArchivesSpace instance. This functionality was built as part of Yale’s contribution to the top containers module and integrated into ArchivesSpace’s core code in version 1.5.
Local access restriction types (see “B” in the below screenshot) are built into the Conditions Governing Access note and provide a way for staff to use the machine-actionable functionality of ArchivesSpace to facilitate management and review of access restrictions on our collections. While the Conditions Governing Access notes textual sub note (see “C” in the below screenshot) provides a textual, human-readable means for communicating access restrictions with users, the local access restriction types provide a machine-actionable way for restrictions to interact with other systems at Yale, particularly Aeon.
Therefore, in addition to documenting access restrictions in a textual sub note, staff should ensure that restrictions are machine-actionable at the appropriate level of description by using the ArchivesSpace local access restriction type field and/or restriction begin and end dates (see “A” in the below screenshot), as needed. Staff should always use a local access restriction type and should not use the restriction begin and end dates without using an accompanying local access restriction type; this is because using restriction begin and end dates without a local access restriction type will cause machine-actionable restrictions to expire without requiring staff to review the material and/or update the textual sub note.
Staff should be aware that machine-actionable local access restriction types are inherited at lower levels of description; a local access restriction type applied at the collection level, for example, will be inherited down to all subcomponents of the collection. Staff should also be aware that multiple local access restriction types may be used for the same material.
Staff should also note that local access restriction type information and machine-actionable restriction begin and end dates are not publicly-viewable. Users will only be able to view published access information provided in the Conditions Governing Access textual sub note.
YAMS recommends that each repository run periodic reports on their expiring restrictions. Repositories should contact YAMS for guidance on running these reports.

Types and their usage
| Translated Value | Database Value | Guidelines for Use |
| 1 - Donor/University imposed access restriction | RestrictedSpecColl | Should be used for time-delimited restrictions imposed by law, donors, or university policy, including:
These restrictions may or may not be time-delimited or may have non-specific end dates (e.g. a future death date). Restrictions with an end date attached still require user action to remove the machine-actionable restriction (and update the textual note) as long as the local access restriction type has been applied. |
| 2 - Repository permission required access restriction | RestrictedCurApprSpecColl | Should be used exclusively for repository imposed restrictions, including:
Example: Joseph Albers papers (MSSA MS 32) > Writings by Albers > Books > Interaction of Color, 1963 |
| 3 - Restricted fragile | RestrictedFragileSpecColl | Should be used for audiovisual material, born-digital, and other fragile materials that are too fragile for researchers to use. In some cases a surrogate may be available when the original is restricted. Example: David Brion Davis Papers (MSSA MS 1970) > Additional material > Lectures > Audiotapes |
| 4 - Restricted in-process | InProcessSpecColl | Should be used at the collection level to signal a temporary access restriction while we work on a collection. Example: Ogden Rogers Reid papers > Additional Material, 1974-1982 |
| 5 - Other | ColdStorageBrbl | DO NOT USE (Pending update to cold storage documentation). This was created as a temporary location management tool for BRBL. It is not a restriction—in each case where it is used, the Voyager statcat for Restricted Fragile is the appropriate restriction designation. Material with this restriction should also be designated “3 - Restricted fragile” |
| NoRequest | NoRequest | Should be used only for material that cannot be requested through Archives at Yale (e.g./i.e. Kissinger). When used, the Request button will not display in Archives at Yale. Example: Henry A. Kissinger papers, part III > Correspondence |
| UseSurrogate | UseSurrogate | Should be used for material that requires the use of a surrogate (e.g. digitized surrogates or microfilm) instead of original material. This is a way to communicate with staff handling access requests that a use surrogate exists and should be paged instead of the original. Can be used in tandem with other restriction types (i.e. 3-Restricted fragile). |
ArchivesSpace restriction types and Aeon
When a machine-readable access restriction is present, the letter “Y” appears on Aeon field “iteminfo1” (“Restriction”) signaling the presence of an access restriction. Machine-readable access restrictions are imported into Aeon as data and pulled into Aeon Field “iteminfo8”.
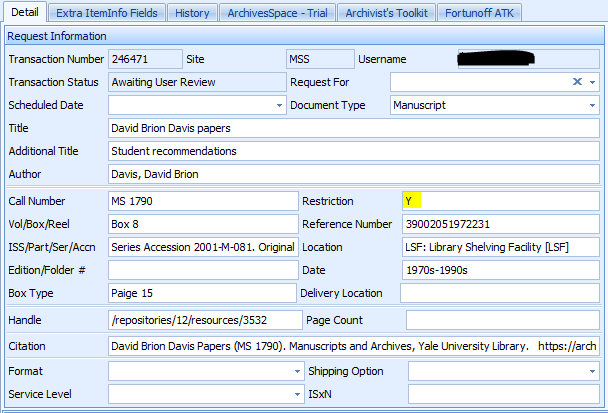
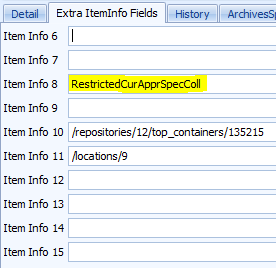
Based on the info in these “iteminfo” fields, items may then be routed into different Aeon queues, though this varies by repository. For example: At the Beinecke Library, items with a “Y” in Aeon Field “iteminfo1” are routed to a separate “New Restrictions” request queue that is monitored by Access Services staff. Access services staff then reviews these items and communicates with the patron about access.


In the User’s Aeon web-view of submitted requests, items with a machine-actionable restriction will include the note “Restricted Material” in the “Status” column after the user submits the request (see red section in screenshot below).

Other restrictions and Aeon
Access restriction notes are imported into Aeon and pulled into Aeon Field “iteminfo5”. These notes are often inherited so do not always apply to every item.
Use restriction notes are imported into Aeon and pulled into Aeon Field “iteminfo6”
Guidance on requesting new restriction types
YAMS would like to maintain as few restriction type variants as possible while still accommodating restriction use cases. If the current restriction types do not meet a repository’s needs, the repository may request a new restriction type through their YAMS repository liaison. A repository liaison may propose a new restriction type for approval by YAMS on behalf of a repository.
Requests for new restriction types should include the following:
Reason for introducing a new restriction type including:
Use cases
Reason why existing restriction types are insufficient for use cases
Translated value (human readable restriction name for the staff interface display)
Suggested guidelines for the use of the restriction type
Desired relationship with Aeon
Finding Aid Data
Bibliographic information about a finding aid for the resource can also be added to the Resource record. This information is used to identify and provide bibliographic descriptive data about the finding aid for the resource and should not be confused with description of the archival resource itself. Finding aid information is not required for a valid Resource record by ArchivesSpace, but some fields are required for export to YFAD.
To add finding aid information to the Resource record:
Select the Finding Aid Data section in the Resource record template.
Enter information for all pertinent fields, as determined by local guidelines (note: after January 2019, users must leave “EAD location” blank)
Required fields in this section for the ArchivesSpace system include: Language of Description and Script of Description. For most Yale finding aids, these will be English and Latin, respectively. For finding aids written in a language other than English, the appropriate language should be recorded in Language of Description. Any finding aid languages with non-Latin scripts should have their script indicated in Script of Description.
Click on Save or Save Resource to save the information as part of the Resource record.
Required fields prior to publication in YFAD include: EAD ID, Finding Aid Title, and Finding Aid Filing Title.
Agent and Subject records
Names of entities (e.g., persons, families, or corporate entities) that have played a significant role in creating, using, and maintaining the archival materials are considered the creator of the materials. These persons, families, or corporate entities may also be represented topically as subjects of the materials, as may other topical subjects describing what the materials are about. Lastly, persons, families, or corporate entities can be defined as sources (i.e. donors) of the materials.
Terms representing all of these contextual and topical relationships can be added to the Resource description by linking Agent and Subject records to it. This will be covered in a later section in this manual.
Resource Records: Lower-Levels
Functional overview
ArchivesSpace also supports the creation of Resource records comprising multiple levels of description, using component records. Resource component records have the following characteristics:
Serve to describe the logical or physical parts of a resource that make up an aggregation of archival materials.
Require the following elements:
Level: chosen from a pick list containing the values class, file, item, series, subseries, subgroup, or other level. Note: typically you will not use the level values of collection or record group for Resource component records, since components are parts of a broader resource that will have one of those levels.
Either of the following:
Title
Dates sub-record (either expression or normalized dates)
Like the Resource record, the Resource component record accommodates extensive description of the component, including the same support for Notes sub-records and controlled access headings. You should use the guidelines for subsequent levels of description in DACS and repository-specific guidelines to help you determine which of the available ArchivesSpace fields should be used.
Creating and managing resource component records
The following are the command functions for navigation and creating components on the ArchivesSpace Resource template (note: you must open the Resource record in edit mode to have access to the command functions that allow you to create components):

Add Child: This button will open a new component record that is hierarchically subordinate to the context record (the record from which you use the Add Child button).
Each Child record represents a level of hierarchy. ArchivesSpace will support an unlimited hierarchy; however, using numbered components in an EAD export requires the hierarchy to be limited to 12 levels.
Add Sibling: This button will open a new component record that is at the same level as the context record and that follows the context record within the component sequence.
ArchivesSpace places no limit on the number of sibling records, nor does EAD, the primary export option for a resource description in ArchivesSpace.
Transfer: You can use this button to transfer a component or a set of components from one resource to another.
Rapid Data Entry: This option is for entering a series of components at the same level that have very similar data, e.g., level of description, instance type, container type, container identifier, etc. The Rapid Data Entry option is discussed in greater detail at the end of this section.
Enable Reorder Mode: You can rearrange a multi-level description by using this option and then using the cut/paste or Move menus or by dragging and dropping. You can:
Move a component to a new position within the same level,
Promote a component, i.e., move it higher in the hierarchy, or
Demote a component, i.e., move it lower in the hierarchy.
Bear in mind that all components that are children of a component that is moved will move with their parent component.
To create a Resource component record, select a context record in the multi-level description for the component record. The context record will be the parent record if there are no other component records in the description, and the only choice will be to create a child component.
Creating Resource component records
Select a context record.
Choose either to Add Child or Add Sibling component record. Adding a child component record will be the only option if the context record is the top-level Resource record.
A blank component record template will be loaded.
Select a Level of Description for the component record.
Enter a Title; or alternatively enter a Date Expression and/or Begin date and End date for the materials.
Add any additional information warranted for the resource component record description.
Save the record by pressing the Save command button at the bottom right corner of the window.

When you add a sub-record, depending on the type of sub-record, specific fields may be required. If any required information is missing, you will be prompted to add the required information.
Publishing and unpublishing component records
The “Publish this and all children” and “Unpublish all children” menu items (located under the More drop down menu) allow staff users to publish and unpublish archival components en masse in the Public User Interface.
The “Publish this and all children” option publishes the selected component and all of its children (both direct descendents and inherited descendents). The option also publishes all notes associated with the component and its children, with the exception of machine-generated Preservica notes.
The “Unpublish all children” option unpublishes all the children components of the selected record (both direct descendents and inherited descendents). This option does not unpublish the selected component itself. The option also unpublishes all notes associated with the component and its children.
Staff should be aware that unpublished notes are indexed in the Public User Interface. They will therefore be searchable by users, but the note itself will not display in the Public User Interface.
Note that the publish/unpublish all feature does not publish linked agent records. There is also no option to reindex a top container via this feature.
Adding Instances to a Resource or Resource component record
“Instances” in ArchivesSpace refer to embodiments of the same content in different media. For example, a Resource record or Resource record component may describe a letter which exists in multiple formats:
Ink on a sheet of paper
A microfilm image of the letter
A digital object
The letter is physically represented in three distinct formats. ArchivesSpace is structured to allow you to use the same description for multiple instances rather than repeating the description for each new instance.
Equally important, the instance declaration also enables describing the containers that house an analog instance, e.g., a folder inside a box. The container information can then be linked to the Location record designating where the container is stored, either permanently or temporarily. For digital objects, the instance record allows you to describe the digital object and record information about the files that comprise it, as well as indicate its location on the web or within a file management system.
In short, the ArchivesSpace instance data model supports assertions of the following type: the described content exists in a certain physical format, which is housed in a certain container and located at a certain place in a repository.
Because archivists typically describe materials at aggregate levels, instances can be created at any level in ArchivesSpace: collection, series, file, etc.
Note that digital media, such as a 3.5 inch computer disk or a CD-ROM that might be part of an archival resource, is not considered to be a digital object in ArchivesSpace. Digital object records in ArchivesSpace are intended to describe either digitized surrogates or born-digital materials that are stored on a server or other digital storage media and are accessible by staff and/or researchers via a network.
Adding Instances
To declare an instance for the content described in a resource or resource component record:
On the Instances bar for the Resource or Resource component record, click on Add Container Instance if the instance declaration is for analog content or on Add Digital Object if the instance declaration is for digitally available content.

Select the Type of instance you wish to declare. You should always select “Mixed Materials.”
Next, you’re going to be either creating a container or linking an already-created container to this record.
If you’re adding a new component to a box of materials that already exists as part of the collection, simply start typing that box number and choose it.
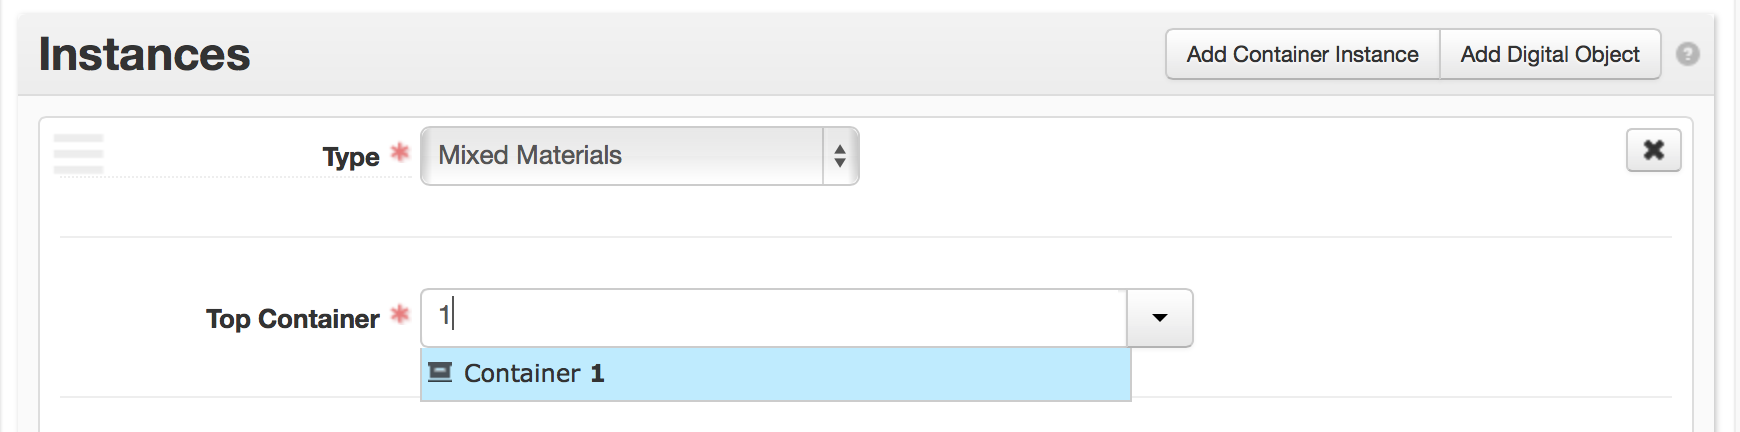
The “top container” refers to the container that circulates and usually has a barcode. It’s often useful to add information about “children” containers, like folders.
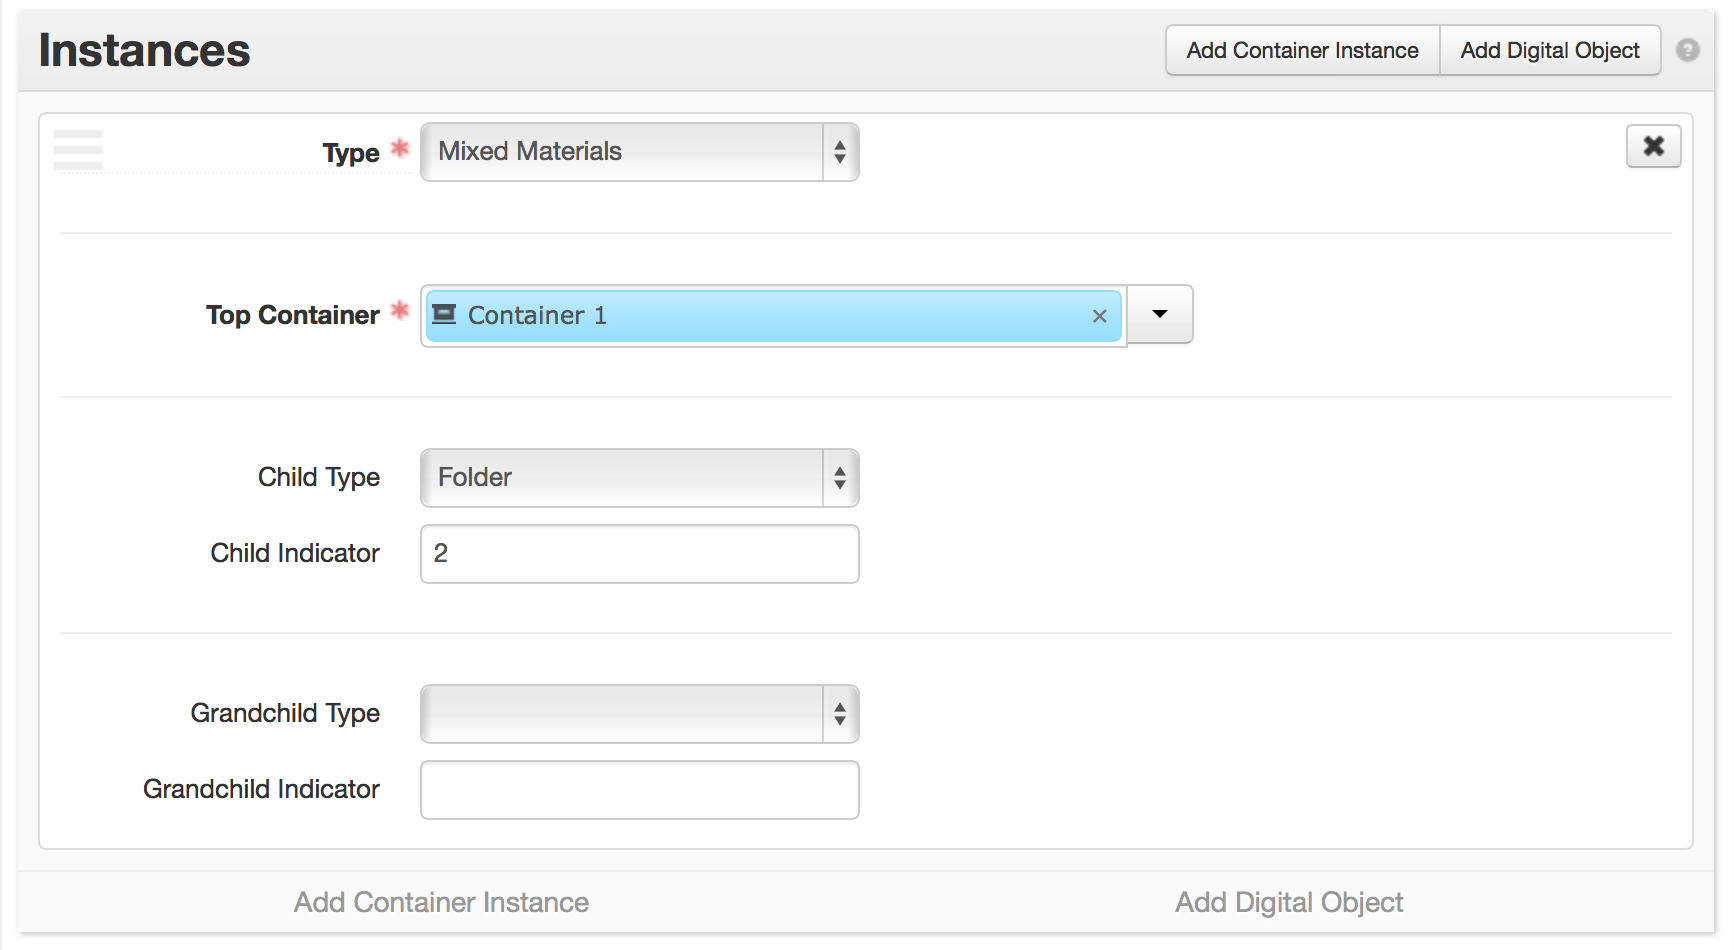
If the box doesn’t already exist in the database, click on the triangle at the end of the Top Container data field and choose “Create.”
NOTE: Once you’ve created a top container, you won’t need to create that same top container again. For instance, if you’re describing Box 1, Folder 1 (and you haven’t described anything else in Box 1), you’ll need to create a top container for Box 1. Once you describe material in Box 1, Folder 2, you do not need to create Box 1 again. You can use the typeahead to simply link to Box 1.
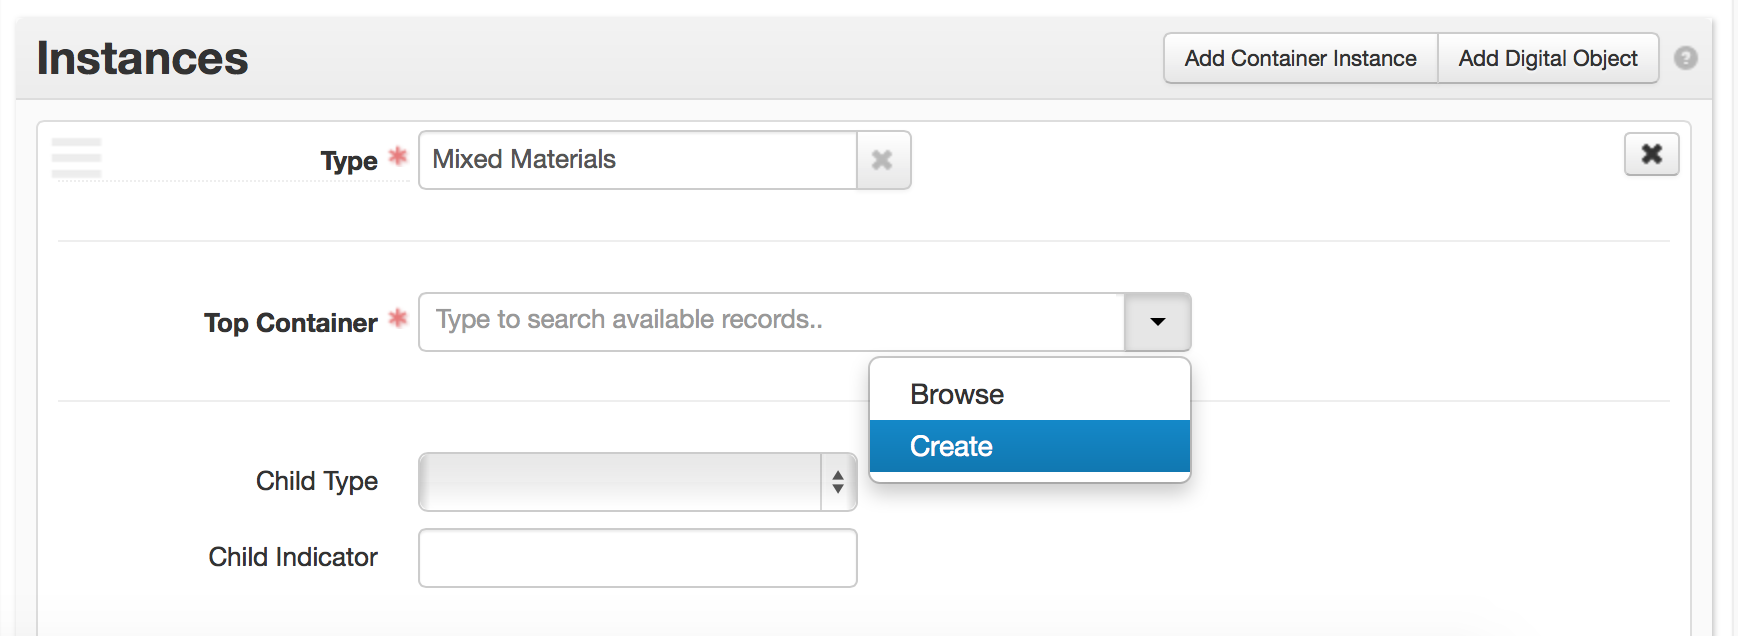
You’re then taken to a screen where you can enter information about a particular container.
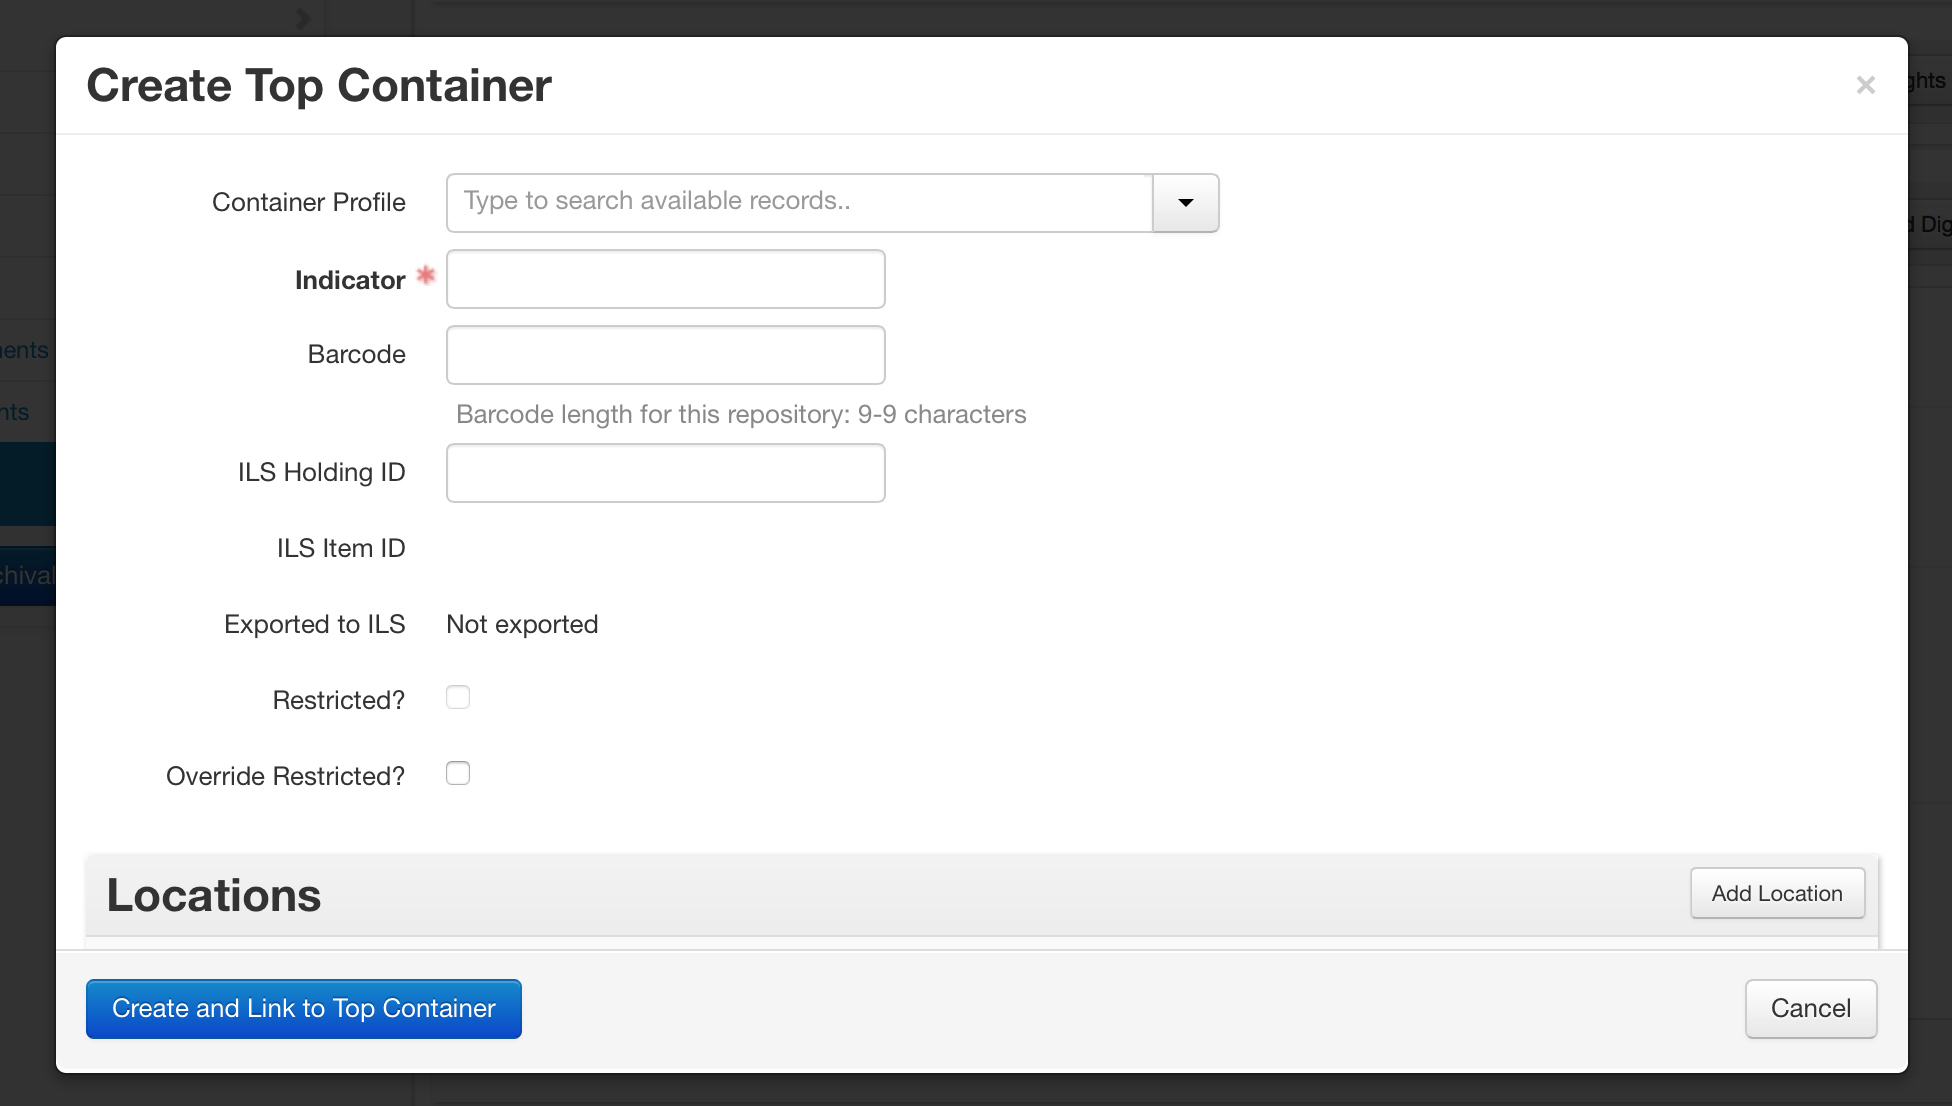
Indicator: This field is required. It represents the number that you assign to a box.
Barcode: This field is optional. It can be entered in this screen or as part of rapid barcode entry later, in the “Manage Top Containers” view.
ILS Holding ID: This field is optional and is built to help synchronize ArchivesSpace containers and ILS item records. It can be entered in this screen or as part of bulk operations later, in the “Manage Top Containers” view.
ILS Item ID and Exported to ILS: These fields cannot be edited as part of the application and have the potential to be managed by an external program to synchronize ILS item records and ArchivesSpace containers.
Container Profile: A container profile is information about the physical box itself. You can start typing to choose a container profile that already exists, or click the triangle and the “Create” button to create one if it doesn’t already exist.

It will be very unusual to create new container profiles unless your repository starts using new container types. Usually, in the course of your work, you will link to an already-existing container profile.
In this example, you’re describing a Paige miracle box.
Name: You may give a container profile whatever name is most
appropriate for your use in your repository, Keep in mind that container profiles are scoped across Yale – in this case, any repository using a Paige legal box will link to this container profile. Make sure that the nickname gives enough information so that the next user knows what the container type is, but don’t record dimensions in this field – they belong in other fields.
URL: Do not use at this time. In the future, the data in the rest
of this record may be stored as linked data, and the URL will be the only data element needed to populate this record.
Dimension Units: Indicate the unit for how other dimensions are
measured. The convention at Yale is to measure in inches.

Extent Dimension: This indicates how the records in a container
are filed, for the purpose of calculating extent. For instance, if you have a normal Paige miracle box filled with legal-sized documents, and the box is shelved with the smallest side facing out, that extent calculation will be measured by width. In other words, this is a way of measuring how many records are in a container – if records are filed letter in a Paige box, there will be more records than if filed legal.
At Manuscripts and Archives and the Beinecke, the consensus decision has been to measure extent by shelf space occupied. This means that the extent dimension will always be width.
Depth: This is a measurement that is relative to shelving, rather
than inherent to the container itself. Measure how deep into the shelf the box will measure.
Height: This measures the distance from the bottom of the box to
the top of the box.
Width: This is another measurement relative to shelving, and
should measure the width of the face of the container as you would see it on a shelf.
When entering the dimensions for Depth, Height, and Width, you may use no more than two decimal places. If dimension is less than 1, enter 0 followed the rest of the dimension. (Examples: 0.25, 0.5, 0.75, etc.).
To link an existing container profile record, simply start typing information about that container profile and choose from a list. Alternately, go to the “Browse” option (under “Create”), and choose the container profile you want to associate with your top container.
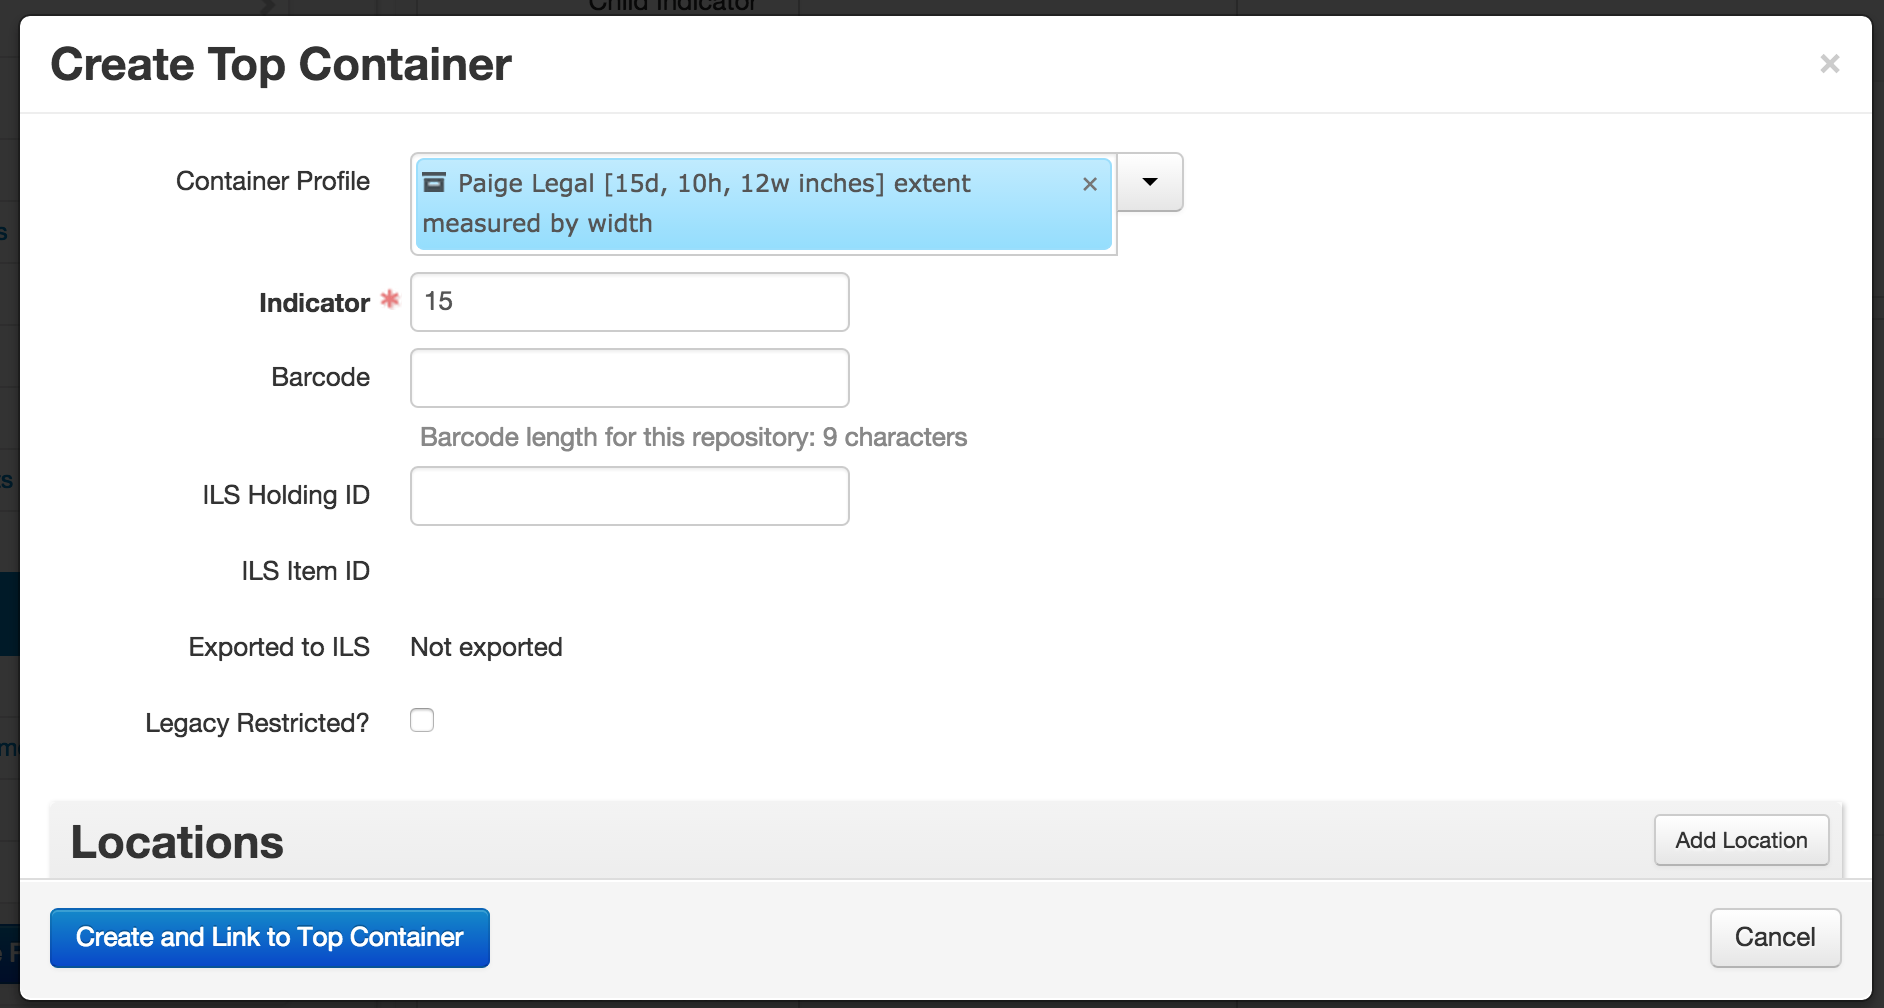
Some repositories file collection material from different collections in the same container. If you’re adding a new component to a box of materials that already exists as part of another collection, click on the triangle at the end of the Top Container data field and choose “Browse.”
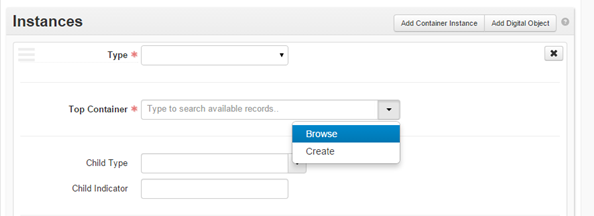
From the Browse Top Container screen search for the resource that contains the container you want to link to. Select the container from the results list and click Link to Top Container.
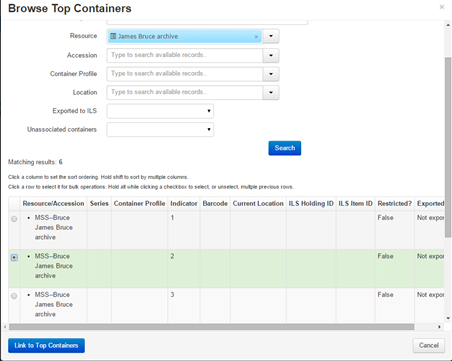
Associating Instances with Location records
Once the container information is added, it can be linked to a Location record. To do so:
Scroll down to the bottom half of the Top Container record.
Click on the “Add Location” button.

Enter:
Status (required): In almost all cases, the status should be “Current”
Start Date (required): The date that this container went to that location
End Date: This field is optional. It indicates the date that a container is no longer at that location.
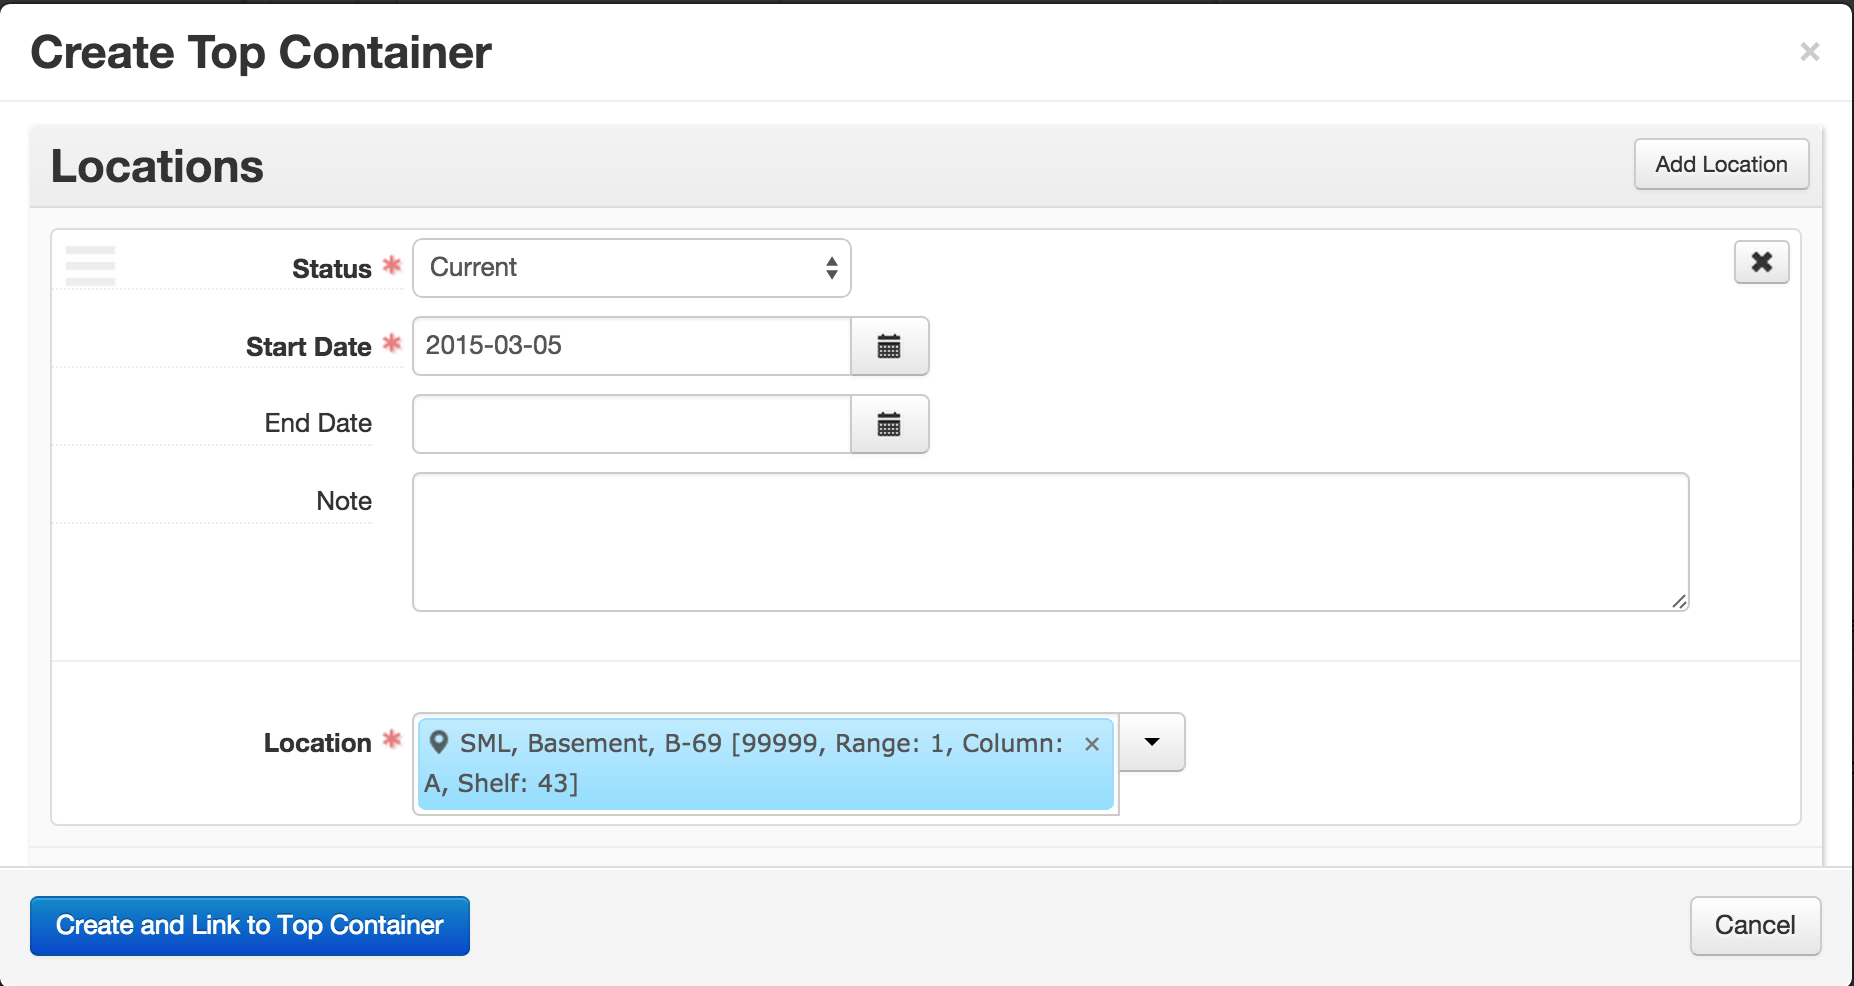
Save the record.
Using the Rapid Data Entry (RDE) tool
The Rapid Data Entry (RDE) tool supports repeated entry of Resource component records at the same level, thus requiring fewer mouse clicks than when adding individual resource component records and then adding instance records. Through the use of “sticky values” and other mechanisms, the RDE tool provides a more efficient interface for entering series or folder lists, where multiple components of the same level and same basic content are entered one after another. The RDE tool also includes in one data row fields from the Resource component record, the Dates sub-record, the Notes sub-record, and the Instance sub-record.
To create Resource component records using the RDE:
Select Rapid Data Entry at the top of the multi-level description.
Enter desired data. The Level of Description element and either Title or one of the Dates sub-record elements is required.
Instance Type and at least one Container Type and Container Indicator are necessary if locations are to be linked to the Resource component record.
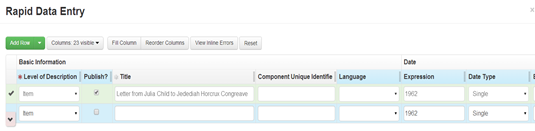
Select Add Row to add another row, or use Shift + Return to add another row using all the data in the previous row.
Select Validate Rows to check that all rows are properly encoded.
Select Save Rows to save the row(s) to the Resource record.
You can do the following to the RDE tool during a given session:
Remove columns from view using the Columns: ### visible display configuration option.
Turn sticky values on and off by clicking on the label for a data column.
Reorder the left-to-right sequence of the data columns using the Reorder Columns option.
Designate a value to fill all occurrences within a data column using the Fill Column option.
Digital Object Records
Functional overview
The Digital Object record is the place for technical and administrative metadata about digital objects.
The Digital Object record can either be single- or multi-level; that is, it can have sub-components just like a Resource record. Moreover, the record can represent the structural relationship between the metadata and associated digital files–whether as simple relationships (e.g., a metadata record associated with a scanned image, and its derivatives) or complex relationships (e.g., a metadata record for a multi-paged item; and additionally, a metadata record for each scanned page, and its derivatives).
One or more file versions can be referenced from the Digital Object metadata record.
The Digital Object record can be created from within a Resource record, or created independently and then either linked or not to a Resource, Archival Object, or Accession record. Digital Object records are often created via external processes (e.g. via the Preservica synchronization, which currently only syncs to Archival Object records). Please note that editing an ArchivesSpace digital object record created by Preservica will result in changes to Preservica after a re-synchronization is performed on the data.
Creating and managing digital object records
ArchivesSpace requires two elements in a Digital Object record, Title and Identifier, though you will also need to add a File URI subrecord if you want an actionable link:
Title
Identifier
Creating a Digital Object record
On the main toolbar, click Create and select Digital Object.
Enter the following information:
Title: The record title the Digital Object is linked to. Note that Preservica uses the SIP deliverable unit folder title, and local practice may dictate adding something in front of the title (e.g. [Preservica])
Identifier: The identifier from whatever the referenced system uses (e.g. for this FindIt example [http://findit.library.yale.edu/catalog/digcoll:845272] the identifier would be digcoll:845272). Note that Preservica-generated identifiers are just strings of letters/numbers. For material in FindIt, users should use the object identifier (OID) from Ladybird, since that identifier will always exist, and the PID from FindIt may not.
Click Save Digital Object. If any required element is missing, you will be prompted to add the information, which you must do in order to save the record.
Adding further information to a Digital Object record
After the minimum information about a digital object has been entered, you can continue to describe the digital object using the sub-records available in the left navigation bar.
When you add a sub-record, depending on the type of record, specific fields may be required. If any required information is missing, you will be prompted to add the required information.
Below is a summary of selected additional, optional key data fields often used in the creation of digital object records. In all cases, follow your repository’s guidelines and supervisor’s instructions when creating digital object records.
Basic Information
Title: See above
Identifier: See above
Publish?: Indicate whether you would like for the digital object to be published in the ArchivesSpace PUI
VRA Core Level: Do not use
Type: Do not use. Note that it may be synced automatically from the Ladybird “Type of resource” field
Language: Do not use
Restrictions?: Do not use. Note that this is not used for archival objects at Yale, so YAMS recommends not using it here, either, for consistency.
File Versions
Make representative: Do not use. Note that if ArchivesSpace develops this feature further, we may wish to reconsider using it at Yale.
File URI: Required if you wish to have a link out to another system. If you wish to have thumbnails or links, you need to indicate the file URI here. Note that this is repeatable, but until the “make representative” feature works, users should not add multiple file URIs aside from when they’re adding a link + thumbnail pair of file URIs.
Publish?: Indicate whether you’d like the file version and URI information published in the ArchivesSpace PUI
Use Statement: Optionally use to indicate use of the file version, e.g., Digital Preservation Staff System (used for Preservica)
XLink Actuate Attribute: Do not use
XLink Show Attribute: Select “embed” if you wish to embed a thumbnail in the ArchivesSpace PUI
File Format Name: Do not use
File Format Version: Do not use
File Size (Bytes): Do not use
Checksum: Do not use
Checksum Method: Do not use
Caption: Optionally use to indicate a caption. Caption will start displaying in version 2.2.3. Note: There is no hover definition.
Dates
Do not use
Users may notice that Preservica occasionally creates a date sub-record for date of Preservica processes
Extents
Do not use
Agent Links
Do not use
Subjects
Do not use
Notes
Optionally use to record a different access restrict note from the associated archive object
External Documents
Do not use
Rights Statements
Do not use
Collection Management
Do not use
User Defined
Do not use
Agent and Subject Records: Authorities Basics
For guidance on creating agent and subject records, please see the
Agent and Subject Records: Best
Practices
cheat sheet
Authorities workflows
Changing an authority record changes the record for everyone at Yale using ArchivesSpace. For this reason, be extremely careful about editing authority records.
Generally, there are three ways a repository can use the authorities modules in ArchivesSpace to provide additional description about accessions, archival resources, and digital objects:
Link to a pre-existing authority record: If an authority already exists in the ArchivesSpace application, it can be linked to from new or existing Accession, Resource, and Digital Object records. (Individual authority records can be linked to zero, one, or many records). The editing screens for records provide a linking option – and, in the case of Agent records, to specify the role in which the authority is linked (for example, as the creator, subject, or source of the archival materials).
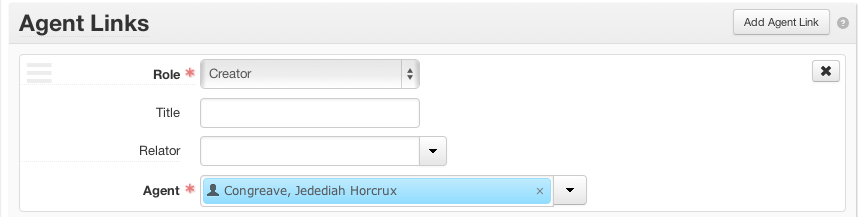
Establish a new authority: If an authority does not exist in the database, it can be created, then linked automatically, from within the context of a specific Accession, Resource, or Digital Object record. You can also use the Create menu on the homepage to establish a new authority.

Import external authority: ArchivesSpace includes a plug-in application to enable importing of authorities maintained within the Library of Congress Name Authorities (LCNAF) file. After name files have been imported, they can be linked to Accession, Resource, and Digital Object records.
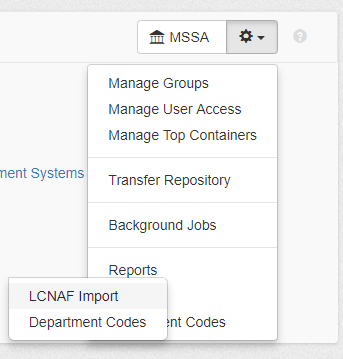
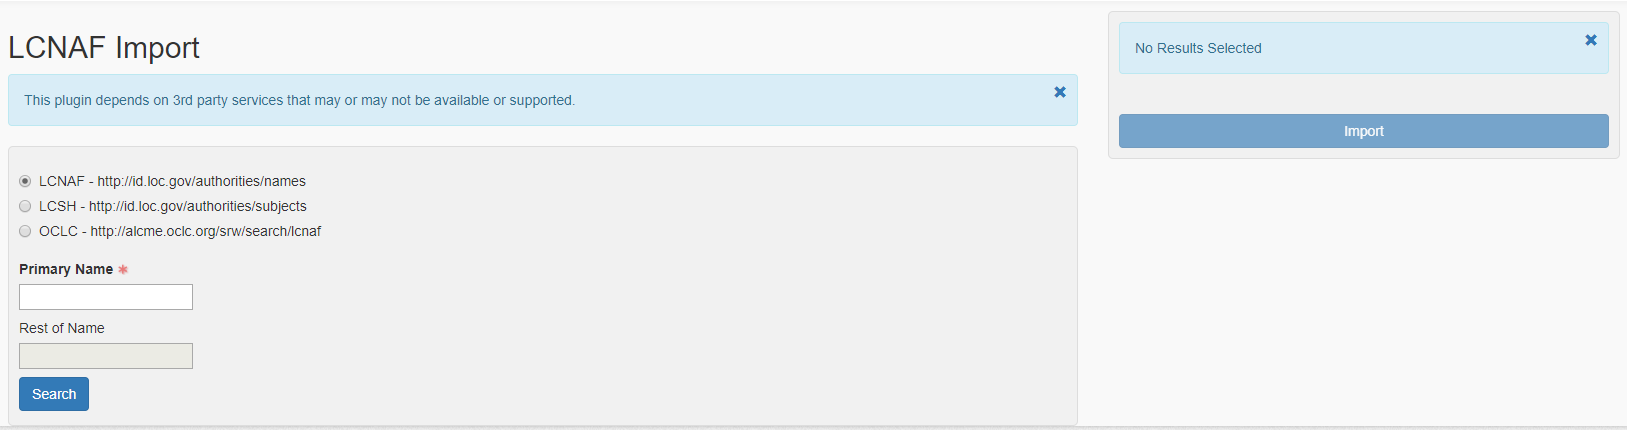
Agent Records
Functional overview
Agent records identify persons, families, corporate entities, or software that have a specified relationship (such as source, creator, topic, rights owner) to archival materials or to an event. The Agent record is also used for managing relationships among agents.
Agents are established and controlled separately from accessions and resource descriptions in ArchivesSpace and are associated with material descriptions by linking.
Agent records can be associated with Accessions, Resources, and Digital Objects through one of three primary relational modes:
Creator: Designates the primary responsibility for the origin, accumulation, or maintenance of the material being described. Creator can encompass, at varying levels in a multi-level description, the person, family, or corporate entity responsible for the archival provenance of the material being described, or for the intellectual content of that same material.
Source: Designates the immediate source of acquisition for the materials being described.
Subject: Indicates that the materials being described are topically about the named person, family, or corporate entity in some respect.
Agent records can be one of four types in ArchivesSpace:
Person
Family
Corporate Entity
Software
Agent records in ArchivesSpace are designed to conform with the International Council on Archives’ International Standard Archival Authority Record for Corporate Bodies, Persons, and Families, 2nd edition (ISAAR(CPF)). They are also designed to support output in the Encoded Archival Context–Corporate Bodies, Persons, and Families (EAC-CPF) data structure and interchange standard. If an authority record cannot be located and copied from an authorities database, agent records also accommodate the creation of names according to data content rules established in standards such as Resource Description and Access (RDA) and DACS. ArchivesSpace users are encouraged to use the DACS rules for forming names when creating Agent records in ArchivesSpace.
Note: Agent and Subject records linked to collection-level Resource records are exported to MARCXML. The first one listed exports as main entry (MARC 1XX); subsequent agents export as added entries (MARC 7XX). Agent and Subject records linked to Accession records, Resource component records, and Digital Object component records will not be exported to MARCXML records.
Creating and managing Agent records
Changing the content of an Agent record changes it for every link to that record in every ArchivesSpace repository at Yale. Be extremely careful when updating Agent records, particularly when attempting to disambiguate agents with similar names.
The following fields are required for the four types of Agent records:
Person
Primary Part of Name (DACS references 9.8, 11.5, 12.1-12.11)
Source (DACS reference 11.26) or Rules (DACS reference 11.20)
Sort Name (automated if selected)
Name Order (default value of “indirect” provided; you may change
to “direct”)
**
Family**
Family Name (DACS references 9.8, 11.5, 12.29)
Source (DACS reference 11.26) or Rules (DACS reference 11.20)
Sort Name (automated if selected)
Corporate Entity
Primary Part of Name (DACS references 9.8, 11.5, 14)
Source (DACS reference 11.26) or Rules (DACS reference 11.20)
Sort Name (automated if selected)
Software
Software Name
Source (DACS reference 11.26) or Rules (DACS reference 11.20)
Sort Name (automated if selected)
Names
For personal names, the Primary Part of Name field serves to separate the principal sorting element (e.g. the last name or surname) of the name from the remainder of the name, the latter of which is generally input into the Rest of Name field. Guidance on when to use the additional fields that are available for an Agent record should come from the subfields in an authority record for the name found in a national database such as the LC/NACO Authority File or from a content standard such as DACS or RDA.
For Family names, the Family Name field serves to hold the family name. Subfields in an existing authority record or rules in a content standard should guide you in inputting information into the Agent record’s available fields.
For corporate entities, the Primary Part of Name field holds the principal name by which the corporate entity is known. Your content standard of choice, or the subfields in the authority record for names already found in an authority file, will provide guidance to help you determine how and when to enter a corporate name subordinately using the Subordinate Name fields in the Agent record.
For software, the Software Name field serves to hold the name of the software.
Source
Source is the data field used to indicate that a name has been found in a standard authority file. Five default values are provided in a drop-down menu:
Local sources (e.g. Local - Arts): Designates an authority file created and maintained at your repository.
LC/NACO Authority File[2]
Union List of Artist Names[3]
Unspecified ingested source: If names are imported in Accession or Resource records, the Source field will contain this value to flag the record for review to assure it is the authoritative form of the name.
This list may be customized and additional values added by the repository, or in the process of importing legacy data.
Rules
Rules is the data field used to indicate the data content standard used to formulate the name entry. You should only use the Rules field when you have not found the name in an existing authority file, in which case you should use the Source field instead.
Four default values are provided in a drop-down menu:
Resource Description and Access
Anglo-American Cataloging Rules[4]
Describing Archives: a Content Standard
Local rules: Designates a data content standard created and maintained by your repository
This list may be customized and additional values added by the repository, or in the process of importing legacy data.
Sort Name
Sort Name is the data field that contains the complete, concatenated version of the name containing all individual elements. This is the form of the name that will be shown within ArchivesSpace displays and is exported in reports and standardized outputs such as MARCXML and EAD.
Creating Agent records
The directions here are for constructing an Agent record for a Person. Follow these same basic instructions for Family and Corporate Entity records–any variants specific to those types will appear below. Before you begin, search in LC Linked Data Service or Union List of Artist Names to see if your Person/Family/Corporate Entity has an authorized record, and use that data to populate the subfields in the record you create. If there is no authorized record, construct an agent record using RDA rules.
The fields in ArchivesSpace agent records map to Library of Congress Name Authority MARC fields referred to in the directions below. Do not enter punctuation or parentheses at the end of subfields; all punctuation will be supplied by ArchivesSpace. Be sure you do not leave any blank spaces at the end of the subfields.
To begin, click “Create” and choose the record types from the two dropdown menus:

The “New Person” screen will appear with the following fields:
Basic Information
Leave defaults shown.
Dates of Existence
Optional; use primarily if an authorized name lacks life dates. To add, click the Add Date box on right and a form will appear. For Type choose Range
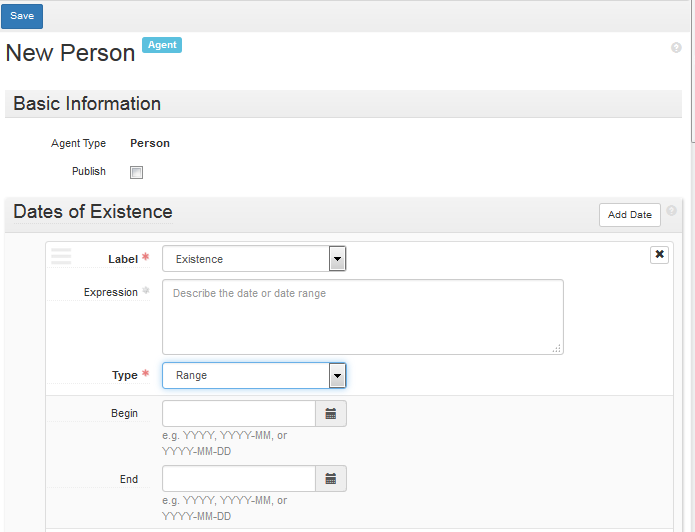
and enter dates (LCNAF 046 ‡f ‡g for personal names, or LCNAF 046 ‡s ‡t for family and corporate names) in fields Begin and/or End.
Name Forms
Required.
Authority ID: required, if available from LC Linked Data Service; URI is found near the top of the entry
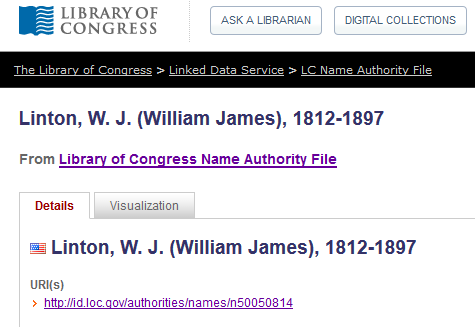
To find the URI for a ULAN record, click Semantic View on the left above the name
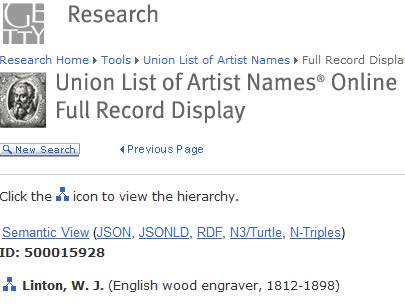
which opens another screen with the URI up at the top
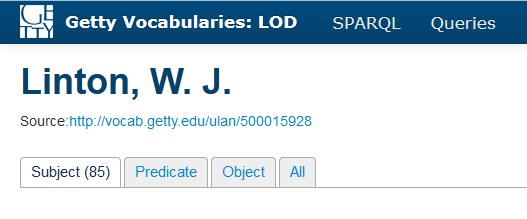
Source: required; choose Library of Congress Name Authority File, Union List of Artist Names, or appropriate local library code if not in either authorized source.
Rules: choose Resource Description and Access if Source is a local library code; otherwise leave blank.
Name Order: required; choose Indirect for Person unless the person has a single name (then choose Direct).
Primary part of name: required. Use LCNAF 100 ‡a for family (surname) only
Rest of Name: Use LCNAF 100 ‡a for forename or initials only
Required when applicable:
Title: LCNAF 100 ‡c
Fuller Form: LCNAF 100 ‡q
Number: LCNAF 100 ‡b
Dates: LCNAF 100 ‡d
All other Name Forms elements: leave blank.
Check Automatically generate at end of field.
Example of Person with Library of Congress authorized record:
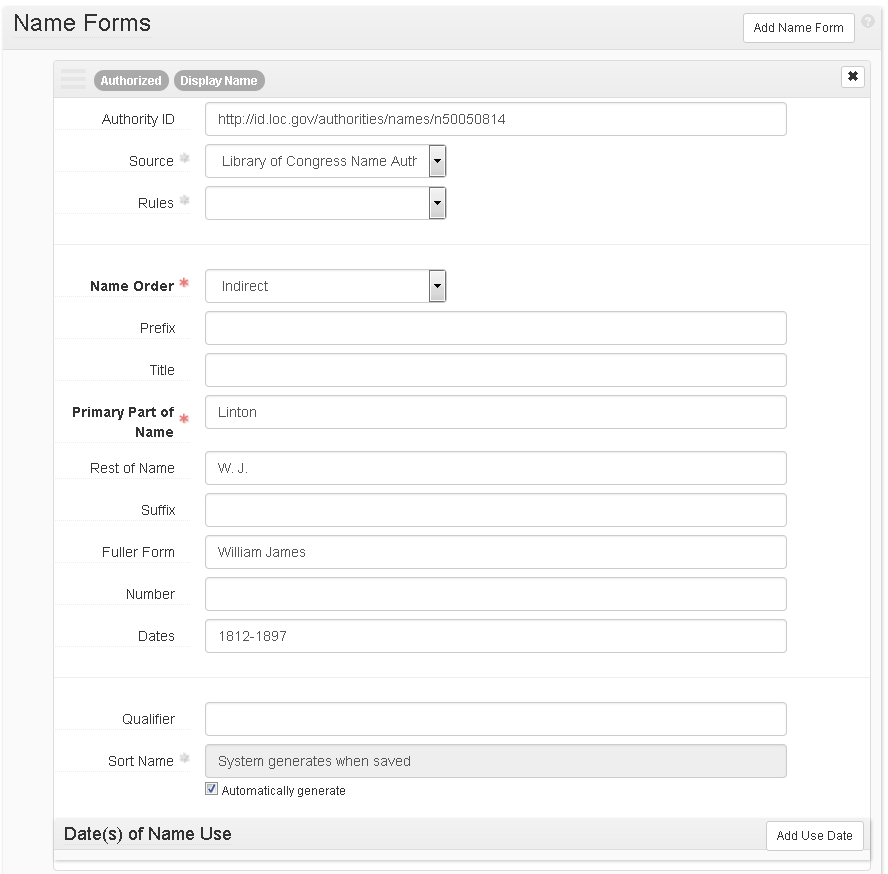
Contact Details
Optional; to add click Add Contact button at right, and enter fields manually, per local practice.
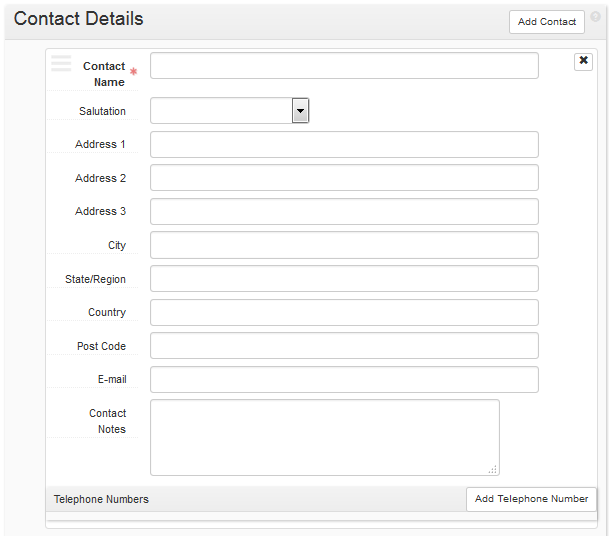
Notes - Biographical/Historical
Optional, except when creating an Agent record for a Yale staff member or student worker who will be adding or editing ArchivesSpace records.
Biography/Historical note with the person’s YUL affiliation, including dates of service if known, followed by a semicolon and the person’s NetID. Do not check Publish.
Example of YUL Staff Person:
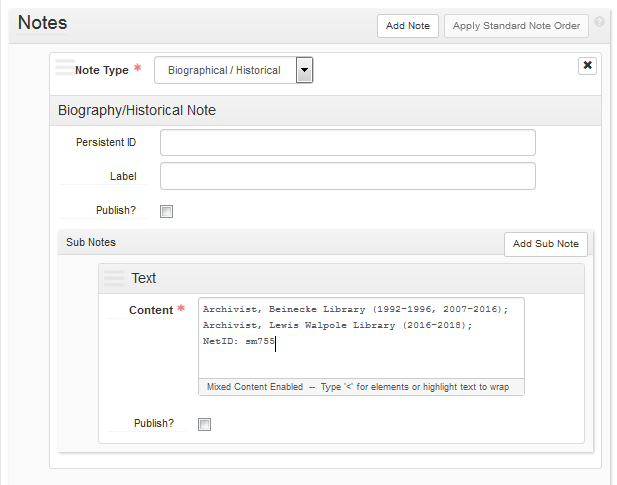
Other fields
Generally, do not use.
For Family agent records:
Name Forms
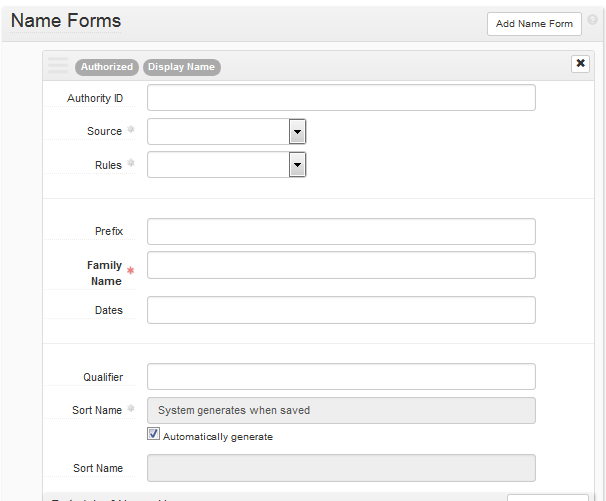
Required name element: Family Name: LCNAF 100 ‡a
Required when applicable:
Dates: LCNAF 100 ‡d
Qualifier: LCNAF 100 ‡c, ‡g
For Corporate Entity agent records:
Name Forms
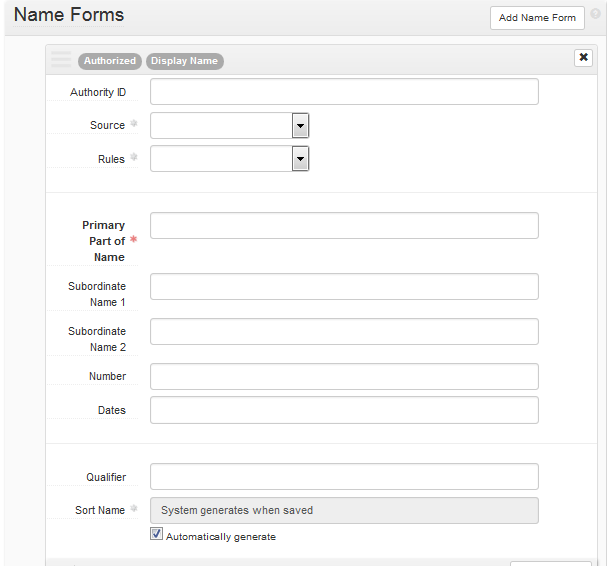
Required name element: Primary Part of Name: LCNAF 110 ‡a
Required when applicable: Subordinate Name 1 and 2: LCNAF 110 ‡b
All other name elements: blank
For Corporate Entity (conference) agent records:
Name forms
Required name elements: Primary Part of Name: LCNAF 111 ‡a
Required when applicable:
Subordinate Name 1 and 2: LCNAF 111 ‡e
Number: LCNAF 111 ‡n
Dates: LCNAF 111 ‡d
Qualifier: LCNAF 111 ‡c
All other name elements: blank
For YUL repository agent records:
Name forms
Required name element: Primary Part of Name: LCNAF 110 ‡a
Required when applicable: Subordinate Name 1 and 2: LCNAF 110 ‡b
All other name elements: blank
Contact Details
Fill out form with address, email address, and telephone number from the library’s website.
Save the Agent record by pressing the Save Person | Family | Corporate Entity | Software command button at the bottom of the record. If entering more than one Agent record, save the record by pressing the +1 command button. This will save the current record and open a new Agent record screen so a subsequent record can be entered.
If you are already working in an Accession or Resource record:
On the left navigation bar, click Agent Links and then click Add Agent Link.
Next to Role, click the drop-down list button, and select the role of the agent in relation to the accession or resource you are linking it to: Creator, Source, or Subject.
Add a value for Relator, if you want for Creator or Source. Do not add a value for Relator for subjects
Next to Agent, either start typing to see if the desired agent already exists, or click on the drop-down list and select Browse to browse existing Agent records.
If you know there is no record for your agent, or you cannot find one when you type or browse, click on Create, and select Person, Family, Corporate Entity, or Software, depending on what type of Agent record you wish to create. Follow instructions for Creating Agent records.
Note: When working within Accession, Resource, Resource component, Digital Object, and Digital Object component records you can link to an existing name record or create a new name record that you wish to associate with that material, without having to exit the Accession, Resource, Digital Object, etc. record.
Subject Records
Functional overview
Subject records are used to control information about topics, geographic names, genre and form terms, occupations, functions, and uniform titles that serve as important access points to facilitate discovery of the materials being described. These records are established and controlled separately from resource descriptions in ArchivesSpace and are associated with accession, resource, and digital object descriptions by linking.
The terms that serve as access points for collection materials function most effectively when derived from broadly shared standard thesauri or controlled vocabularies such as the Library of Congress Subject Headings (LCSH)[5] or the Art and Architecture Thesaurus (AAT).[6] The output formats (e.g., EAD, MARCXML) that you generate from your resource descriptions in ArchivesSpace will be much more effective if you utilize standard thesauri or controlled vocabularies to select terms. Document your usage locally so that you can apply common terms, as appropriate, in a consistent manner across all of your resource descriptions.
Subjects can be one of 10 types in ArchivesSpace:
Cultural context
Function
Genre/form
Geographic
Occupation
Style/period
Technique
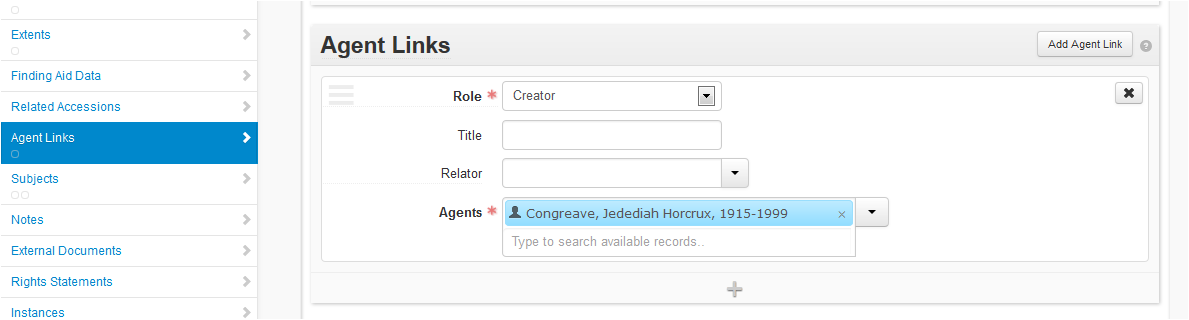
Temporal
Topical
Uniform title
Personal, family, and corporate names that are used as subjects are managed as Agent records in ArchivesSpace; therefore a name type is not an option within Subject records.
Subject records can be linked to Accession records, Resource records, Resource component records, Digital Object records, and Digital Object component records in order to provide subject and other types of controlled vocabulary access to those materials at all appropriate levels of granularity and at whatever points in local repository workflows this type of description is done.
Note: as with Agent records, Subject records linked to Accession records, Resource component records, and Digital Object component records will not be exported to MARCXML records.
You or someone at your repository should be familiar with the rules for using the specific thesaurus, authority file, or controlled vocabulary (data value standards) from which you derive subject and controlled vocabulary records. Appendix B in DACS, provides a helpful list of the primary data value standards used by archivists doing archival description in the U.S.
Creating and managing Subject records
Subjects are shared across Yale repositories using ArchivesSpace. This means that updating a subject heading in your repository will affect everyone else referencing that subject – please be extremely careful when creating and editing subjects.
ArchivesSpace requires three elements in a Subject or other controlled vocabulary record:
Subject Source: Choose from a drop-down list. This list indicates the thesaurus or controlled vocabulary from which the subject term was selected.
Term: Open text field. Use this field to indicate the subject heading or controlled vocabulary term or phrase describing the content, coverage, or resource type of the materials.
Subject Type: Choose from a drop-down list. This indicates the type of term being recorded (e.g., function, genre/form, geographic name, occupation, topic, uniform title).
Creating a Subject record
The directions here are for constructing a Subject record for a Topical subject**.** Follow these same basic instructions for Occupation, Geographic, Preferred Title, and Genre records–any variants specific to those types will appear below. Before you begin, search in LC Linked Data Service or Art & Architecture Thesaurus to see if your subject or genre has an authorized record, and use that data to populate the subfields in the record you create. If there is no authorized record, construct a subject record using local rules.
The fields in ArchivesSpace Subject records map to Library of Congress Subject Heading MARC fields referred to in the directions below. Do not enter punctuation or parentheses at the end of subfields; all punctuation will be supplied by ArchivesSpace. Do not leave any blank spaces at the end of the subfields.
If you are already working in an Accession or Resource record: on the left navigation bar, click Subjects, and then click Add Subject. Click the drop-down list button, and then click Create.
If you are starting from ArchivesSpace home: on the main toolbar, click Create and select Subject.
Authority ID: optional. If available, use a URI from LC Linked Data Service or Art & Architecture Thesaurus.
Source: required. Choose Library of Congress Subject Headings, another thesaurus code, or appropriate Yale Library local code (at the end of the list) from the drop-down menu.
Note: For LCSH subjects with free-floating subdivisions:
Code as local, using the appropriate local code
For LCSH subjects with subdivisions, record an Authority ID only if the entire heading, with subdivisions, has been established
(example: Carrots ‡x Diseases and Pests).
Also create a second New Subject without free-floating subdivisions
Enter the required Term and Subject Type information. For the required Term information, use LCSH 150 ‡a, or local term. For the required Type information**,** use the default, Topical
If the Subject record includes a term subdivision, click Add Term/Subdivision and enter information for the Term and Subject Type for the subdivision. You can add additional subdivisions as needed.
The Add Term/Subdivision is optional and repeatable
Term: LCSH 150 ‡x, ‡z, ‡y, ‡v, or local term
Type: use one of the following:
LCSH 150 ‡x: Topical
LCSH 150 ‡z: Geographic
LCSH 150 ‡y: Chronological
LCSH 150 ‡v: Genre
Click Save Subject. If any required element is missing, you will be prompted to add the information.
Create new subject: Occupation
Terms and Subdivisions
Term: required: LCSH 150 ‡a, or local term
Type: required: choose Occupation
Add Term/Subdivision: optional and repeatable
Term: LCSH 150 ‡y, ‡z, or local term
Type: choose Geographic or Chronological
Create new subject: Geographic
Terms and Subdivisions
Term: required: LCSH 151 ‡a, or local term
Type: required: choose Geographic
Add Term/Subdivision: optional and repeatable
Term: LCSH 151 ‡v, ‡x, ‡y, ‡z, or local term
Type: choose Genre, Topical, Geographic,or Chronological
Create new subject: Preferred title
Terms and Subdivisions
Term: required: LCSH 130 ‡a through ‡t, or local term
Type: required: choose Preferred title
Add Term/Subdivision: optional and repeatable
Term: LCSH 130 ‡v through ‡z, or local term
Type: choose Genre, Topical, Geographic,or Chronological
Create new subject: Genre
Terms and subdivisions
Term: required: choose term from AAT or other thesaurus, or local term
Type: required: choose Genre
Add Term/Subdivision: optional and repeatable
Term: local term
Type: choose appropriate term
External Documents sub-records
Generally, do not use External Documents.
This sub-record allows links to external documentation that discusses how a particular Subject record is to be used.
Title: Open text field. The title of an external document. The document may be of any form or content such as a web accessible file, a network accessible file, or a file on the same computer as the application.
Location: Open text field. The location of the file, ideally a resolvable URI. Example: http://www.archivesspace.org/membershipfile:///c:/path/to/the%20file.txt
Publish: Select or clear the check box. A selected check box indicates that this External Document should be published to the Public User Interface.
Assessment Records
Functional overview
Assessment records contain information about the quantitative and qualitative condition of surveyed material, its readiness for reformatting, housing, physical arrangement, intellectual access, and research value. This allows users to rank the material’s needs relative to the needs of other surveyed materials. Assessment can occur at various points in the life cycle of an archival collection and for many reasons.
Assessment records can be linked to Accession, Resource, Resource Component, and Digital Object records. Assessment records can be linked to a single record or to multiple records.
The possible linkages are as follows:
Assessment to Accessions (one to many)
Assessment to Resources (one to many)
Assessment to Archival Objects (one to many)
Assessment to Digital Objects (one to many)
Required elements
Assessment records must contain a link to an Accession, Resource, or Resource Component, or Digital Object record, and must record who the material was surveyed by and the date the survey began. All other fields and ratings are optional.
Creating a Minimal Assessment Record
There are two ways to create an assessment record: from within the Assessment module and from within the record of something being surveyed.
To create an assessment record from within the Assessment module
On the main toolbar, click Create and select Assessment.
To create an assessment from within the record of something being surveyed
Select the More button and choose Create Assessment:
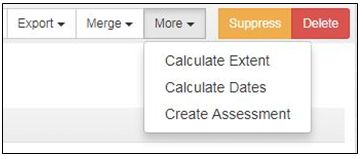
ArchivesSpace requires three elements for an ArchivesSpace valid assessment record: a link to the records being assessed, a link to the Agent who did the surveying, and the date the survey began. These document only that the assessment occurred; you will likely wish to enter other elements as needed.
Link to other records (required): A link to the resource(s), accession(s), resource component(s), or digital object(s) that are the subjects of the assessment.
Surveyed By (required): Name(s) of the person(s) who performed the assessment. This field is restricted to those with user records in ArchivesSpace
Survey Begin Date (required): The date the survey began, in yyyy-mm-dd format.
Click Save Assessment. If any required element is missing, you will be prompted to add the information.
Adding Additional Information to an Assessment Record
After the required information about an assessment has been entered, you can continue to record information about the assessment using the additional fields listed below. Which fields you use and how you enter the data is subject to the policies and procedures of your individual repository.
Existing description
This section consists of check boxes you can use to record the existing types of description present for the materials being surveyed. The existing description notes field is free text and allows you to enter any further information on existing description for the materials.
Survey Information
This section consists of information about the survey itself.
Surveyed By (required): Name(s) of the person(s) who performed the assessment. This field is restricted to those with user records in ArchivesSpace
Survey Begin Date (required): The date the survey began, in yyyy-mm-dd format.
Survey Completed Date (recommended): The date the survey ended, in yyyy-mm-dd format.
Time it took to Complete Survey: The time it took to complete the survey, measured in hour increments.
Extent Surveyed: The extent of the materials that were surveyed, which may or may not be the same as the extent of individual accession, resource, or object.
Review Required: Indicates if review is required for the collection because of its format, subject matter, or circumstances.
Who Needs to Review: Indicates who needs to perform the review. This field is restricted to those with user records in ArchivesSpace.
Review Note: Explanation of the outcome of any special review.
Purpose of Assessment: Indicates the reason the assessment was undertaken. Examples: conservation priorities; processing priorities; appraisal; etc.
Scope of Assessment: Indicates the scope of the assessment. Examples: 10% sampling; entirety; a particular format or genre within or across collections; or other constraints or conditions on materials actively reviewed during an assessment.
Sensitive Material?: Indicates whether sensitive materials are present.
Inactive: Indicates if the Assessment record is no longer considered “active” and thus should not be included in searches or reports.
Assessment Information
All ratings are accompanied by an optional note field that can be used to record further information. Definitions for all rating values are available by clicking the question mark icon next to the field title. The definition of the fields in the rollover tooltips is configurable by repository to accommodate local practice (see https://github.com/archivesspace/archivesspace/blob/5e1ca66f1f04f142f2695024efb7200825046325/common/locales/LOCALES_README.md). An additional ten ratings may be defined by an administrator using the Manage Assessment Attributes function. See the Lyrasis ASpace manual for more details: Manage Assessment Attributes
Documentation Quality: A rating from 1 to 5 that applies to the richness and depth of documentation available in a collection. Interest + Documentation Quality create the “Research Value” score.
1: Slight
2: Incidentally valuable
3: Moderately rich
4: Rich
5: Very rich
Housing Quality: A rating from 1 to 5 intended to describe the overall quality of housing of the materials in a collection; items or groups of materials within a collection may be in better or poorer housing than what the overall rating indicates.
Collection housed in non‐archival boxes, might have items loose on the shelf. Majority of material is not in folders and/or boxes are too full or not full enough. For bound volumes, binding is in poor condition, lacking boards or otherwise compromising the text block.
Collection housed in non‐archival boxes and folders. Significant number of boxes and folders might have unreasonable amount of material in them or are not the correct size and type for the materials they house. For bound volumes, binding is in fair condition (boards might be detached).
Collection housed in non‐archival boxes and folders but they are in good condition. Most boxes and folders have reasonable amount of material in them. Most boxes and folders are correct size and type for the materials they house. For bound volumes, binding is in good condition (somewhat the worse for wear yet intact).
Collection housed partially in acid‐free boxes and folders in good condition. Most boxes and folders have reasonable amount of material in them. Most boxes and folders are correct size and type for the materials they house. For bound volumes, binding is in very good condition (expected wear).
Collection housed completely in acid‐free boxes and folders in good condition. Boxes and folders have reasonable amount of material in them. Boxes and folders are correct size and type for the materials they house. For bound volumes, binding is in excellent condition.
Intellectual Access (description): A rating from 1 to 5 that applies to a collection’s intellectual description and the accessibility of that description to users.
Researcher has no access to collection: Internal documentation such as a donor/control file or brief or inaccessible accession record serves as the only description of the collection. While such internal documentation may vary in quantity and quality, by its nature it is inaccessible to researchers.
Researcher has poor access to collection: Collection has no finding aid or a substandard finding aid. The collection has printed catalog cards or another type of offline collection‐level description, but no collection‐level MARC record in the OPAC or a national bibliographic utility. The collection has a MARC record in the OPAC or national bibliographic utility, but that record does not provide sufficient access because the collection is large or complex. In either case, the collection may be described in other online or offline sources available to researchers, but because of the complexity of the collection or the inadequacy of the sources, this provides insufficient access.
Researcher has fair access to collection: The finding aid is substandard or there is no finding aid. There is a collection‐level MARC record for the collection in the institution’s OPAC and/or in a national bibliographic utility such as OCLC. In the absence of a full MARC record, there is another type of online collection‐level description. The collection‐level description in online or offline sources available to researchers provides sufficient access because it is a small or straightforward collection.
Researcher has good access to collection: There is a good finding aid, but it is not available online. There is a collection‐level MARC record for the collection in the institution’s OPAC and/or in a national bibliographic utility such as OCLC. There is a good finding aid, online or offline, but there is no collection‐level MARC record for the collection in the institution’s OPAC and/or in a national bibliographic utility such as OCLC. Given the quality of the finding aid, the finding aid alone provides good access. In both cases, the collection may also be described in other online or offline sources that are available to researchers.
Researcher has excellent access to collection: There is a good online finding aid (EAD, HTML, PDF, or other format). There is a collection‐level MARC record for the collection in the institution’s OPAC and/or in a national bibliographic utility such as OCLC. The collection may also be described in other online or offline sources that are available to researchers (such as a printed or online guide to collections).
Interest: A rating from 1 to 5 that indicates researcher, donor, or local interest in the materials. Interest + Documentation Quality create the “Research Value” score.
Negligible
Slight
Moderate
High
Very high
Physical Access (arrangement): A rating from 1 to 5 that applies to a collection’s physical arrangement, taking into account the complexity and size of collection. For example, a small, relatively homogenous collection in rough order is generally more physically accessible than a large, heterogeneous collection in rough order, and the ratings will reflect that fact. (Note that arrangement to the item level may not be desirable for many collections; a rating of 4 may be the top rating that is desirable for a collection.)
Totally unarranged; many, sometimes most, documents not yet removed from envelopes, unfolded, and flattened. Completely inaccessible to researcher.
Partial or superficial arrangement and/or non‐standard housing and labeling discourage use except with special staff assistance.
Rough arrangement by date, document type, function, source, or other characteristic; papers not thoroughly screened, but have been unfolded and flattened; series not fully established; files not fully established; researchers often must work through voluminous extraneous material to locate pertinent items. Single volumes might have had more than one use, or have items pasted in or otherwise be somewhat disorganized.
Arrangement in series to file level. There is generally good order within the files. Single volumes are orderly (i.e. an account book in alphabetical order or a neat scrapbook in thematic order).
Full arrangement to item level in series and, as appropriate, subseries. Single volumes are orderly and indexed (i.e. chronological accounts with a name index).
Physical Condition: A rating from 1 to 5 intended to describe the overall condition of the materials in a collection; items or groups of materials of particular concern will be indicated in the conservation note.
Poor: Significant damage/deterioration that makes collection difficult to use.
Fair: Somewhat worse than expected deterioration with some further deterioration possible.
Good: Expected deterioration with some further deterioration possible.
Very good: Little damage with some further deterioration possible, due to the mixed quality of the material.
Excellent: Little damage with very slow or minimal further deterioration expected, based on the high quality of the material.
Reformatting Readiness: A rating from 1 to 5 that indicates how easily materials can be reformatted.
Materials would be extremely difficult to reformat. They might have serious conservation issues, be in an obsolete format with no available technology to recover the file or information, or have intellectual property concerns that restrict reformatting. Metadata might be missing or incomplete.
Materials would be difficult to reformat. They might have conservation issues, be in an obsolete format with no readily available technology to recover the file or information, although the technology still exists, or have some intellectual property concerns. Metadata might be missing or incomplete.
Materials would be moderately easy to reformat. They may have some conservation issues, be in an obsolete format with readily available technology to recover the file, or have minimal intellectual property concerns. Metadata is present or could be created easily.
Materials would be relatively easy to reformat. Conservation issues are minor, formats are not completely obsolete and are easily migrated to current formats with readily available technology, or there are minimal intellectual property concerns. Metadata is present.
Materials could be reformatted with no difficulty. There are no conservation issues, formats are recent or current, and technology is readily available to recover or convert files, or there are no intellectual property concerns. Metadata is present and complete.
Research Value: Research value is automatically calculated by adding the Documentation Quality + Interest scores. Because this field is automatically calculated and cannot be edited, it does not appear on the edit assessment form. It will appear on the view assessment page whenever the Documentation Quality and/or Interest scores have been entered.
List of Material Types / Formats
In addition to the fifteen available specific formats and the ‘other’ option in the format checkboxes, an additional twenty formats may be defined by an administrator using the Manage Assessment Attributes function.
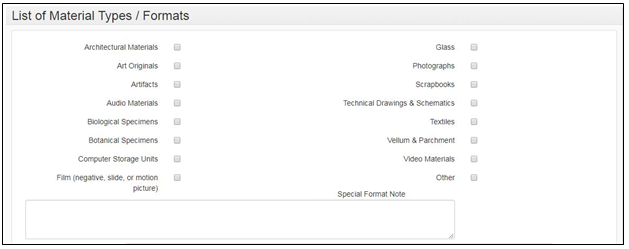
Special Format Note: Additional or explanatory information about the special formats present.
Exhibition Value Note: Indicates whether the collection itself or individual items found in the collection might be especially appropriate for exhibition. For example, this field might note a unique artifact or a letter or photograph of historical significance.
Monetary Value: Appraised or estimated market value of the assessed materials (numerical value).
Monetary Value Note: Indicates who provided the monetary value, date of appraisal, and any other relevant information.
Conservation Issues
In addition to the nine available conservation issue checkboxes, an additional twenty conservation issues may be defined by an administrator using the Manage Assessment Attributes function.
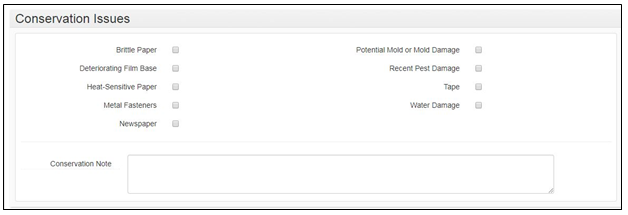
Conservation Note: Indicates areas of particular concern with regard to the physical condition of the collection.
Viewing an Assessment Record
There are two ways to view an assessment record: from the main menu and from within the record of something that has been surveyed.
From the main menu
On the main toolbar, click Browse and select Assessments. Search, sort, and/or filter to find and select the assessment you wish to view. Click the View button to see the record.
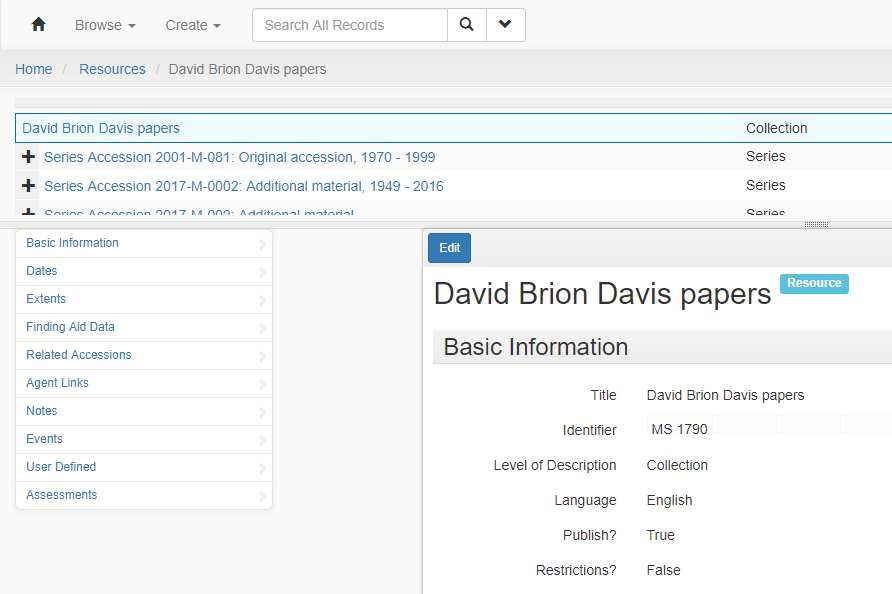
Viewing an assessment record from within an accession, resource, archival object, or digital object record
From within a record, click Assessments in the left-hand navigational column. This will bring you to a list of all linked assessments. Clicking View will take up a the assessment record.

This will bring up a list of all linked assessments. Clicking View will take you to the assessment record.
Deleting an Assessment Record
Find the assessment record(s) you want to delete. You can browse or search.

From the results screen, you may delete an assessment in two ways.
Click the checkbox next to the assessment(s) you wish to delete. A checkmark will appear in the box for the assessments selected.
Click the Delete button in the upper right corner.
You will be asked confirm your intention to delete the assessment record(s). Click Delete Records to delete the record(s) and Cancel to return to the list without deleting.
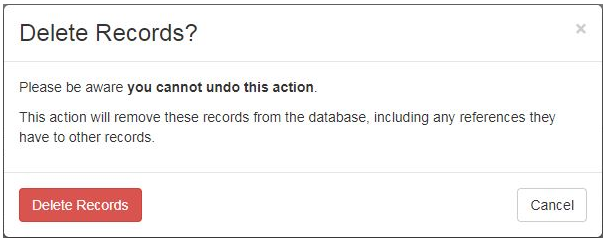
or
Click the View or Edit button for the assessment you wish to delete.
From the Assessments Toolbar, click Delete.
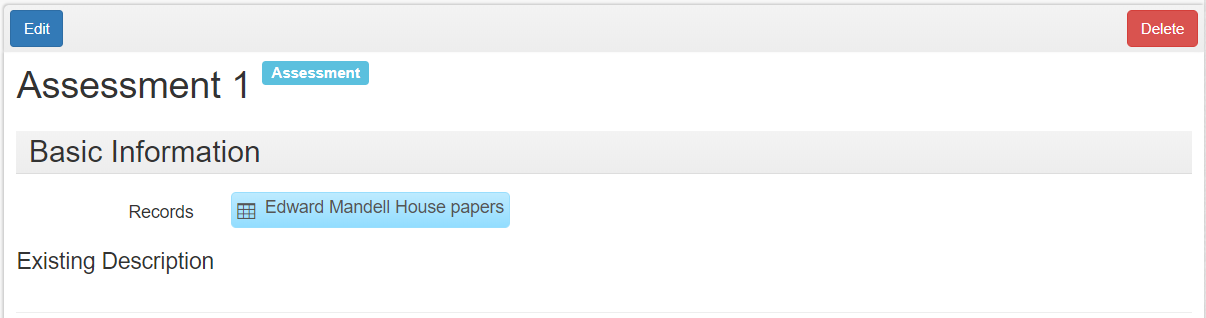
You will be asked confirm your intention to delete the resource record. Click Delete to delete the record and Cancel to return to the list without deleting.
Transferring an Assessment Record
If an assessment’s only linked record is transferred to another repository, the assessment is also moved to the target repository.
If an assessment has more than one linked record, and not all of the linked records are transferred to another repository, the assessment is duplicated in the target repository.
In either case, if additional Assessment Attributes (ratings, material types/formats, or conservation issues) are present in an assessment in one repository, the exact same rating, material type/format, or conservation issue must also be present in the new target repository for the field to transfer.
Managing Assessment Attributes
To add additional ratings, formats, or conservation issues, you must be logged in as a System Administrator. System administrators may also choose to grant permissions to create/update/delete repository assessment attributes definitions to other user groups using the Manage Groups function.
Use the Select Repository option to select the repository for which you want to manage assessment attributes.
Click on the Settings button next to the repository name and then choose the Manage Assessment Attributes option.
Within the Manage Assessment Attributes page, you can add up to ten additional Ratings, twenty additional Material types/formats, and twenty additional Conservation Issues. Navigate to the Repository section at the bottom of each list and click the green + button to add additional fields. You can also delete additional fields by clicking the red X button.
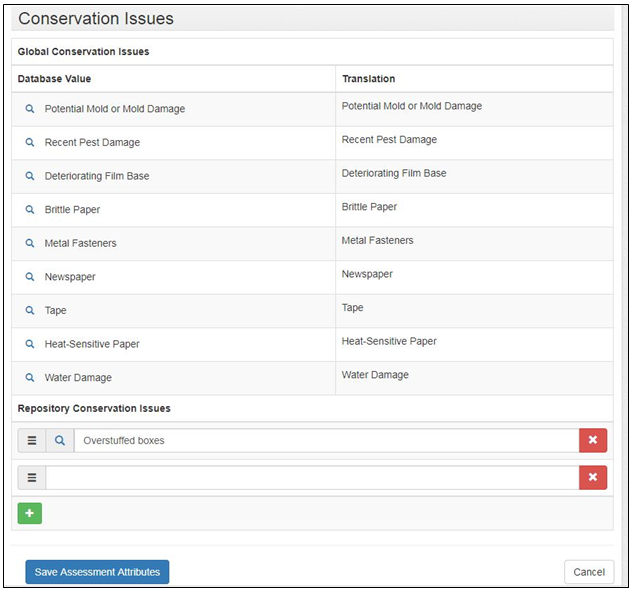
Click Save Assessment Attributes.
Viewing associated records from the Manage Attribute Assessments page
You can view any records associated with a particular rating, material format/type, or conservation issue by clicking on the magnifying glass icon to the right of the field name.
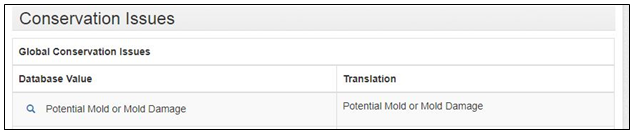
Assessment Reports
There are two types of reports associated with Assessments module, the Assessment Rating Report and the Assessment Record List. Note that “inactive” records do not appear in reports.
The Assessment Rating Report allows you to choose a date range (if desired), a rating type, a rating range, and a report format (JSON, CSV, HTML, PDF). Only global repository ratings values are available in this report.
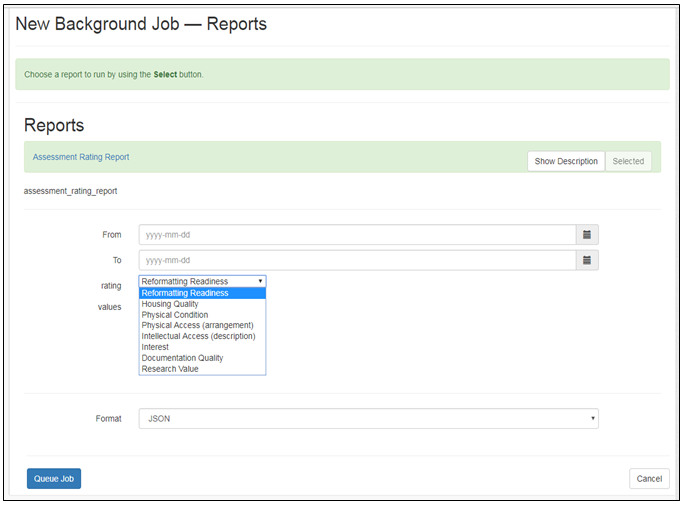
Once you have selected a rating type, you can select values for the ratings you wish to report on.
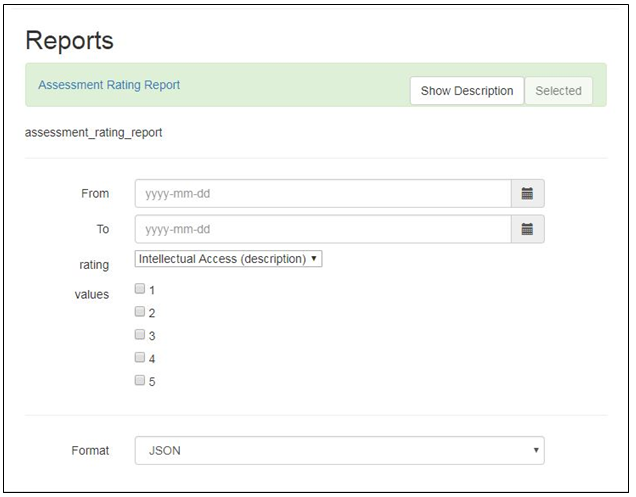
The Assessment Record List allows you to choose a date range (if desired), and a report format (JSON, CSV, HTML, PDF). This report returns all fields in all assessment records, except those marked “inactive”.
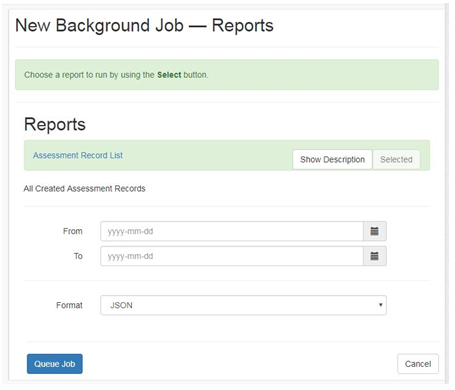
Importing Assessment Records Using a CSV Template
The CSV template for importing assessment records into ArchivesSpace is available at https://github.com/hudmol/archivesspace/tree/assessment-module/backend/app/exporters/examples/assessment.
Basic information
Record link: This field will create the link to the collection. In order for the link to work, the entry must be in the format of the ArchivesSpace id. You can find this at the top of the browser bar.
Example: For MSSA MS 1790, the ArchivesSpace id is resource_3532
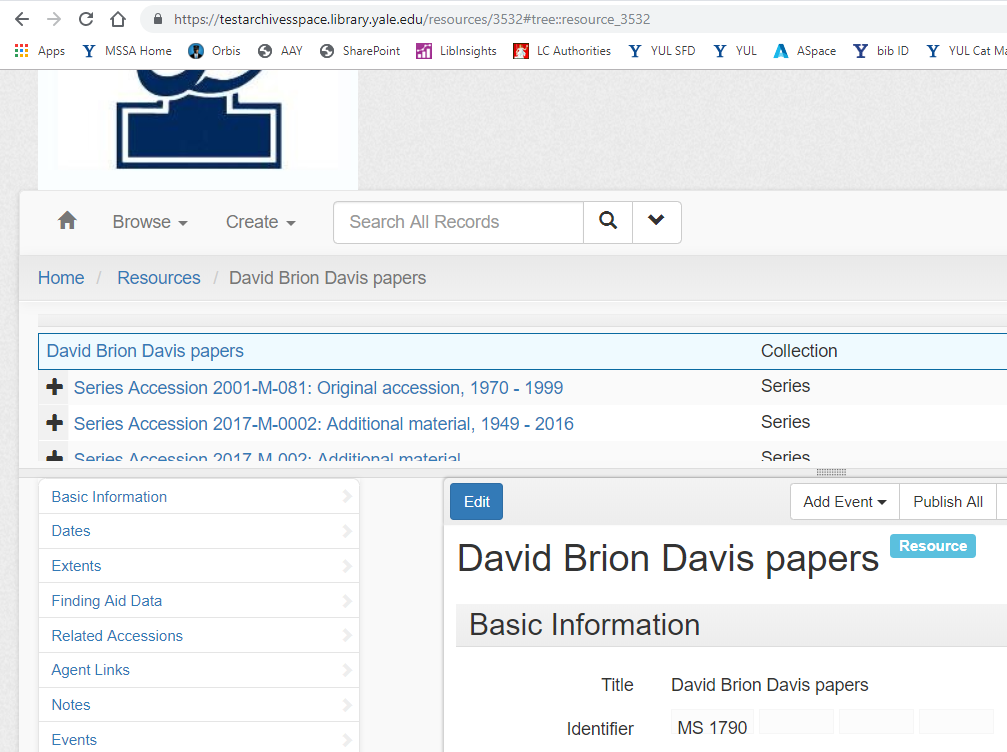
Accession link: This field will create the link to an accession. In order for the link to work, the entry must be in the format of the ArchivesSpace id. You can find this at the top of the browser bar.
Example: For MSSA accession 2017-M-0002, the ArchivesSpace id is accessions/22314
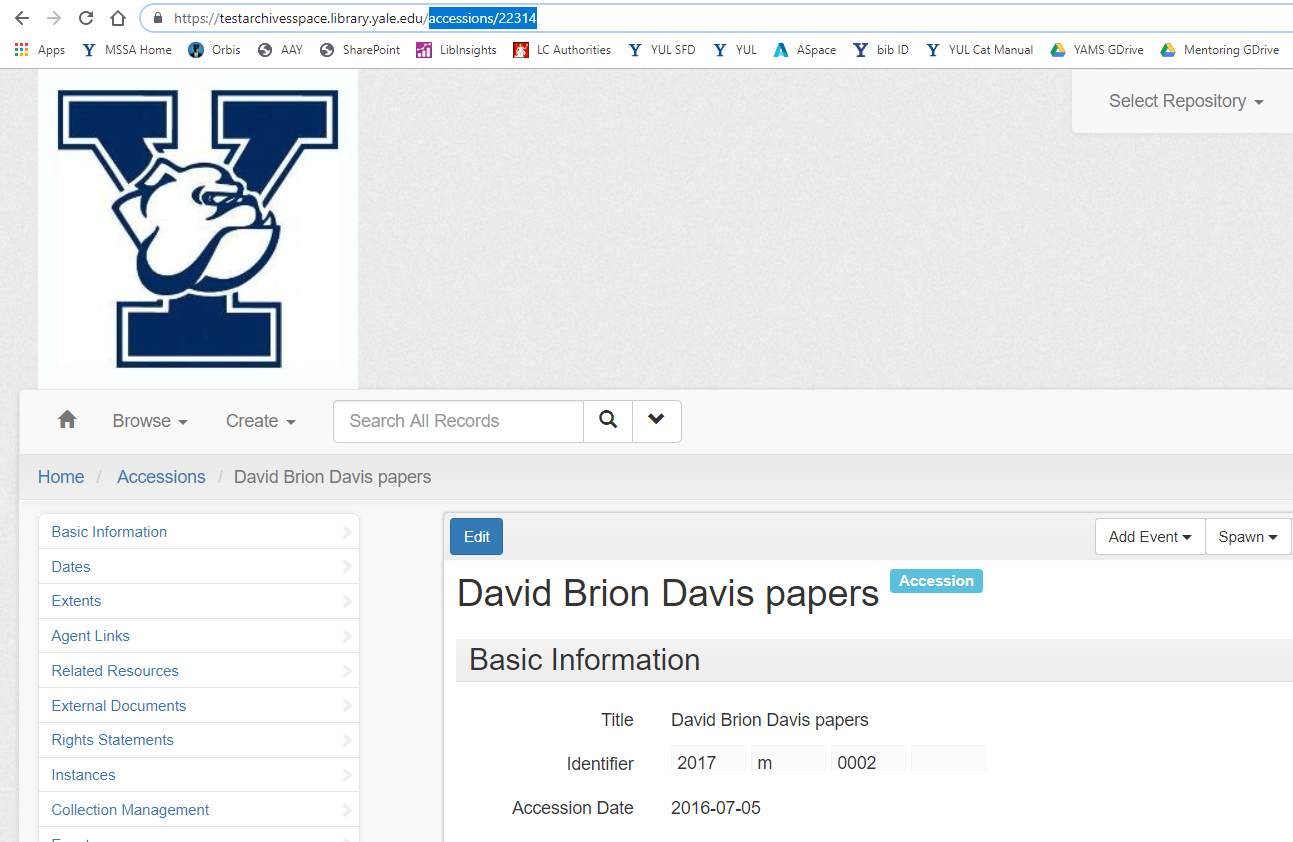
Other fields can be filled out according to the guidelines on the ArchivesSpace Assessment CSV Import Template. Aside from the link to an Accession, Resource, or Object record, the Surveyed by, and the Date the survey began fields, no fields are required; anything without data may be left blank. If you have created additional Assessment Attributes, those may be added to the csv import. Remember to add the relevant header information (basic, rating, format, conservation) as well as the field title.
Linking Records
Functional overview
Linking records adds to the description and assists in the management of archival materials. For example, linking Agent and Subject records to a Resource record helps reveal the context and content of the archival materials. These linked headings also provide access headings to data format exports such as EAD, MARCXML, and METS records.
In addition, linking Top Container and Location records to the Resource record facilitates retrieving and reshelving the archival material without having to rely on another tool external to ArchivesSpace. Linking one or more Accession records to a Resource record helps to document the acquisition and processing of the resource, while linking one or more Digital Object records to an Accession or Resource record indicates the relationship of the digital object content to a larger aggregate of materials.
Linking records also makes data management easier. For example, one Agent or one Subject record can be linked numerous times to a Resource record or to numerous Resource records. Modifying the linked Agent record or Subject record means the changes will appear in all places in the ArchivesSpace implementation where the record is linked. This technique also reduces the chance of errors and variations being introduced into the data due to multiple re-keying of the same data. The linked Agent or Subject record also provides a collocation point in the ArchivesSpace Public User Interface; it allows users to browse by name or subject.
Linkable records may be recorded and linked as part of the process of constructing an Accession, Resource, or Digital Object record. Removing a link to a linked record simply removes its relationship to a given Accession, Resource, or Digital Object record. The linked record’s other links, or relationships, will remain intact. In contrast, deleting a linked record–an Agent or Subject record, for example–will delete relationships it has to all other records.
| Context Record | Can Link to Record Type |
| Accession, Resource, Resource Component, Digital Object, Digital Object Component | Agent Subject |
| Accession, Resource, Resource Component | Digital object |
| Accession, Resource, Resource Component | Top Container |
| Accession | Resource |
| Agent | Agent |
Creating and managing links
Linking to Agent records
To link Agent records to Accession, Resource, Resource component, Digital Object, and Digital Object component records:
In the context record, click on the Agent Links option in the record navigation pane or scroll to the Agent Links part of the record.
Click on the Add Agent Link option which will open a new link template at the bottom of the list of linked agents.
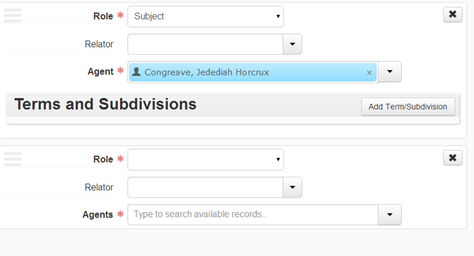
In the Role field (required), indicate if the agent is linked to the materials as Creator, Source, or Subject.
In the Relator field, select any term that better specifies the nature of the role the agent has to the materials.
In the Agents field, indicate the Agent record that is to be linked to:
You can begin to type the agent name in the Agent field and then select a match.
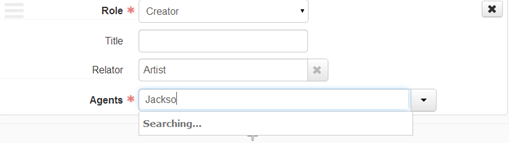
Or Browse the list of available Agent records to find a match. Select the matching record and then click on Link to Agents to link the Agent record to the context record.
Or create a new Agent record if the one you require is not in the list. (Refer to the section on Agent records for instructions on creating a new Agent record).
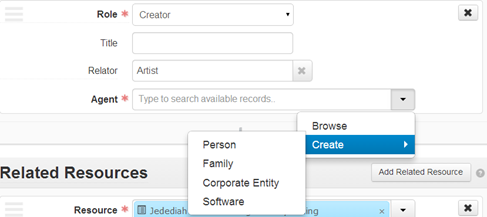
If desired, add Terms and Subdivisions for Agents linked as Subjects.
Click on Save to save the context record with the new link to an Agent record.
Editing or updating a link to an Agent record
In the context record, find the agent link that is to be updated.
Change values for the Role, Title, or Relator fields.
Click on Save to save the context record with the updated agent link.
Removing a link to an Agent record
In the context record, find the agent link that is to be deleted.
Click on the X in the upper right corner of the Agent record link.
Click on the Confirm Removal option to remove the link, or on the Cancel option to retain the link.
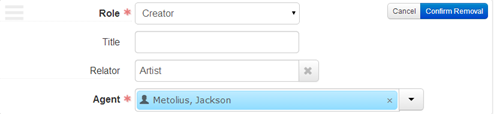
Click on Save to save the context record with the agent link removed
Linking to Subject records
To link Subject records to Accession, Resource, Resource component, Digital Object, and Digital Object component records:
In the context record, click on the Subjects option in the record navigation pane or scroll to the Subjects part of the record.
Click on the Add Subject option which will open a new link template at the bottom of the list of linked subjects.
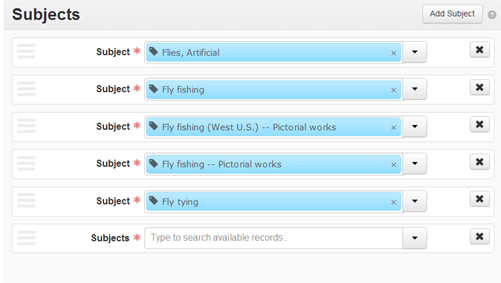
In the Subjects field, indicate the Subject record that is to be linked to:
You can begin to type the subject term in the Subject field box and then select a match.

Or browse the list of available Subject records to find a match. Select the matching record and then click on Link to Subjects to link the Subject record to the context record.
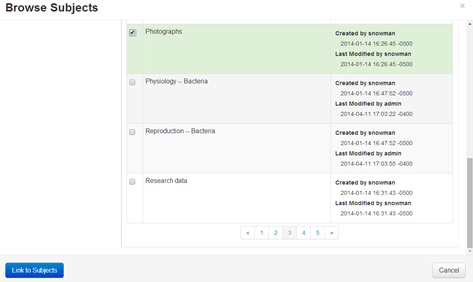
Or create a new Subject record if the one you require is not in the list. (Refer to the section on Subject records for instructions on creating a new Subject record).

Click on Save to save the context record with the new link to a Subject record.
Removing a link to a Subject record
In the context record, find the subject link that is to be deleted.
Click on the X in the upper right corner of the Subject record link.
Click on the Confirm Removal option to remove the link, or on the Cancel option to retain the link.

Click on Save to save the context record with the subject link removed.
Linking to Digital Object records
The Yale Archival Management Systems Committee is working on guidelines for digital objects module of ArchivesSpace (as of spring 2018). Please contact your ArchivesSpace liaison with questions.
To link Digital Object records to Accession, Resource, or Resource Component records:
Click on the Instances option in the record navigation pane or scroll to the Instances part of the record.
Click on the Add Digital Object option which will open a new link template at the bottom of the list of linked instances.

In the Digital Object field, indicate the Digital Object record that is to be linked to:
You can begin to type the digital object title in the Digital Object field and then select a match.

Or browse the list of available Digital Object records to find a match. Select the matching record and then click on Link to Digital Objects to link the Digital Object record to the context record.
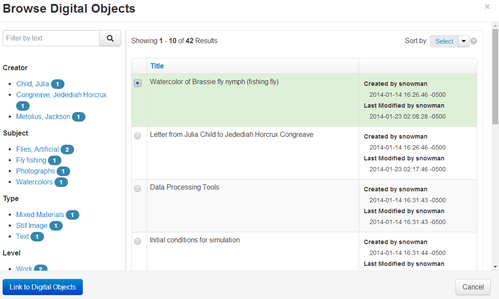
Or create a new Digital Object record if the one you require is not in the list.
Click on Save to save the context record with the new link to a Digital Object record.
Removing a link to a Digital Object record
In the context record, find the Digital Object record link that is to be deleted.
Click on the X in the upper right corner of the Digital Object record link.
Click on the Confirm Removal option to remove the link or on the Cancel option to retain the link.

Click on Save to save the context record with the digital object link removed.
Linking to Location records
You can link Top Containers associated with Accessions and Resource components to locations individually or in bulk.
To link Top Containers to Locations in individually or in bulk see Update Locations in the Managing Top Containers section. It is generally advisable to link to locations via the Manage Top Container plug-in as this is the more efficient method.
To link Top Containers individually from within an Accession or Resource component records:
Click on the Instances option in the record navigation pane or scroll to the Instances part of the record.
Click on the container to which a Location record is to be linked. This will display a View button. Click on the View button.
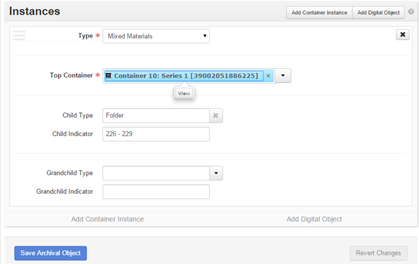
This will take you to the Top Container record. Click the Edit button in the upper left of the window.
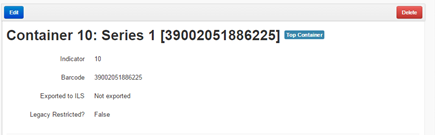
Click on the option to Add Location in the container record template, which will open a location link template.
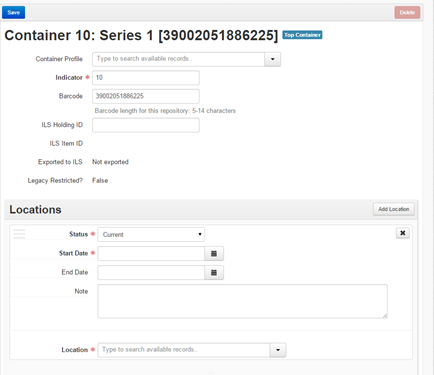
In the Status field, indicate if the location is the current location for the material described or a previous location. “Current” is the default value.
In the Start Date field, indicate when the materials were shelved at the location.
In the End Date field, indicate when the materials stopped being at the location, if warranted. This field will typically be used to indicate the end of temporary locations.
In the Note field, add a note appropriate to the location for the described materials, for instance, that the materials were relocated to their permanent location.
In the Location field, indicate the Location record that is to be linked to:
You can begin to type the location in the Location field and then select a match.
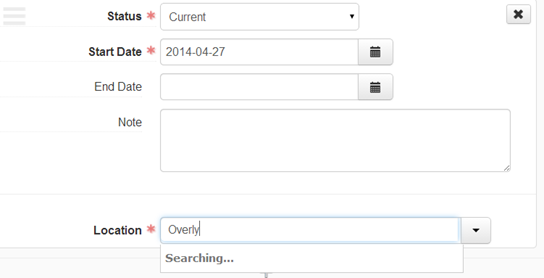
Or browse the list of available Location records to find a match. Select the matching record and then click on Link to Locations to link the location to the context record.
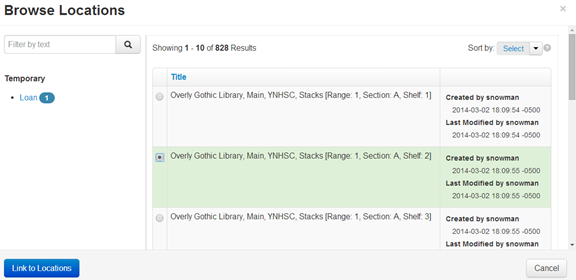
Or create a new Location record if the one you require is not in the list. (Refer to the section on Location records for instructions on creating a new Location record).
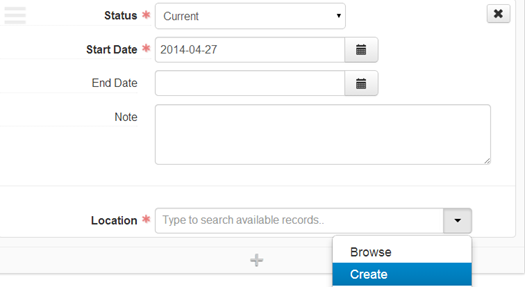
Click on Save Top Container to save the record with the new link to a Location record.
Removing a link to a Location record
In the context record, find the Location record link that is to be deleted.
Click on the X in the upper right corner of the Location template.
Click on the Confirm Removal option to remove the link, or on the Cancel option to retain the link.
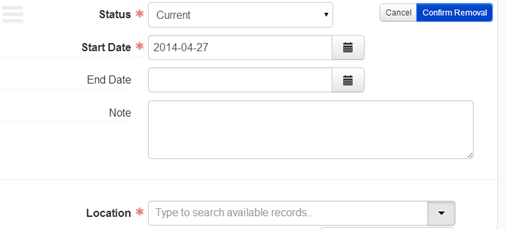
Click on Save to save the context record with the location link removed.
Linking Accession and Resource records
An Accession record can be linked to one or more Resource records, and, reciprocally, a Resource record can be linked to one or more Accession records.
To link an Accession record to a Resource record:
Click on the Related Resources option in the record navigation pane of an Accession record or scroll to the Related Resources part of the record.
Click on the Add Related Resource option which will open a new link template at the bottom of the list of linked Resource records.

In the Resource field, indicate the related Resource record that is to be linked to:
You can begin to type the resource title in the Resource field and then select a match.

Or browse the list of available Resource records to find a match. Select the matching record and then click on Link to Resources to link the Resource record to the Accession record.
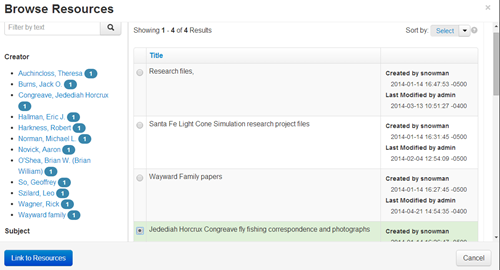
It is not permitted to create a new Resource record at this point. But you can exit the Accession record and create a new Resource record and then return to the Accession record to link the Resource record. Or you can spawn a new Resource record from the Accession record, to which the Resource record will be automatically linked.
Click on Save to save the Accession record with the new link to a Resource record.
Removing a link to a Resource record
In the Accession record, find the Resource record link that is to be deleted.
Click on the X in the upper right corner of the Related Resources template.
Click on the Confirm Removal option to remove the link, or on the Cancel option to retain the link.

Click on Save to save the Accession record with the related resource link removed.
**
To link a Resource record to an Accession record:**
Click on the Related Accessions option in the record navigation pane or of a Resource record or scroll to the Related Accessions part of the record.
Click on the Add Related Accession option, which will open a new link template at the bottom of the list of linked Accession records.

In the Accession field, indicate the related Accession record that is to be linked to:
You can begin to type the accession title in the Accession field
and then select a match.
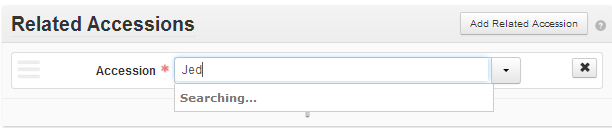
Or you can browse the list of available Accession records to find a
match. Select the matching record and then click on Link to Accession to link the Accession record to the Resource record.
You cannot create a new accession record at this point. But you can
exit the Resource record and create a new Accession record and then return to the Resource record to establish a link between it and the Accession record. (Or you can link the new Accession record to the Resource record.)
Click on Save to save the Resource record with the new link an Accession record.
Removing a Link in a Resource to an Accession record
In the Resource record, find the link to the Accession record that is to be deleted.
Click on the X in the upper right corner of the Related Accessions template.
Click on the Confirm Renewal option to remove the link, or on the Cancel option to retain the link.

Click on Save to save the Resource record with the related accession link removed.
**Do not remove the link by deleting the Accession record. That will remove the accession record from the database and all links to it will be deleted.
An Accession record can be linked to one or more Accession records.
To link an Accession record to another Accession record:
Click on the Related Accessions option in the record navigation pane of an Accession record or scroll to the Related Accessions part of the record.
Click on the Add Related Accessions option which will open a new link template at the bottom of the list of linked Resource records.

Relationship type: Choose from drop-down list. The options are
“Part of” relationship and Sibling relationship. Once the type is selected three required fields will be displayed.
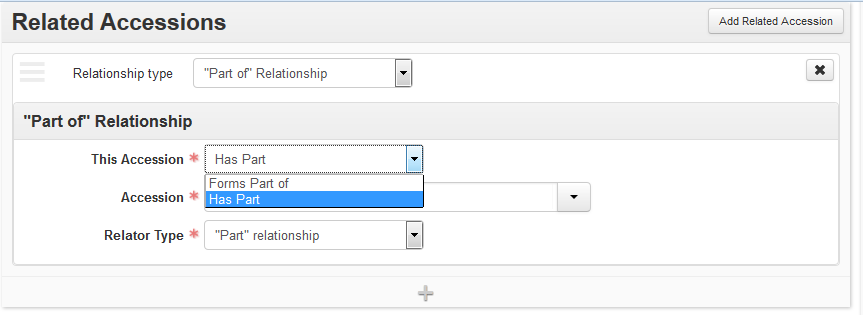
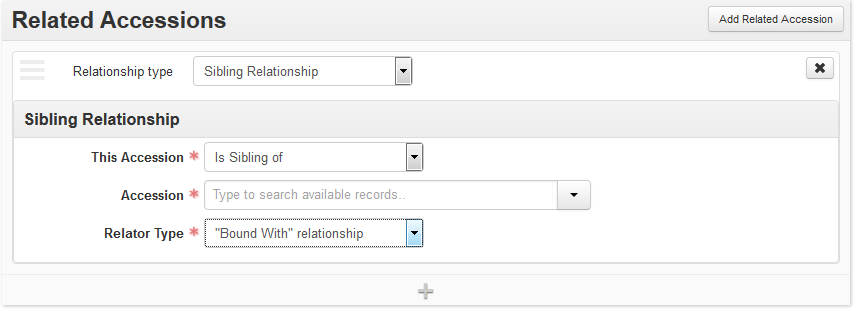
This Accession: Choose from drop-down list. Select the appropriate
term to describe the relationship type. The “Part of” relationship type provides two options for This Accession, either “Forms Part of” and “Has Part”; Sibling Relationship provides one option, “Is Sibling of”.
Accession: Choose from drop-down list. Select an accession related
to the material described in the record. Accession may be searched using auto-complete, using a browse function, or may be created on demand.
Relator Type: Choose from drop-down list. Select the appropriate
term to describe the relationship. Each type relator currently has only one option.
Removing a link to a Related Accession record:
1. Find in the context record, the accession link that is to be deleted.
2. Click on the X in the upper right corner of the Related Accessions record link.
3. Click on the Confirm Removal option to remove the link, or on the Cancel option to retain the link.
4. Click on Save Accession to save the record with the link removed
Including EAD elements (i.e. adding “Mixed Content”)
*******************************************************************************************
You must consult the EAD Tag Library, https://www.loc.gov/ead/tglib/index.html, before including any inline EAD elements, whether as part of a component title or part of a note.
*******************************************************************************************
Resource / Component Unit Title
If you need to add EAD elements to a unit title, you will have to hand-encode those elements in ArchivesSpace currently.
To indicate a preferred title (e.g. the equivalent of putting the text in a red font in the Excel template), you have to include the EAD title element like so:
<title>Preferred Title</title> and a bit more information in the component title
If you only need to format text for whatever reason, then you have to use the emph element along with an extra attribute to explicitly indicate that it should be in italics, bold, underline, etc. Here’s an example:
<emph render=”italic”>italicized text</emph>
It is crucial that these fields be typed in correctly, so please consult with someone if you have any questions whatsoever about how to format EAD correctly.
Notes
When adding EAD elements in a note, you can use ArchivesSpace’s wrap-in-tag feature or you can type “<” to show the available EAD tags (e.g. persname, title, etc.).
To see the available attributes for each specific element, you will need to include a space after the element name once that has been added. When adding an attribute, ArchivesSpace will *not* currently provide you with valid values (e.g. “italic | bold | underline | bolditalic | etc.”, so you must consult the EAD Tag Library, https://www.loc.gov/ead/tglib/index.html to ensure adherence to the EAD standard.
A Special Note on adding links within Notes:
If you want to create an external hyperlink, rather than using HTML to do that, you will also need to do that with EAD. In this case, the “ref” element is what you’ll want to employ. Here’s a template:
<ref href=”PUT LINK HERE”>LINK TEXT GOES HERE</ref>
If you want to create an internal link within a finding aid (i.e. point from one note to an archival object elsewhere in the finding aid), then you should also use the “ref” element, but in this case you will use the “target” attribute instead of an “href” attribute. In this case, you will also need to get the ArchivesSpace Ref ID of the archival object to which you want to provide an internal link (please note that internal linking in ASpace is only supported for archival objects, not for notes, or other sections of the finding aid). You will put that value into the target attribute (since that is the intended target of the internal link), similarly to how you would include the full link in an href attribute for an external hyperlink. Here’s an example:
If you like this material, just wait until you check out this <ref target=”320c03888ebec23f359a5b0eaa65748c”>other file</ref> of information!
Usually the ArchivesSpace Ref IDs will be a long string of characters (e.g. 320c03888ebec23f359a5b0eaa65748c), but for finding aids migrated from Archivists’ Toolkit, might have values like “ref1” instead. In that case, you still use the ArchivesSpace Ref ID (e.g. ref1) and add that to the “target” attribute, as illustrated above.
Exporting Records
ArchivesSpace enables the production of several export options for Agent and Resource records:
| Type of Data | File Types |
| Agent records |
|
| Resource records |
|
Exports are XML documents produced compliant with community standards and are usable in information systems such as ILSs or EAD databases. All the exports produced by ArchivesSpace are intended to foster access to the described materials. The ArchivesSpace website (ArchivesSpace Application > Technical Documentation > Data Import and Export Maps) provides a summary of export mappings for Resource records into EAD and MARCXML.
EAC-CPF files are XML-encoded documents compliant with the EAC-CPF schema. These can be utilized within the context of or contributed to EAC-CPF name authority systems.
EAD files are XML-encoded documents compliant with the EAD 2002 schema. These may be uploaded to an EAD database for indexing and made publicly searchable with EAD files from the same repository and/or other repositories. Exports reflect the parent-level Resource record, plus any associated child-level component records. You can also opt to exclude notes and sub-notes that are not intended for publication.
MARCXML files are XML-encoded documents compliant with the MARCXML schema. These may be uploaded to an ILS to be searched amongst other MARC records. Exports reflect the parent-level Resource record only.
ArchivesSpace currently supports exporting of individual Resource records; support for batch exporting of multiple records will be available in forthcoming releases.
Exporting EAC-CPF, EAD, and MARCXML files
Find the Agent or Resource record you want to export. You can browse or search.
To browse, on the main toolbar, click Browse and select Agents (for EAC-CPF exports) or Resources (for EAD and MARCXML exports). A listing of all the records in the repository will display.
To search, type your search query into the Search box on the main toolbar.
Next to the record you want to export, click View.
Click the Download EAC-CPF button (for Agent record exports) or Export button (for Resource record exports). In the case of the latter, choose an export option:
Download EAD (include unpublished): select this option for EAD
exports to include all notes and subnotes (even if they have been marked as not intended for publication).
Download EAD (include <dao> tags): select this option for EAD
exports to include digital object instances.
Download EAD (print to PDF): select this option to print a PDF
from ArchivesSpace’s default exporter.
Note: This PDF will not adhere to Yale style guidelines. To create a PDF adherent to Yale style guidelines, select Download EAD in ArchivesSpace. Then, run the ASpace-to-YaleEADbpg transformation. Once that transformation is complete, run the YaleEADbpg-to-PDF transformation; a PDF finding aid file should automatically open. If you do not have these oXygen transformations installed, see the Yale Archival Management Systems Committee LibGuide to download the project file: https://guides.library.yale.edu/c.php?g=296249&p=4694565
Download MARCXML: select this option for MARCXML exports.
The data will download into a file. Depending on your browser’s settings, the file will be saved to your Downloads folder or you may be prompted to choose a location for saving the file.
Importing Records
Instructions for importing legacy data are included below. Please contact your Yale Archival Management Systems Committee liaison for help importing legacy records.
In ArchivesSpace, you can import data from standardized records as well as comma-separated value data from spreadsheets. The following file types can be imported:
| File Type | Type of Data |
| Encoded Archival Context – Corporate bodies, Persons, Families (EAC-CPF) XML | Agent records |
| Encoded Archival Description (EAD) XML | Resource records |
| Machine-Readable Cataloging XML (MARCXML) | Resource records Accession Records Names and Subjects |
| Comma-separated value (CSV) files | Accession records Digital object records |
By importing legacy data, you can centralize the management of information about your collections within one application.
The ArchivesSpace website (ArchivesSpace Application > Technical Documentation > Data Import and Export Maps) provides a summary of import mappings from EAD and MARCXML files to the ArchivesSpace database scheme. It also provides a summary of export mappings for Resource records to EAD and MARCXML. Last, it includes CSV import mappings and templates to facilitate importing of accession and Digital Object records.
You may create an import job through two different routes. You can select Import Jobs from the Create drop-down menu on the main toolbar or you can select Import Jobs from the Repository drop-down and then select the Create Import Job button on the upper right corner of the resulting screen
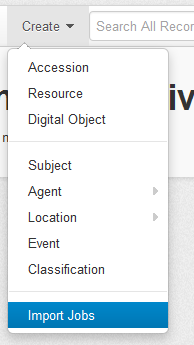
Importing EAC-CPF and EAD files
On the main toolbar, click on the Create drop-down and select Import Jobs.
Select the type of file: EAC or EAD. Files must be valid XML and compliant with referenced schemas or DTDs.
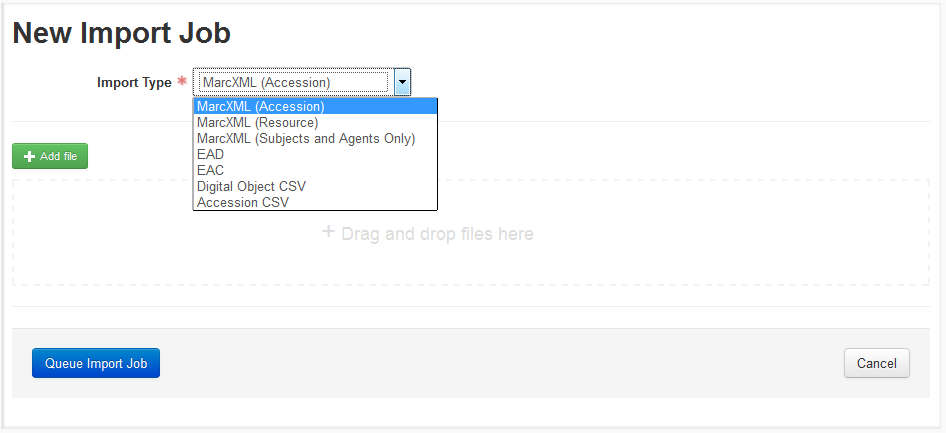
Click Add File and select the file(s) to import; note that you can select multiple files. Alternatively, drag-and-drop the file(s) into the designated area of your browser window.
Click Queue Import Job.
When import is complete the page will indicate an import summary, including a report with any errors.
The imported data will subsequently be available as new records:
Imported EAC files will be available as new Agent records.
Imported EAD files will be available as new Resource records.
Importing MARCXML files
ArchivesSpace supports two options for importing MARCXML files:
You can either import a MARCXML file, resulting in the creation of a new Resource record.
In some cases, the detailed description of a resource may be in EAD format, but the controlled access headings are in the MARC record. It is possible to import only the controlled access headings from the MARCXML record and add them to the resource description created from importing the EAD file.
Below are steps for importing MARCXML files:
On the main toolbar, click on the Create drop-down and select Import Jobs.
Select the type of file: MARCXML (Accession), MARCXML (Resource) or MARCXML (Subjects and Agents Only). Files must be valid XML and compliant with referenced schemas or DTDs.
Click Add File and select the file(s) to import; note that you can select multiple files. Or alternatively, drag-and-drop the file(s) into the designated area of your browser window.
Click Queue Import Job.
When import is complete the page will indicate an import summary, including a report with any errors.
The imported data will subsequently be available as new records:
If MARCXML (Resource) was selected as the file type, the imported data
will be available as new Resource records.
If MARCXML (Accession) was selected as the file type, the imported
data will be available as new Accession records.
If MARCXML (Subjects and Agents Only) was selected as the file type,
the imported data will be available as new Agent and Subject records.
Importing accessions data or digital object data from a CSV file
Accession and digital object data should be formatted and normalized according to ArchivesSpace CSV import mapping specifications. See the ArchivesSpace website (ArchivesSpace Application > Technical Documentation > Data Import and Export Maps) for CSV import mappings – and in particular, for a template that can be used to format accession data.
Below are steps for importing CSV data:
On the main toolbar, click on the Create drop-down and select Import Jobs.
Select the type of file: Accession CSV or Digital Object CSV
Click Add File and select the file(s) to import; note that you can select multiple files. Alternatively, drag-and-drop the file(s) into the designated area of your browser window.
Click Queue Import Job.
When import is complete the page will indicate an import summary, including a report with any errors.
The imported data will subsequently be available as new Accession or Digital Object records.
Import summary
Every import job includes a summary report of the process:
Job Status: indicates if records were successfully imported or not, and the date/time of import job.
Basic Information: summarizes information about the file that was imported, the target repository, and the user that initiated the job.
Log: if records were not successfully imported, the log summarizes problems with the source file (e.g., XML validation issues).
Customizing the Application
User interfaces
The staff and the Public User Interface that are provided by ArchivesSpace can be customized for local use. Repository Managers can provide simple customizations of the staff interface using tools available in the staff interface. More extensive customizations to both the public and staff interface can be made by defining ‘local’ files in the plugs-ins folder of the application.
Staff interface
Certain preferences can be configured in the application at the global (instance) level, repository level, or individual user level. Changes to preferences at the global level affect all users of the instance. Changes to preferences at the repository level override preferences at the global level and affect only users registered to that repository. Changes to preference at the user level override preferences at the repository or global level and apply only to the designated user.
The following instructions are for changing preferences at the user level. With the exception of where the process starts, the options and instructions for changing preferences is the same for all three levels.
To begin the process, log on as a user assigned to the repository and then select User Preference Defaults.
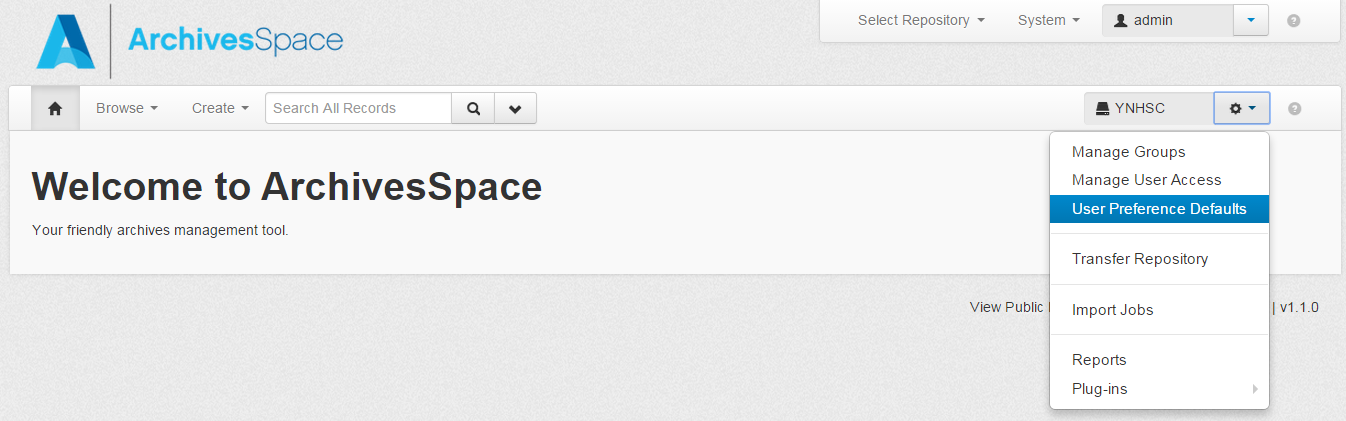

User-defined fields
User-defined fields are “semantically neutral” data fields available in the accession, resource, and digital object records. Below is a list of User Defined fields and their Yale translations. Fields marked “(accessions only)” should only be used in Accession records. Fields marked “(not used)” are currently unassigned and should NOT be used.
boolean_1: Authorization Received (accessions only)
boolean_2: Record Reviewed (accessions only)
boolean_3: Boolean 3 (not used)
integer_1: Integer 1 (not used)
integer_2: Integer 2 (not used)
integer_3: Integer 3 (not used)
real_1: OCLC Number
real_2: Real 2 (not used)
real_3: Real 3 (not used)
string_1: BRBL ACQ Number (ACC) (accessions only)
string_2: Voyager Bib ID
string_3: Place of Publication (accessions only)
string_4: ISBN or ISSN (accessions only)
text_1: Call Number (accessions only)
text_2: Title Main Entry (accessions only)
text_3: Monographic Series (accessions only)
text_4: Plating Information (accessions only)
text_5: Bibliographic Citation (accessions only)
date_1: Restriction Review Date (accessions only)
date_2: Accession Completed Date (accessions only)
date_3: Date 3 (not used)
enum_1: Order Type (accessions only)
enum_2: BRBL Owner (accessions only)
enum_3: Controlled Value 3 (not used)
enum_4: Controlled Value 4 (not used)
Setting Default Values for Fields
Functional overview
Repository managers and system administrators can set default values throughout the application. Default values are typically set when the value of a field is very frequently the same across records (e.g., the same notes are often repeated for new records created within a repository). Setting default values for repetitive data values is a good way for repositories to streamline data input.
Default values may be edited in a record that they have been applied to, and default values may be changed in settings at any time. Changing default values in settings will have no impact on applications of the prior default value; previous default values will be retained in the records in which they were applied. Users should note that default values are not applied in spawning an Accession or Resource record from a source Accession record.
Repository-wide default values apply across the repository unless they are in conflict with individual user settings. Individual users may choose whether or not default values are applied in their User Preferences. Individual user settings override repository-wide settings, as described in the Applying default values as a user section.
Default values can also be set by the system administrator using controlled value lists. More information is in the Setting a Default Value in a Controlled Value List section of Managing Controlled Value Lists (requires Lyrasis account log-in).
Setting default values as a system administrator or repository manager
System administrators or repository managers may set default values by doing the following:
Click on the option for Repository Preferences
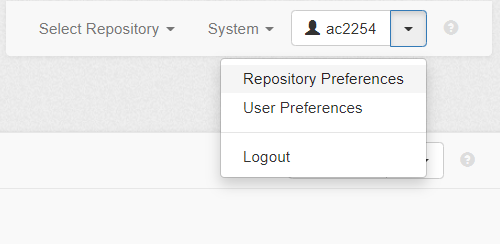
Activate the option to Pre-populate Records.
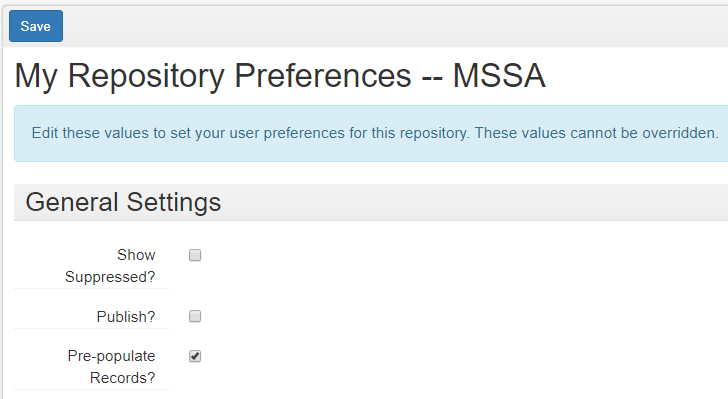
Click on Save to save your new preferences.
Open the browse list for the record type you want to set default values for and click on the option to Edit Default Values at the top of the list.

In the case of Resources and Digital Objects, you will need to select between setting default values for the parent record or the component record:

Clicking on Edit Default Values will open a blank record of the type you set default values for; you may enter the value defaults into the appropriate fields:
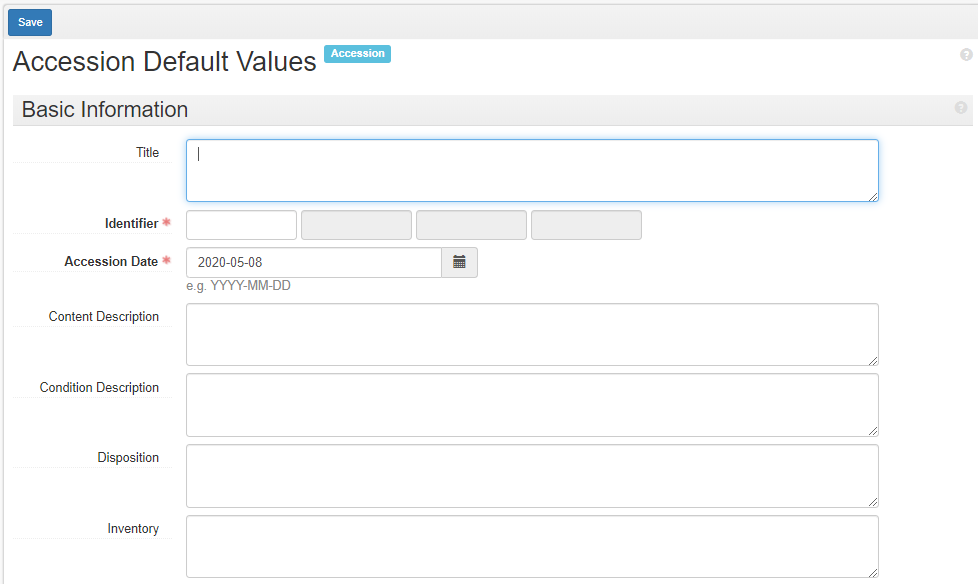
Click on Save to save the default values to the template.
When creating a new record, the default values should populate the fields to which they are assigned for users across the repository.
If you want to stop default values from pre-populating, you may deactivate the option to pre-populate records in the Repository Settings menu (shown in step 2, above). This will result in an empty template when you start a new record.
The Repository Preferences menu also allows repository managers to set repository defaults on whether to display suppressed records; whether new records are published by default; which columns display in browsing Accession records, Resource records, and Digital Object records; and default note order and material types settings. These repository-wide settings apply across the repository unless they are in conflict with individual user settings. Individual user settings override repository-wide settings, as described below in the Applying default values as a user section.
Applying default values as a user
Individual user preferences may be viewed and edited in the User Preferences menu:
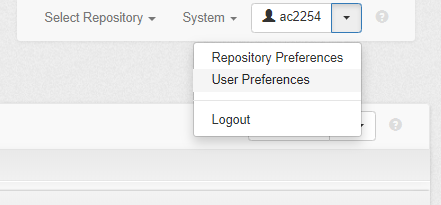
Opening the User Preferences menu will allow you to change your settings on whether to display suppressed records in your repository; your publication status settings; your settings on whether records are pre-populated; your settings on which columns display in browsing accession records, resource records, and digital object records; and your note order and material types settings.
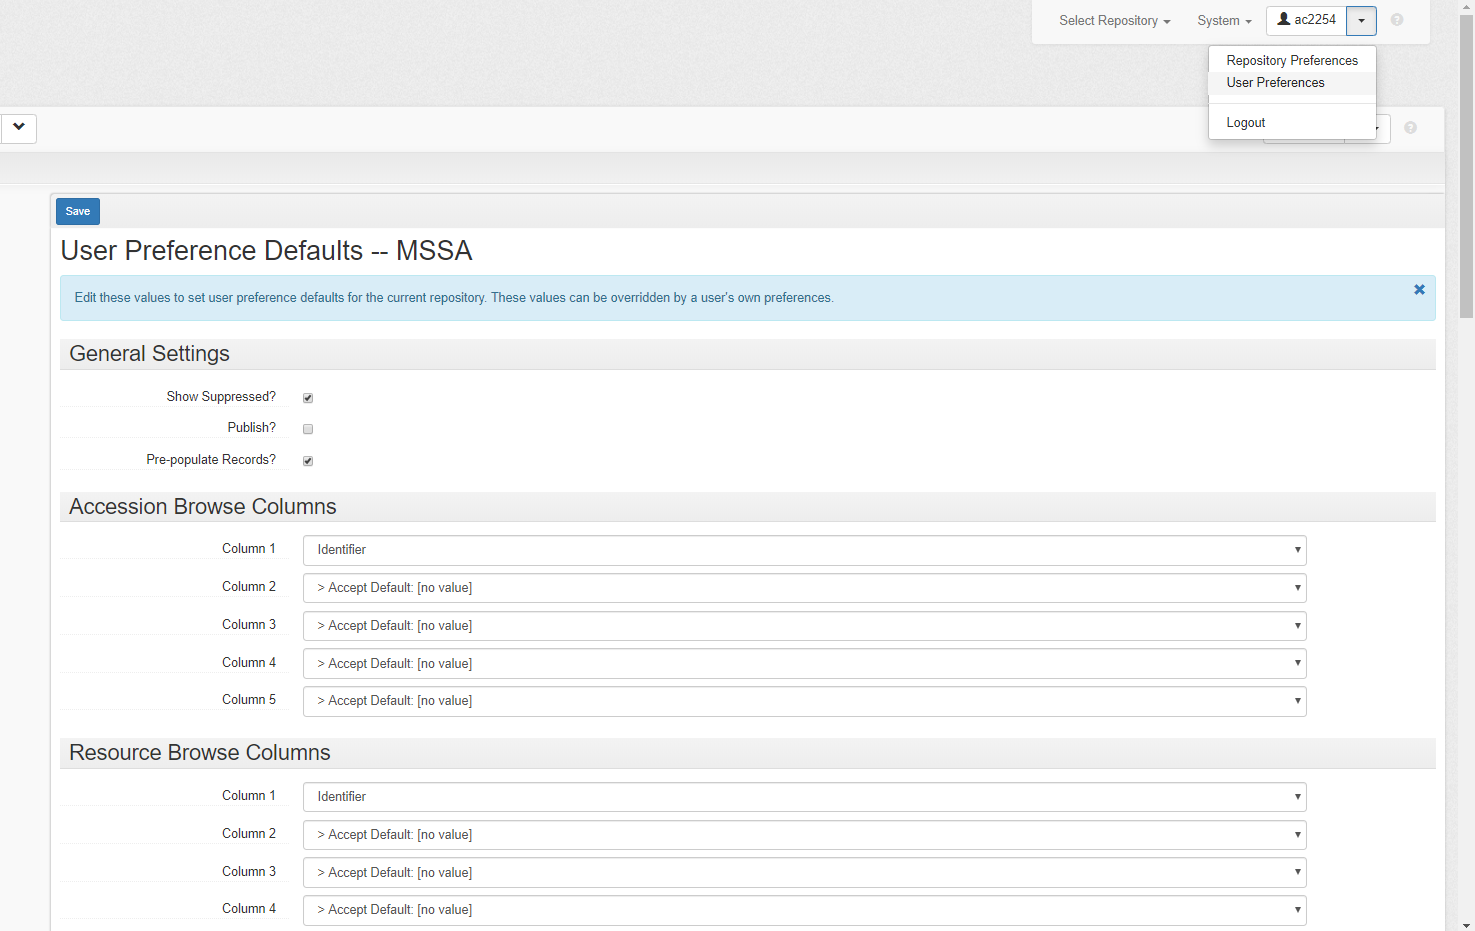
If an individual user checks the Pre-populate Records? checkbox, their newly-created Accession, Resource, and Resource component records will be pre-populated with the default values assigned by their repository manager, as outlined in the Setting default values as a system administrator or repository manager section. If users do not check the Pre-populate Records? checkbox, their newly-created records will not be created with the repository default values.
Individual user settings override repository-wide settings. If an individual user wishes to use their repository-wide settings, they should ensure that their individual user settings are blank.
[1] Note that ArchivesSpace does not provide native support for storing and managing files referenced from Digital Object records. The assumption is that the files will be stored and managed in an external digital asset management system or network- or web-accessible location.
[2] Name Authority Cooperative Program. Additional information is available online at https://www.loc.gov/aba/pcc/naco/index.html .
[3] Additional information about this resource is available online at http://www.getty.edu/research/tools/vocabularies/ulan/index.html .
[4] Additional information about this resource is available online at http://www.aacr2.org/ .
[5] Additional information about this resource is available online at http://authorities.loc.gov/.
[6] Additional information about this resource is available online at http://www.getty.edu/research/tools/vocabularies/aat/index.html.